#kinesiology

Top Five Tips for the Fair-Weather Runner

If you’ve ever been a runner, you probably know this feeling: the weather is getting nicer, sun is coming out again, so you decide to pull out the running shoes and head out for a run.

If you’re anything like me, you probably think, “how bad can it be? I’ll just run the same distance as I used to, aim for the same pace, and everything will be fine!”. Unfortunately, this isn’t always how it works.

Jumping right back into running can often lead to injuries, including a bruised ego when you realize how hard it is to run at your old pace (trust me, I’ve learned this the hard way). In this blog, we are going to talk about a few tips on how to get back into running in a safe and productive manner.

Kheya’s Top Five Tips To Getting Back to Running

1.      Make A Plan and Start Slow

The first tip to getting back into running is to make a plan. How often are you going to run? For how long? Do you have an end goal in mind for how long you would like to be able to run? When making your pain, consider the following:

  • Frequency - aim for 3 times per week max. This will allow you to have at least one rest day between each of your runs to give your body the appropriate amount of time to recover, as well as time to add in some strength training.

  • Pace - start slow! I often recommend to my clients to start with a walk/jog mix, then slowly decreasing your walking time and increasing your running time. For example, this might look like walking for 2 minutes, then running for 1 minute the first week, and then increasing to 1 minute and 30s walk and 1 minute and 30s run the next week, 1 minute walk, 2 minutes run the following week, and so forth. Continue this until you can keep up a slow running pace for your whole run!

  • Time/ distance - start small and add a little bit of time each week. This is going to be very dependent on your current fitness but beginning with 10-20 minutes and slowly working your way up is a great place to start. Once you get comfortable with this time, you can start adding 5 minutes to your run each week. You can also track this with distance (for example, starting with 1-3km run and adding 0.5km each week).

  • Setting a goal: having a goal distance in mind is a great way to keep yourself motivated when getting back into running. Goals should be SMART (specific, measurable, achievable, relevant, and time-bound). This means you should set a clear distance you would like to run in a clear within a reasonable time frame. A great example would be “I am going to run 3 x per week, beginning with a 2km run and increasing by 0.5km each week, with a goal of being able to run 5km in 6 weeks”.

2.      Train Smarter, Not Harder

Up until this point, we’ve only been talking about your basic steady run. However, just doing a simple base pace run isn’t always the most effective way to improve your running. When setting up a running schedule, it is great to break up your runs into different types. For example, you could split up your week into doing one long run, one run with sprint intervals, and one recovery run. You could even investigate different types of runs such as hill runs, Fartlek running, or tempo runs.

Here’s an example:

  • Monday: 25 minutes of sprint intervals, 20s sprint, 2 minutes of walking/jogging

  • Wednesday: Recovery run (3km at a slower pace than typical)

  • Saturday: Long run (8km at your base pace)

3.      Have A Proper Warm Up and Cool Down Routine

A warm up that focuses on mobility and activating the muscles you are going to be using during a run is important. I would then start your run with a fast walk or very slow job for 5-10 minutes, before transitioning into your faster running pace. For a cool down, I would recommend doing a light walk at the end of your run, to help transition your body as your heart rate slows down, followed by some light stretching. Remember, a proper routine also includes proper nutrition and rehydrating!

4.      Keep Up With Your Strength Training

Strength training is very important for preventing injuries as well as increasing your running speed and efficiency. If you decide to totally transition into running without keeping up with your other workouts, you are going to be missing out big time! Aim for 2-3 days a week of strength training.  

5.      Invest In The Proper Shoes

Fun fact: did you know runners should be replaced every ~800 kilometers? Running shoes are the foundation of your performance and having improper shoes can impact your running gait, posture, and cause a whole array of problems. I would strongly recommend going to a proper running store like the Run Inn and have someone assess your foot and gait and recommend proper shoes for you. I promise, paying the price to have proper shoes is well worth it in the long run!


I hope you enjoyed these tips on getting back into running! If you have any questions, give us a call at (778) 630-8800, email us or book online to seek advice/treatment from a physiotherapist or to work with a registered kinesiologist.

Strength Training vs. Cardio - Which Is Better?

First off, let me start by saying that the title of this blog is a total hook. Cardiovascular exercise and weightlifting/strength training are both fantastic and one is not better than the other. The truth is that it is important to include both in your routine and have several benefits on their own.

Cardiovascular Training

Cardiovascular or aerobic training refers to exercise which increases heart rate and respiration. Examples include running, walking, cycling, swimming, or skiing.

Regular aerobic exercise (also known as cardio) has many incredible benefits:

  • Reduce risk of cardiovascular disease and chronic health conditions

  • Improve heart and lung health

  • Positive benefits on mental health

  • Improve endurance

  • Improve immune system function

Overall, cardiovascular training can help you stay healthy and live longer!

Strength Training

Strength training refers to any training using weights or against resistance. This may include body weight, dumbbells, barbells, kettlebells, or a resistance band.

Strength training has many fantastic benefits, many of which overlap with aerobic training. These include:

  • Maintain and improve bone strength

  • Increase muscle mass

  • Reduce risk of heart and lung disease

  • Improve metabolism by helping your body burn more calories

  • Decrease risk of certain diseases including heart disease, diabetes and arthritis

  • Decrease risk of injury

Strength training is very important to keep up with as you age, as it will allow you to keep up the strength to do the things you love and even just your activities of daily living (i.e., cooking, cleaning, grocery shopping) without assistance.

Both cardiovascular exercise and strength training have a plethora of benefits, many of which I didn’t even mention! A successful exercise routine should include a mix of resistance training and cardiovascular training.

And Now, Some Myth-Busting…

Now that we’ve had a little introduction, I need to bust a myth I hear a lot in clinic: That cardio is the best and only method to use for weight loss.

Keep in mind, the literature on this topic is constantly changing, so this is where the research is at the moment. While weight loss shouldn’t be your only reason for exercising, I understand it is a motivator for many people to start. However, the myth that cardio is going to be better than strength training for weight loss is not actually as true as we used to believe.

Cardio can certainly assist with weight loss as it will increase the number of calories you burn; however, strength training is an excellent weight loss tool as it increases muscle mass. When you increase the amount of muscle in your body, these muscles continue to burn more calories, even when you are resting. Think of it like this: muscles help to burn more calories at rest than other types of body mass such as fat- the more muscle you have from strength training, the more calories you are going to burn day to day. While cardiovascular exercise can burn calories and can help you enter the calorie deficit which is necessary for weight loss, it doesn’t have the added benefit of increasing muscle mass. This means you will not continue to burn as many calories you would at rest compared to when you are strength training. 

 So How Much Of Each Type Of Exercise Should I Do?

Current exercise guidelines suggest that adults should get 150 minutes of moderate intensity or 75 minutes of vigorous intensity cardiovascular exercise per week and at least two strength days of strength training in a week.

If you’re not here yet, don’t fret! Start small and slowly increase as you feel comfortable and get into a routine. The most important thing is just that you are moving your body, no matter what that looks like! Ideally you still need at least 2 days of resistance training per week but outside of that stick with what you enjoy! If the gym and running or biking isn’t your thing, try joining a sports team, going on walks with friends, or anything else that gets your heart rate up.

 Decreasing Sedentary Time

Another important tool for staying healthy is decreasing sedentary time - this means time sitting or laying down not doing anything. There are lots of things you can do to break up your sedentary time:

  • Get up for small breaks during long periods of sitting at work

  • Use a standing desk

  • Do some stretches while you watch tv

  • Do squats while you brush your teeth

Anything you can do move your body will contribute!

I hope you learned something about the differences between strength training and cardio in today’s blog! The main takeaway should be that both resistance training and cardio should be incorporated into a strong exercise regimen. If you have questions or need help figuring out to incorporate different types of exercises to meet your goals, be sure to book in with our registered kinesiologist for support.


Give us a call at (778) 630-8800, email us or book online to seek treatment from a physiotherapist or to work with a registered kinesiologist.

Isometric, Isotonic, Concentric, Eccentric... What Does It Even Mean!?

If you’ve been around rehab or gym people, you’ve likely heard terms like isometric, isotonic, concentric and eccentric thrown around. But what do they even mean??

When we talk about exercises, we generally break them down into two types: isometric and isotonic. Isotonic exercises can be further broken down into concentric and eccentric parts of the exercise. All have an important role in exercise and rehab.

The language can be confusing so let us be your guide - we promise, it’ll make sense by then end!

Isometric Exercises

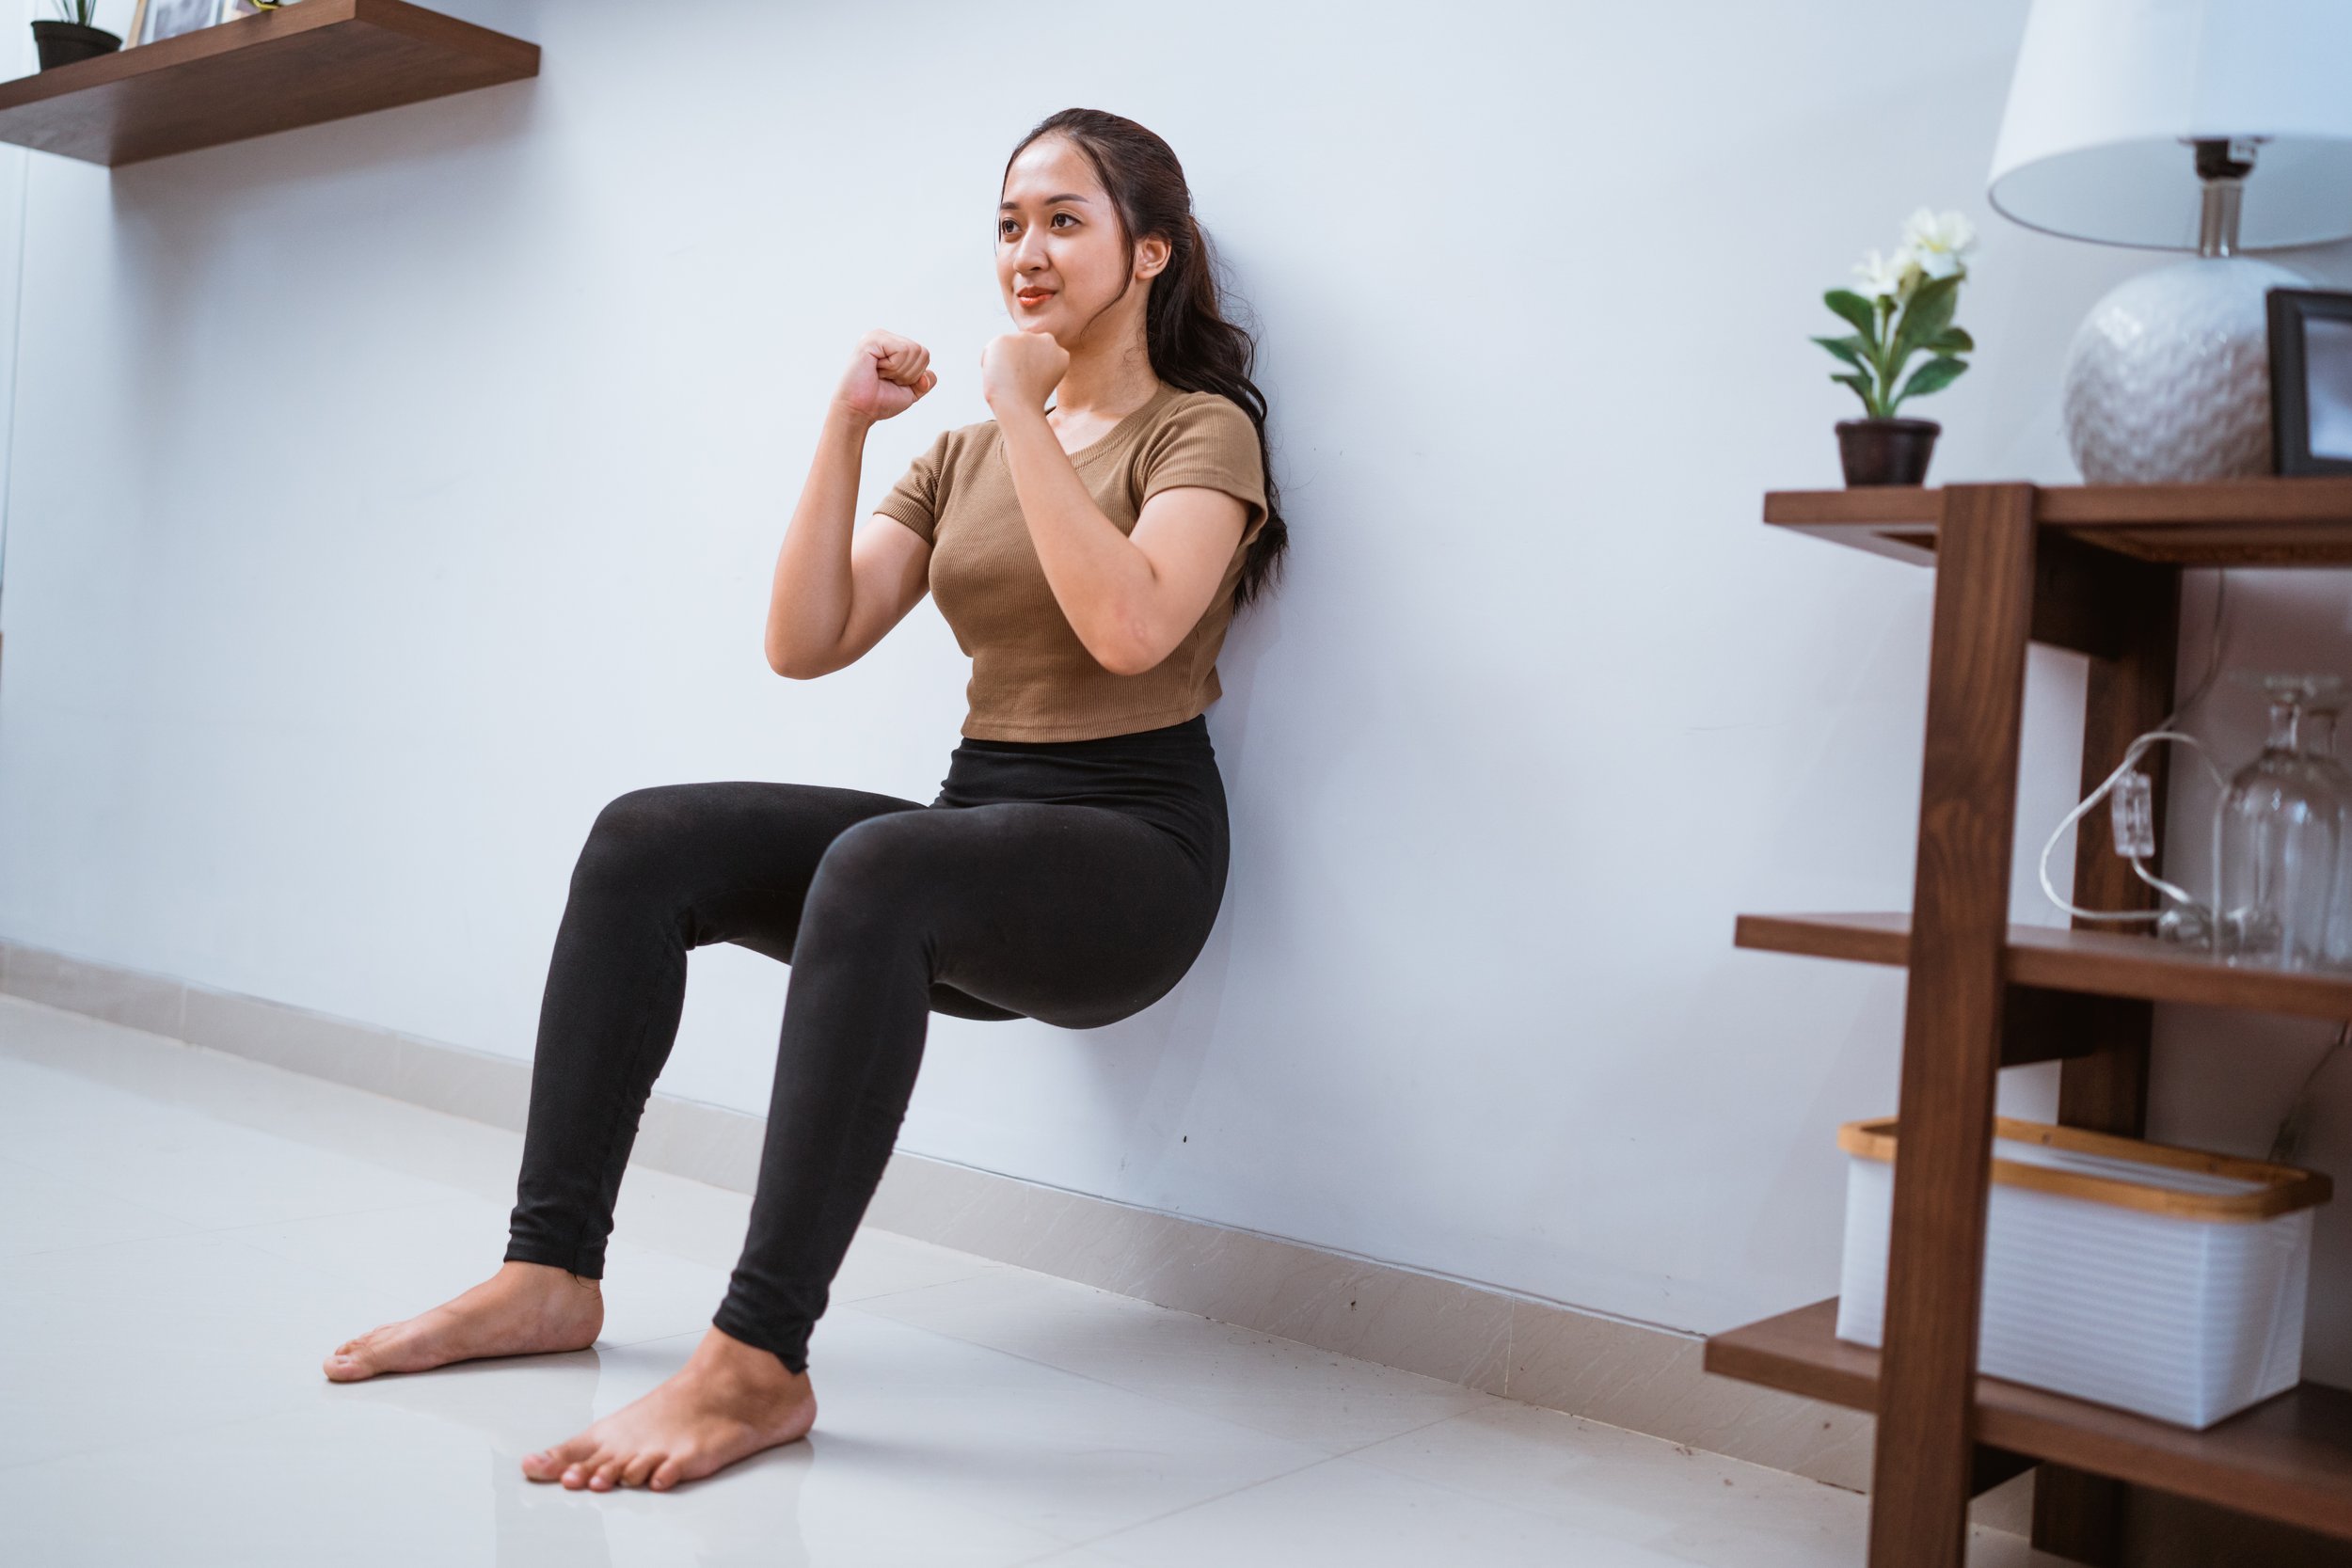
Isometric exercise refers to an exercise where you hold one position, meaning the muscle stays still and does not move through a range of motion. Some great examples of isotonic exercises include wall squats and planks. Isometric exercises may be held from anywhere from a couple of seconds to over a minute.

Isometric exercises are fantastic for improving stability of a joint. They are often used in rehab as they can be lower impact that other types of exercise.

We often use isometric exercises when moving through a full range of motion is painful. While isometric exercises can help you build strength, they will likely not be as beneficial for improving power output or speed in the long term. Recent research has shown the benefit of using isometric exercises for strengthening tendinopathies, so we often do these types of exercises for injuries like patellar tendinopathies, Achilles tendinopathies and tennis elbow.

Isotonic Exercises

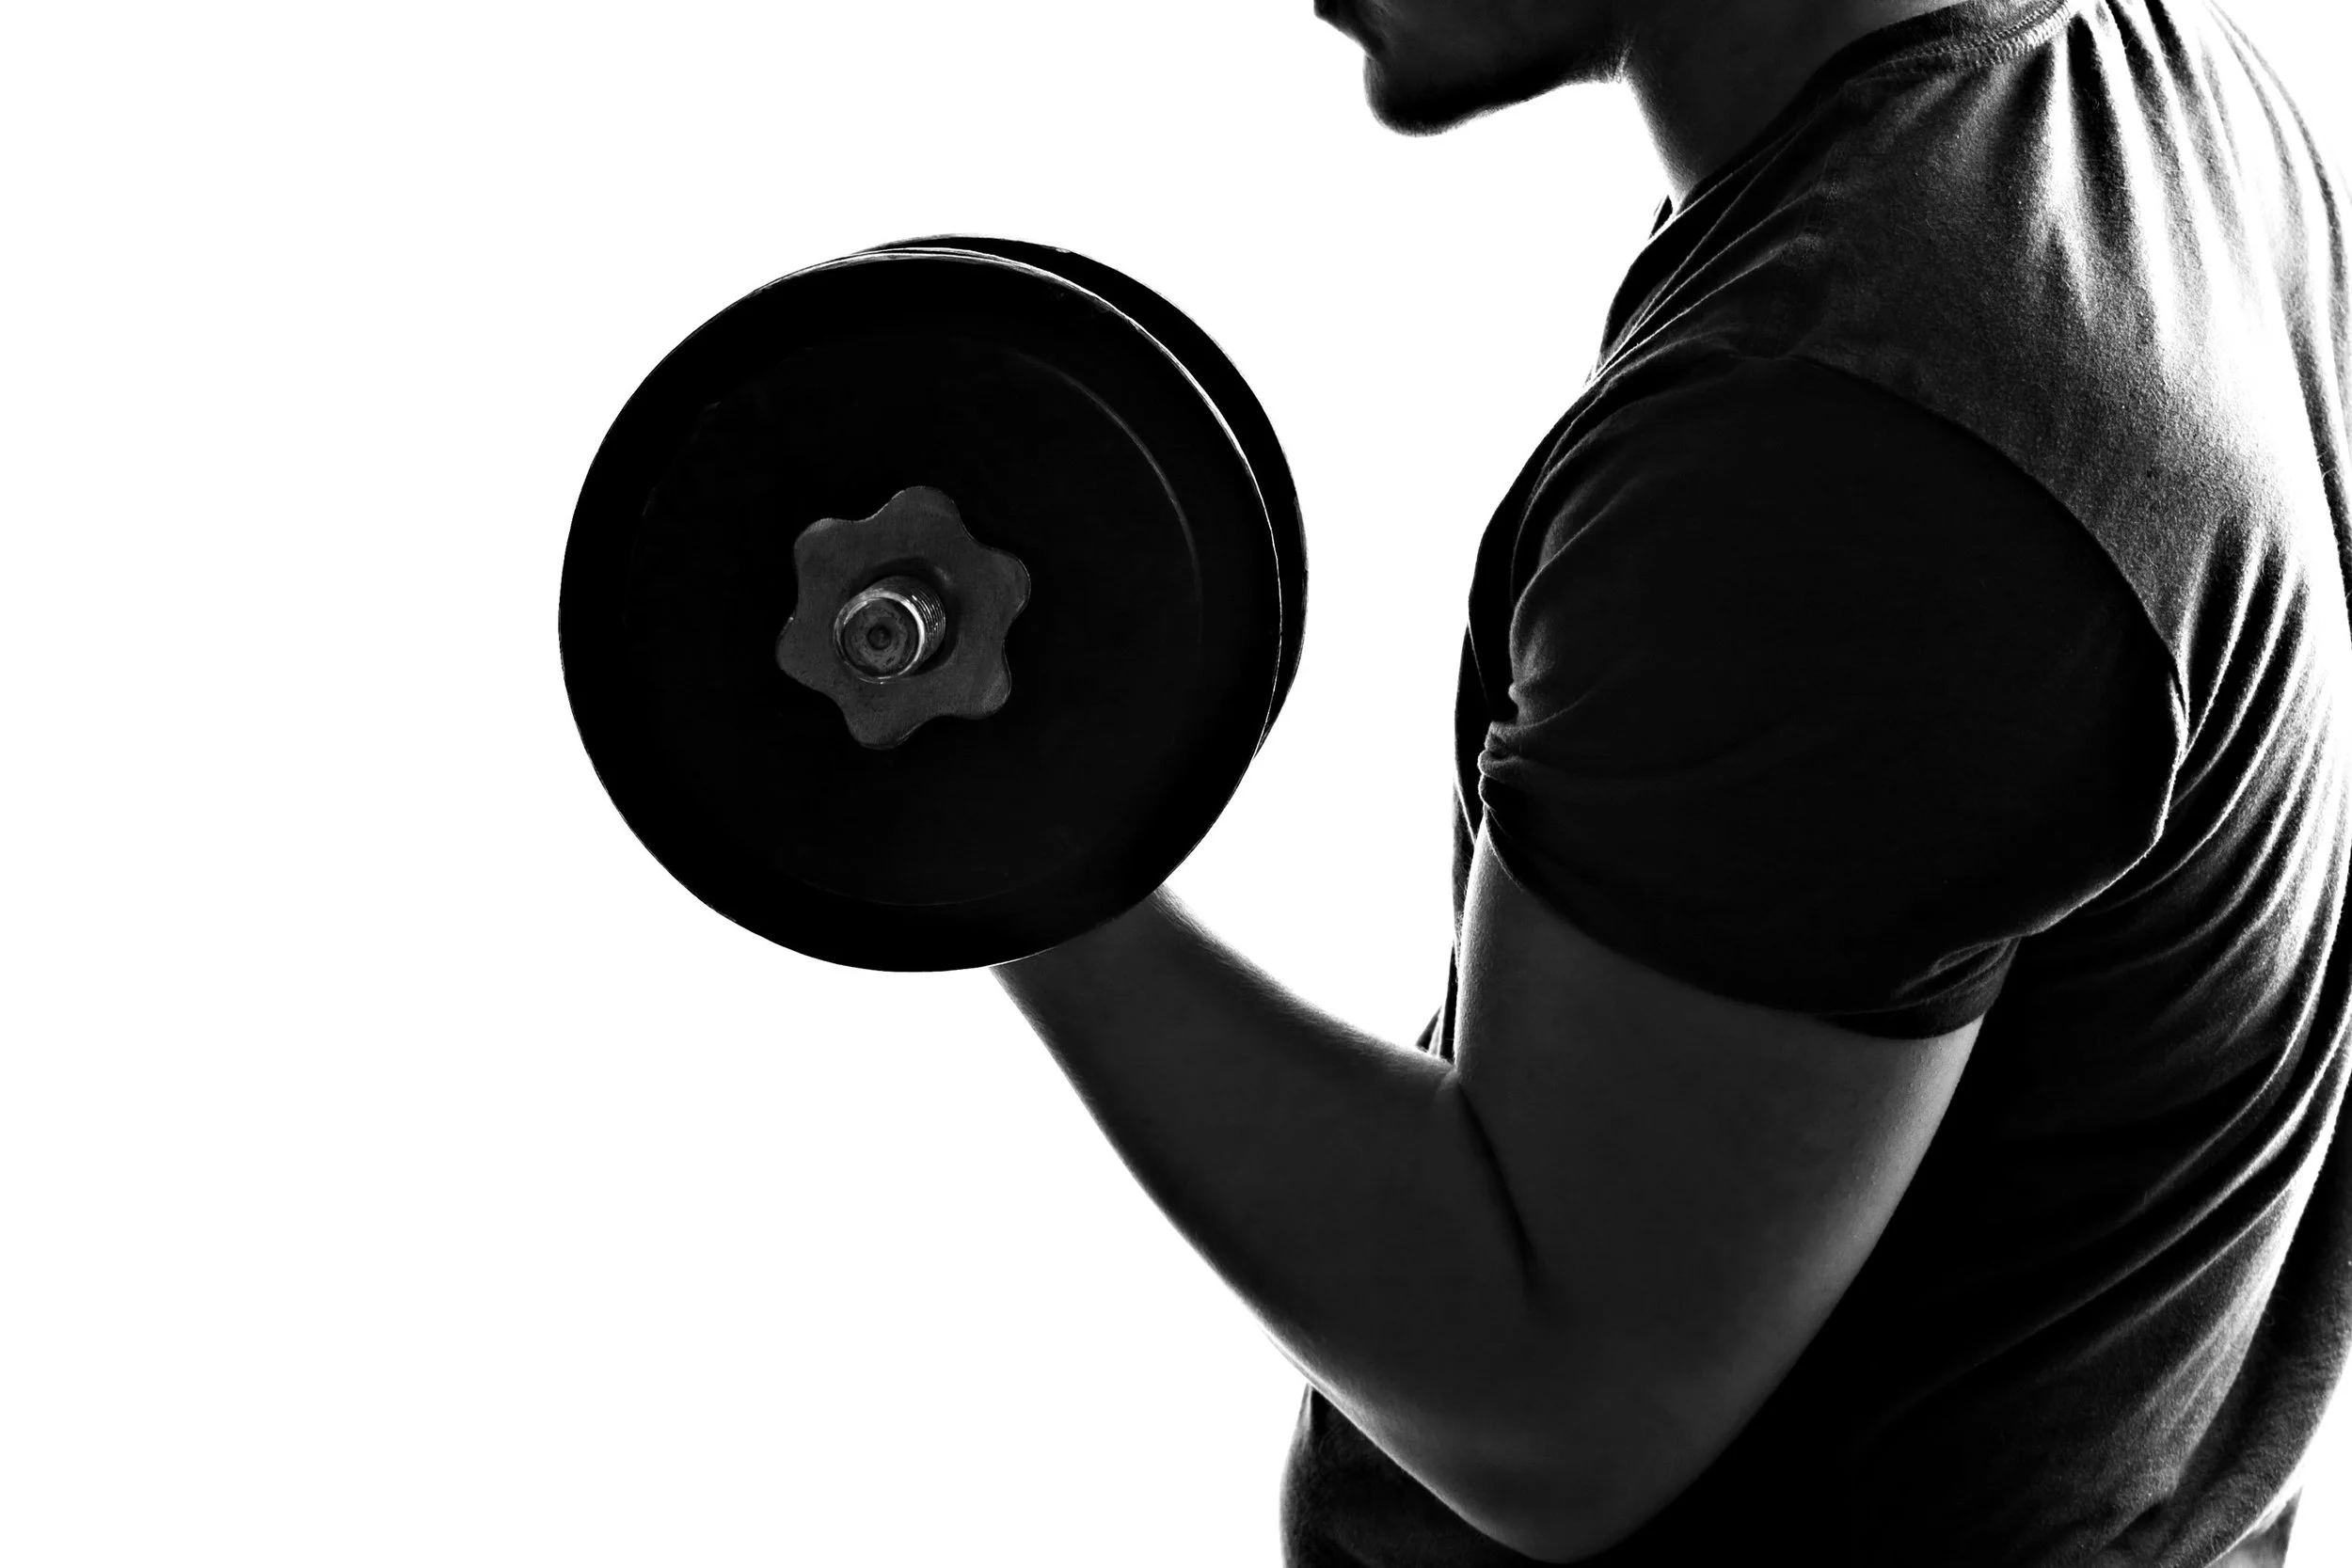
Isotonic exercise refers to an exercise where a joint is moving through a range of motion. Examples of an isotonic exercise would be a bicep curl, squat or a push-up. In each of these exercises you move a weight (whether that be body weight or additional weight, like a dumbbell) through a range of motion.

Isotonic exercises are fantastic for gaining strength and can be adapted to focus on different goals such as power, speed or increasing range of motion.

Isotonic exercises can be broken into two main types:

  1. Concentric - the portion of an exercise where a muscle is shortening.

    With an concentric movement, tension in the muscle increases to meet the resistance of the weight, moving the weight in space. An easy example of a concentric contraction would be the part of a bicep curl where you are lifting the weight up towards your shoulder by bending your elbow.

  2. Eccentric - the portion of an exercise where a muscle is lengthening.

    With an eccentric movement, tension increases are you lengthen the muscle and control the weight as it goes down with gravity. An easy example of an eccentric contraction would be the part of a bicep curl where you are lowering the weight back towards the ground.

While isotonic exercises contain both a concentric component and an eccentric component, you can alter exercises to put more emphasis on one part of the exercise to reach certain goals. Both eccentric and concentric exercises are shown to increase muscle strength, muscle mass and power output.

While the research is not conclusive, some research has shown that focusing on the eccentric portion of an exercise may help to increase muscle strength and growth more than the concentric portion. One way to achieve this is to slow down the portion of an exercise where you are lengthening the muscle (e.g., slowly lowering the dumbbell in a bicep curl, slowly lowering the bar on a chest press, or slowing down how quickly you drop towards the ground in a squat).   

If you have questions or need help figuring out to use these exercises to meet your goals, be sure to book in with our registered kinesiologist for support.

 Give us a call at (778) 630-8800, email us or book online to seek treatment from a physiotherapist or to work with a registered kinesiologist.

Busting Common Exercise Myths: Part 3 - Stretching Tight Muscles

Kheya McGill , Registered Kinesiologist, is back with another myth-busting blog! In part 3, Kheya reviews why stretching may not be the thing you need to get rid of tight muscles.

Most of the time when people are feeling stiff, tight or sore, their go-to response is to stretch. Now don’t get me wrong, stretching can be fantastic, but I’m here to explain to you why it may not be the answer to all your problems.

When we feel a muscle is “tight”, this could mean the muscle is shortened, lengthened or aggravated. Muscles can feel this way for a variety of reasons and may be related to an injury, overuse, posture or muscle weakness.

When a muscle is weak, it takes a lot more effort for the muscle to perform the job it is meant to do. This can end up with the muscle being habitually turned on and activated, leading to stiffness and pain. To put it simply, the muscle ends up being overworked as it is not strong enough to meet the demands of what you are asking it to do in your daily life. This can cause irritation to that muscle or put strain on the muscles around it which are having to work hard to compensate for that weak muscle.

When we stretch a muscle in this state, you may notice it feels better temporarily and you may even gain some range of motion. The problem is stretching is unlikely to get to the root cause of your problem.

Instead, that muscle may need to be strengthened.

When a muscle is stronger, it is easier for that muscle to move through a range of motion and control movements. You won’t need to rely on the supporting muscles as much and it won’t end up being activated all the time.

A good way to think about this is thinking about an orchestra. If you have a whole orchestra but you’re only relying on the 2 clarinet players to carry all the sound, these clarinet players are going to end up becoming extremely fatigued.

On the other hand, if you help all the other members of the orchestra practice their instrument so they can all contribute equally to the music being produced, the clarinet players are going to have some pressure taken off them and be able to relax more. This is the same thing that happens if you are relying too much on one muscle group and another group is not strong enough to support it. The muscle groups around will end up becoming exhausted which can lead to a feeling of tightness or soreness.

A Case Study - The Hip Flexor

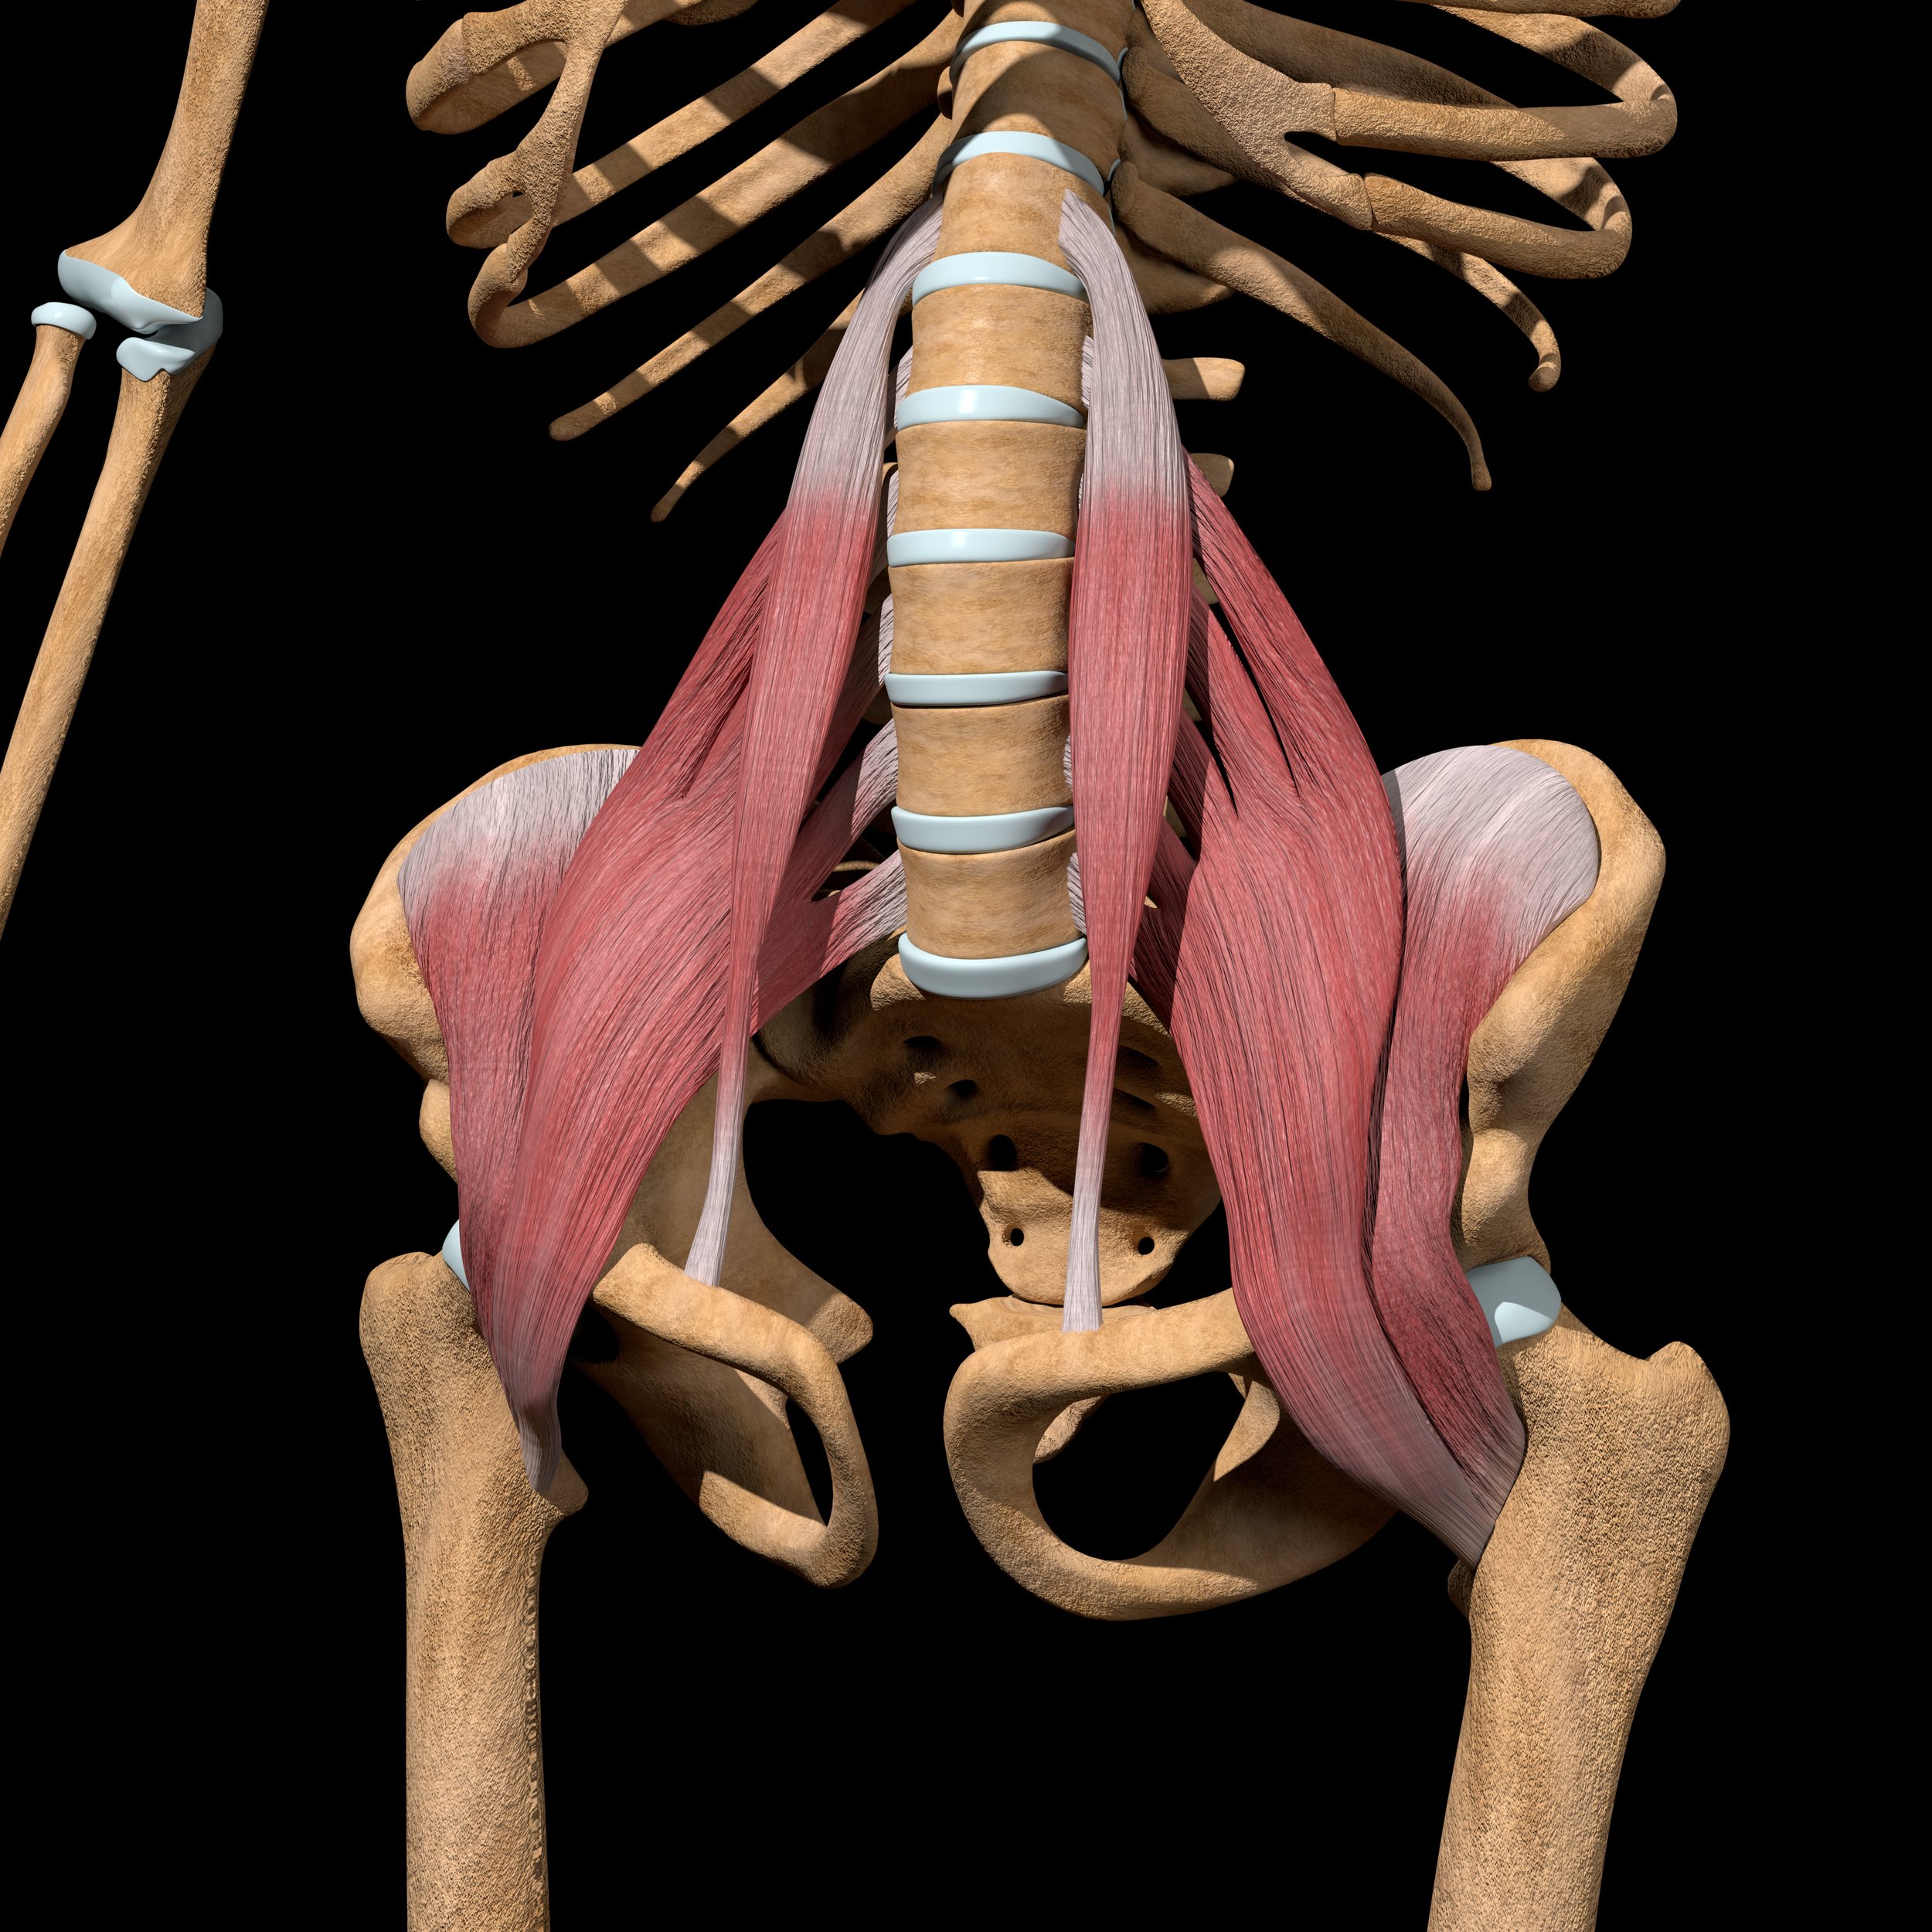
A good example of a muscle this commonly happens to is the hip flexors. The hip flexors sit at the front of your hip and assist you in lifting your leg up towards your body (think about marching, or even just lifting your leg to take a step). When you sit down, your hip flexors are in a relaxed position. Over time they can become weak and learn to stay contracted in a shortened state, leading to the stiff or tight feeling.

If you are having a hard time picturing this, think about holding an elastic band stretched vertically in front of your hip, from below your belly button to the front of your thigh. When you stand up the band is stretched out and when you sit down the band has some slack. When we stretch our hip flexors it is likely to provide some temporary relief as you are pulling them out of that shortened state however it is likely they will return to this state shortly after.

In this scenario, I would suggest you work on strengthening the hip flexors, working them through their full range of motion. Helping this muscle become strong through the full range of motion typically leads to less feelings of tightness in your daily life.

So When Should I Stretch?

Well, this is a great question! Unfortunately, there is no clear answer - the opinions in the literature right now are still vast and strong. Stretching is a very controversial topic and there doesn’t seem to be a right answer. Personally, I like to start my workout with a dynamic warm up and some mobility exercises, and I save the last 5-10 minutes of my work out for cooling down with some stretches. If this works for you, then fantastic, but if you have a routine that seems to work well for you then continue with that!

In this blog, I hope you learned why sometimes “tight” feeling muscles may actually be weak and need strengthening, not stretching! If you have been stretching for a period of time and have not seen the results you are hoping for, give strengthening a try instead!

If you have questions or need help figuring out how to strengthen the muscles that are bugging you, be sure to book in with our registered kinesiologist for support.

Give us a call at (778) 630-8800, email us or book online to seek treatment from a physiotherapist or to work with a registered kinesiologist.

Busting Common Exercise Myths: Part 2 - The Perfect Squat

Is there a perfect squat form for everyone?

If you’ve been around a gym or done much exercise in your life, it is likely you have tried to adjust your squat form at one point or another. Maybe you have seen videos of fitness influencers on social media and tried to copy what their squat looks like.

In our heads, the ideal squatter often has their toes facing forward, feet shoulder width apart, knees stay behind their toes, chest up, back straight, and no “buttwink” (curving of the low back as it drops at the end of a squat).

Unfortunately, this isn’t the perfect form for everyone, and there isn’t a one size fits all perfect squat form. This is due to the differences in our anatomical build. We all have different anatomy in our spine, hips, knees, pelvis, and ankles, and everyone has different levels of function and mobility at each of these joints.

One of the easiest examples of differing anatomy is the angle at which our legs naturally sit. When in a natural position (I.e., laying flat on your back with your legs down and relaxed), some people’s feet will naturally face straight up and forward while some will naturally sit with their toes pointing outside away from their bodies. By forcing everyone to put their toes forward, we may be putting them in a position which is less natural for their specific body anatomy. Individuals whose feet naturally fall towards the outside when in this position may feel more comfortable with their toes pointed away from their bodies when squatting, rather than having their toes facing forwards.

Another good example of this is ankle mobility. Individuals with tight ankles may have a difficult time going into a deep squat as the don’t have a large enough range of motion through the ankle joint to allow their knees to move forward. There are a couple of ways to adjust this. Firstly, these individuals should be working to improve their ankle mobility. However, some people may not be able to improve their ankle mobility a whole lot, and that is okay! People with tight ankles may benefit from raising their heels when they squat. This may mean using a small wedge or small plate under the heels- this will allow them to squat much deeper as their ankles are less limited.

The last example we will talk about is the length of your femur (aka your thigh bone). Online, we often see individuals being praised for how deep they can go in a squat- but this is not something everyone will be able to do safely or comfortably. Individuals with longer femurs will naturally have to lean forward more in their squat to stay balanced and offset the weight or their body. Individuals with longer femurs also may not be able to squat down quite as deep, as they will be unable to stay upright due to the weight of their body or barbell pulling them backwards.

The important thing to remember here is there are anatomical features that CAN NOT BE CHANGED and that is not a bad thing!

This means no squat form is better than another. The best squat form is the one that is safe and feels right for your body.

We don’t expect you to know the length of your femur, hip angle or ankle mobility. If things aren’t feeling right in your squat, play around until they feel better. Here are some things you can try:

  • Depth - short calf muscles and femur length will affect how deep you can go in your squat, so adjust to find the right depth for you

  • Foot angle - pointed straight ahead or pointed outside? This will often be based on your hip anatomy and the amount of torsion on your shin bone

  • Foot width - femur length and the width of your pelvis play in here as well, so feel this one out. A wider stance is more stable and requires less distance to travel.

  • Type of squat - different types of squats (front squat, barbell back squat, goblet squat, box squat, sumo squat, etc.) demand different body positions, depending what muscle group you want to target

  • Ankle position - tight calves or limited ankle mobility may require doing things a bit differently, such as a heel elevated squat

While there is no perfect squat form that works for everyone, there is absolutely a perfect squat form for your body! If you are unsure of where to start or how to perfect your squat form, our registered kinesiologists would be happy to work with you to create an exercise program which matches your exercise goals and injury specific recovery needs.

Give us a call at (778) 630-8800, email us or book online to seek treatment from a physiotherapist or to work with a registered kinesiologist.

Happy squatting!

Neck & Back Pain - Part 2: Strengthening Exercises

She’s back! Registered kinesiologist Kheya McGill is here with part 2 of her two-part blog series on exercises for back and neck pain. In this final instalment, Kheya goes over her favourite strengthening exercises. Go back and read part 1 for a refresher on spinal anatomy and some great mobility and stretching exercises!

If you read our last blog, you know that you are not alone if you’re dealing with back and neck pain. In this blog, we will talk about the importance of adding strength exercises into your routine when dealing with your back and neck pain.

Strengthening is a very important part of this routine! When a person has back pain, we like to focus on strengthening the core and glutes (in addition to the muscles in the back and neck themselves). Increasing strength helps provide more support for the muscles that are tense and increases the ease with which we can complete our daily activities. Strengthening is also a very important tool for avoiding reinjury.

Why do we focus on strengthening the core and glutes when dealing with back pain?

The core helps support the spine. When an individual has a weak core, these muscles can’t do their job properly, putting more strain on the back. However, don’t be fooled by the myth that a strong core always means having rock hard abs!

In terms of postural support, one of the most important muscles to learn how to activate and strengthen is the transverse abdominus (your deepest core muscle). To activate the transverse abdominus, you want to tighten the muscles in the lower abdomen.

I like to think as if I am trying to gently pull my hip bones together but there are lots of different cues we can use, depending on what works for you. Notice in the photos below how I even have my fingers placed on my stomach (roughly 3cm in from my hip bones) so I can feel these muscles turning on beneath my fingers.

The glutes are another important muscle to strengthen when you have low back pain. The glutes include the largest muscle in the human body, the gluteus maximus, and play a very important role in supporting the lower back. When an individual has weak glutes, back muscles often take over the glutes’ job which can add tension and pressure in the low back. If you have a difficult time activating your glutes, the exercises outlined here should help! 

Kheya’s Top Five Strengthening Exercises

1) Toe taps 

Begin on your back. You will want to start this exercise by activating the core muscles as we talked about above. Next, you are going to lift your legs up so both your hips and your knees make a ~90 degree angle. From here, you are going to slowly lower one leg down at a time, trying to keep your knee bent at 90 degrees, and tap your toe to the floor. Try and keep your core engaged the entire time, and don’t let your lower back lift off the ground. Lastly, remember to breathe!

Complete 10 reps (5 toe taps per side) for 2-3 sets.

2) Bridges

Begin laying on your back with your knees bent. Engage your core and lift your bum off the floor, trying to create a straight line down your body and legs. Try and think about squeezing your bum at the top of the movement. If this is too easy, try adding a weight on top of your hips or a band just above your knees.

Complete 8-12 reps for 2-3 sets.


3) Bird dog

Begin on all fours with your hands below your shoulders. Engage your core and extend one arm and the opposite leg. When extending the leg, think about pushing your back heel through the wall behind you to extend as far as possible. If this is too difficult, try beginning by just lifting one arm at a time, keeping both legs on the floor. You can then progress to lifting one leg at a time keeping the arms on the floor, until you are able to lift opposite arms and legs at the same time.

Complete 10 reps (5 per side) for 2-3 sets.

4) Chin tucks 

Stand against a wall with your shoulders and the back of your head against the wall. If you need to, move your feet a step out from the wall so you can put your back flat against the wall. Push your chin so that your head goes straight back, lengthening through the back of your neck.

Hold the tuck for 3-5 seconds and repeat this 10 times.

5) Back rows

To do this exercise, you will need a band. Begin by looping the band at elbow height around something stable such as a banister or a doorknob. Hold one end of the band in each hand and bend your arms at the elbow to 90 degrees. Now, slowly pull your arms backwards, thinking about squeezing your shoulder blade together at the back.

Complete this 10-15 times for 2-3 sets.


In addition to all these exercises, any type of general strength and exercise will be great for lower back pain, even exercises working the muscles not involved in your pain. (For more information on this, see our blog on general exercise for injury rehabilitation.)

If you are unsure of where to start, our registered kinesiologists would be happy to work with you to create an exercise program which matches your exercise goals and injury specific recovery needs.

Give us a call today give us a call at (778) 630-8800, email us or book online to seek treatment from a physiotherapist or to work with a registered kinesiologist.

Overhead Shoulder Pain in Volleyball Players

Kheya McGill graduated from UBC with a Bachelors Degree in Kinesiology. A lifelong Tsawwassen resident, Kheya has recently joined Ladner Village Physiotherapy as a registered kinesiologist. In this article, she reviews the most common causes of shoulder pain in overhead movements common with volleyball players and five great exercises to help combat the pain.

Shoulder pain is common in volleyball players, particularly while arms are in the overhead position. The shoulder is one of the most mobile joints in our body, meaning it is also one of the most unstable joints. If you enjoy playing volleyball (or other overhand activities such as lacrosse, tennis or fly fishing), chances are you’ve experienced shoulder pain at some point whether that be soreness, stiffness or sharp pain.  

What causes overhead shoulder pain?

Common causes of overhead shoulder pain include:

  • Shoulder impingement - A shoulder impingement occurs when tendons get “impinged” or compressed between the head of the humerus (aka the arm bone) and the bony architecture of the scapula (aka the shoulder blade). When you lift your arm overhead, the space between these bones in your shoulder decreases and increases pressure on the tendons. This can cause irritation, which can lead to an impingement. 

  • Rotator cuff injury - The rotator cuff is a group of 4 muscles which surround your shoulder. These muscles help move the arm and scapula, while protecting the shoulder. Rotator cuff injuries are common and can occur for many reasons, including overuse, trauma, or degeneration. (Need more on this? Read our blog on the rotator cuff!)

  • Osteoarthritis - A degenerative joint disease, osteoarthritis causes problems with the cartilage, synovial membrane, ligaments and bone in a joint. Osteoarthritis can cause tissue loss, remodeling, inflammation and lead to loss of normal joint function. A history of shoulder injuries leads to a higher risk of developing osteoarthritis here. Remember, arthritis isn’t just seen in “old” people!! (For more on osteoarthritis, read our blog!)

How can I improve my shoulder pain?

Although these injuries are all quite different, the good news is all of them can be improved with the right exercises! Here are a few of our favourite exercises and stretches to add to your routine: 

1. Internal and external rotation with band 

Using a band, secure one end of the band to a stable point (we suggest tying a large knot in one side and securing the band behind a door).

Internal rotation: 


  • Grab the band with your hand so that the band is pulling your hand away from your body

  • Bend your elbow and tuck it gently into your side

  • Move your hand from the outside of your body towards the inside, bringing your hand closer to your belly

External rotation: 


  • Turn your body around so the band is now going in front of your body and pulling your hand towards your body

  • Bend your elbow and tuck it gently into your side

  • Move your hand away from your belly while keeping your elbow tucked in

2. Shoulder flexion with resisted external rotation 

  • Put a band around your forearms and bend your elbows at 90 degrees 

  • With your arms shoulder width apart, place small amount of tension in the band, and lift your arms up from the shoulder

3. Thoracic spine openers

  • Start laying on your side, with your hips and knees bent in front of you 

  • Place both arms straight out in front of your chest 

  • Keeping your bottom arm on the floor, reach your top arm across your body and towards the floor on the other side, opening the chest 

  • Follow your top hand with your head and eyes, and then slowly return to starting position

  4. I, Y, T, W’s 

  • Laying on your stomach, face down, with your arms overhead, thumbs pointing upwards (You may want to place a folded dish towel under your forehead - this helps you keep a neutral neck and breathe!)

  • Pick a position (I, Y, T or W) and raise your arms, pulling your shoulder blades together

  • Lower your arms back down to the ground, and repeat

  • Try in each position to target different muscle groups

5. Pectoral stretches 

  • Standing next to the corner of a wall, place your forearm against the wall, with your arm and shoulder at 90 degrees

  • Lean your body forward until you feel a stretch across your chest

  • Play around with the height of your arm to stretch different portions of your pectoral muscle

There you have it! Five simple exercises you can do at home or add to your daily workout routine to improve shoulder pain and scapular stability. 

If you’re suffering from shoulder pain, give us a call at (778) 630-800, email us or book online to seek treatment from a physiotherapist or to work with a registered kinesiologist.  

What is Kinesiology?

Kinesiology, also known as human kinetics, is the study of human movement, performance, and function. Kinesiologists work with people of all ages and physical abilities to help them achieve their health and wellness goals as well as improve their quality of life. 

A kinesiologist (kin for short) uses knowledge of anatomy, physiology, neurology and biomechanics to maximize the effectiveness of exercise rehabilitation. A kinesiologist can implement your exercise program, provide support in your rehab,  and help improve physical performance in sport, work or daily life.

In more simple terms, kinesiologists are exercise rehab rock stars!

Kins use exercise to get you back to the things you love. They will discuss your goals and current treatment plan with you and your physiotherapist (if you have a physio) and help develop an exercise program to meet your needs. They work with you for one-on-one exercise sessions to ensure your technique is perfect while they help progress you through your recovery process. Strength, endurance, balance, and general fitness goals will all be addressed - there will be no stone left unturned!

What kind of training does a kinesiologist have?

Kinesiologists have completed a 4 year bachelors degree from an accredited university. Both UBC and SFU have fabulous programs! Our kinesiologists are also active members of the British Columbia Association of Kinesiologists (BCAK).

Is a kinesiologist like a personal trainer? 

The primary difference between kinesiologists and personal trainers is education level. Kinesiology requires a four year university degree whereas personal training education is generally a few weekend courses. The increased scientific knowledge base and use of evidence-based research translates to a higher quality of care, a more comprehensive approach to your exercise, and more capability of helping you troubleshoot issues that may arise.

What can a kinesiologist do for me?

There are many reasons people can find kinesiologists valuable. Kins can:

  • Create an exercise plan that is safe and realistic

  • Identify muscle imbalances through assessment of your movement

  • Help with maintaining fitness while you deal with an injury

  • Develop an exercise rehab program to address an injury

  • Ensure proper exercise technique to avoid unnecessary injury

  • Provide motivation and accountability to stick with your exercise program

  • Help you have fun while achieving the results you want!

Is kinesiology covered by my extended health benefits?

Usually yes! For most people kinesiology, active rehab, and physiotherapy assistant appointments (which are, for this purpose, mostly interchangeable terms) are included within your physiotherapy coverage. Some plans have separate categories for “Physiotherapy” and “Kinesiology”. It is always best to first check with your insurance provider to confirm your coverage.

Do I have coverage if I was in a car accident?

Yes! With ICBC coverage, within the first 12 weeks of a car accident you are automatically approved for:

  • 12 visits with a kinesiologist

  • 25 visits with a physiotherapist

  • 12 visits with a registered massage therapist

If your accident was more than 12 weeks ago or you have had treatment for your accident at another clinic, please let our front desk know so we can help you sort out the logistics.

Do I have coverage if I have a WorksafeBC claim?

Yes! Our kinesiologists works closely with our physiotherapists to aid in the delivery of your recovery program.

What will my session look like?

Your first visit with your kinesiologist will be an hour long. Your kinesiologist will meet you and begin the session with a quick chat. They will ask you about your reasons for coming in, your goals and your current exercise program. They will then take some time to assess your movement, strength and capabilities before taking you through an appropriate exercise program.

The kinesiologist is in constant collaboration with your physiotherapist to ensure your exercise sessions are as effective and pleasant as possible. Follow up sessions can be 30 minutes, 45 minutes, or 60 minutes long. If you are a WSBC or ICBC client your appointments will always be 45 minutes.

If you want to learn more or you would like to book a session with a kinesiologist please contact the clinic via:

We look forward to meeting you!