#neckpain

Neck & Back Pain - Part 2: Strengthening Exercises

She’s back! Registered kinesiologist Kheya McGill is here with part 2 of her two-part blog series on exercises for back and neck pain. In this final instalment, Kheya goes over her favourite strengthening exercises. Go back and read part 1 for a refresher on spinal anatomy and some great mobility and stretching exercises!

If you read our last blog, you know that you are not alone if you’re dealing with back and neck pain. In this blog, we will talk about the importance of adding strength exercises into your routine when dealing with your back and neck pain.

Strengthening is a very important part of this routine! When a person has back pain, we like to focus on strengthening the core and glutes (in addition to the muscles in the back and neck themselves). Increasing strength helps provide more support for the muscles that are tense and increases the ease with which we can complete our daily activities. Strengthening is also a very important tool for avoiding reinjury.

Why do we focus on strengthening the core and glutes when dealing with back pain?

The core helps support the spine. When an individual has a weak core, these muscles can’t do their job properly, putting more strain on the back. However, don’t be fooled by the myth that a strong core always means having rock hard abs!

In terms of postural support, one of the most important muscles to learn how to activate and strengthen is the transverse abdominus (your deepest core muscle). To activate the transverse abdominus, you want to tighten the muscles in the lower abdomen.

I like to think as if I am trying to gently pull my hip bones together but there are lots of different cues we can use, depending on what works for you. Notice in the photos below how I even have my fingers placed on my stomach (roughly 3cm in from my hip bones) so I can feel these muscles turning on beneath my fingers.

The glutes are another important muscle to strengthen when you have low back pain. The glutes include the largest muscle in the human body, the gluteus maximus, and play a very important role in supporting the lower back. When an individual has weak glutes, back muscles often take over the glutes’ job which can add tension and pressure in the low back. If you have a difficult time activating your glutes, the exercises outlined here should help! 

Kheya’s Top Five Strengthening Exercises

1) Toe taps 

Begin on your back. You will want to start this exercise by activating the core muscles as we talked about above. Next, you are going to lift your legs up so both your hips and your knees make a ~90 degree angle. From here, you are going to slowly lower one leg down at a time, trying to keep your knee bent at 90 degrees, and tap your toe to the floor. Try and keep your core engaged the entire time, and don’t let your lower back lift off the ground. Lastly, remember to breathe!

Complete 10 reps (5 toe taps per side) for 2-3 sets.

2) Bridges

Begin laying on your back with your knees bent. Engage your core and lift your bum off the floor, trying to create a straight line down your body and legs. Try and think about squeezing your bum at the top of the movement. If this is too easy, try adding a weight on top of your hips or a band just above your knees.

Complete 8-12 reps for 2-3 sets.


3) Bird dog

Begin on all fours with your hands below your shoulders. Engage your core and extend one arm and the opposite leg. When extending the leg, think about pushing your back heel through the wall behind you to extend as far as possible. If this is too difficult, try beginning by just lifting one arm at a time, keeping both legs on the floor. You can then progress to lifting one leg at a time keeping the arms on the floor, until you are able to lift opposite arms and legs at the same time.

Complete 10 reps (5 per side) for 2-3 sets.

4) Chin tucks 

Stand against a wall with your shoulders and the back of your head against the wall. If you need to, move your feet a step out from the wall so you can put your back flat against the wall. Push your chin so that your head goes straight back, lengthening through the back of your neck.

Hold the tuck for 3-5 seconds and repeat this 10 times.

5) Back rows

To do this exercise, you will need a band. Begin by looping the band at elbow height around something stable such as a banister or a doorknob. Hold one end of the band in each hand and bend your arms at the elbow to 90 degrees. Now, slowly pull your arms backwards, thinking about squeezing your shoulder blade together at the back.

Complete this 10-15 times for 2-3 sets.


In addition to all these exercises, any type of general strength and exercise will be great for lower back pain, even exercises working the muscles not involved in your pain. (For more information on this, see our blog on general exercise for injury rehabilitation.)

If you are unsure of where to start, our registered kinesiologists would be happy to work with you to create an exercise program which matches your exercise goals and injury specific recovery needs.

Give us a call today give us a call at (778) 630-8800, email us or book online to seek treatment from a physiotherapist or to work with a registered kinesiologist.

Neck & Back Pain - Part 1: Mobility and Stretching Exercises

Our fabulous registered kinesiologist Kheya McGill is back! In part 1 of her two-part blog series, Kheya reviews her favourite mobility and stretching exercises to help you tackle your neck and back pain. For Kheya’s favourite strengthening exercises, visit Part 2.

Neck and back pain are very common conditions. Sinnott et al. found that, at any given time, 15-20% of us will report back pain and 10-20% of us will report neck pain. Those numbers are huge! Spending more time hunched over computers (like most of us have been over the past two years) hasn’t helped.

Taking movement breaks throughout the day can be incredibly helpful for keeping pain at bay. It really boils down to the saying “motion is lotion” - the more you move your body, the easier (and less painful) it is to move. If you’re able to, taking a quick break every hour can make all the difference.

In this blog I will outline a few of my favourite exercises to increase spinal mobility and stretch tight back muscles. Make sure to stay tuned for part 2 of my blog series on neck and back pain, which will focus on my favourite strengthening exercises.

But first, a review of spinal anatomy…

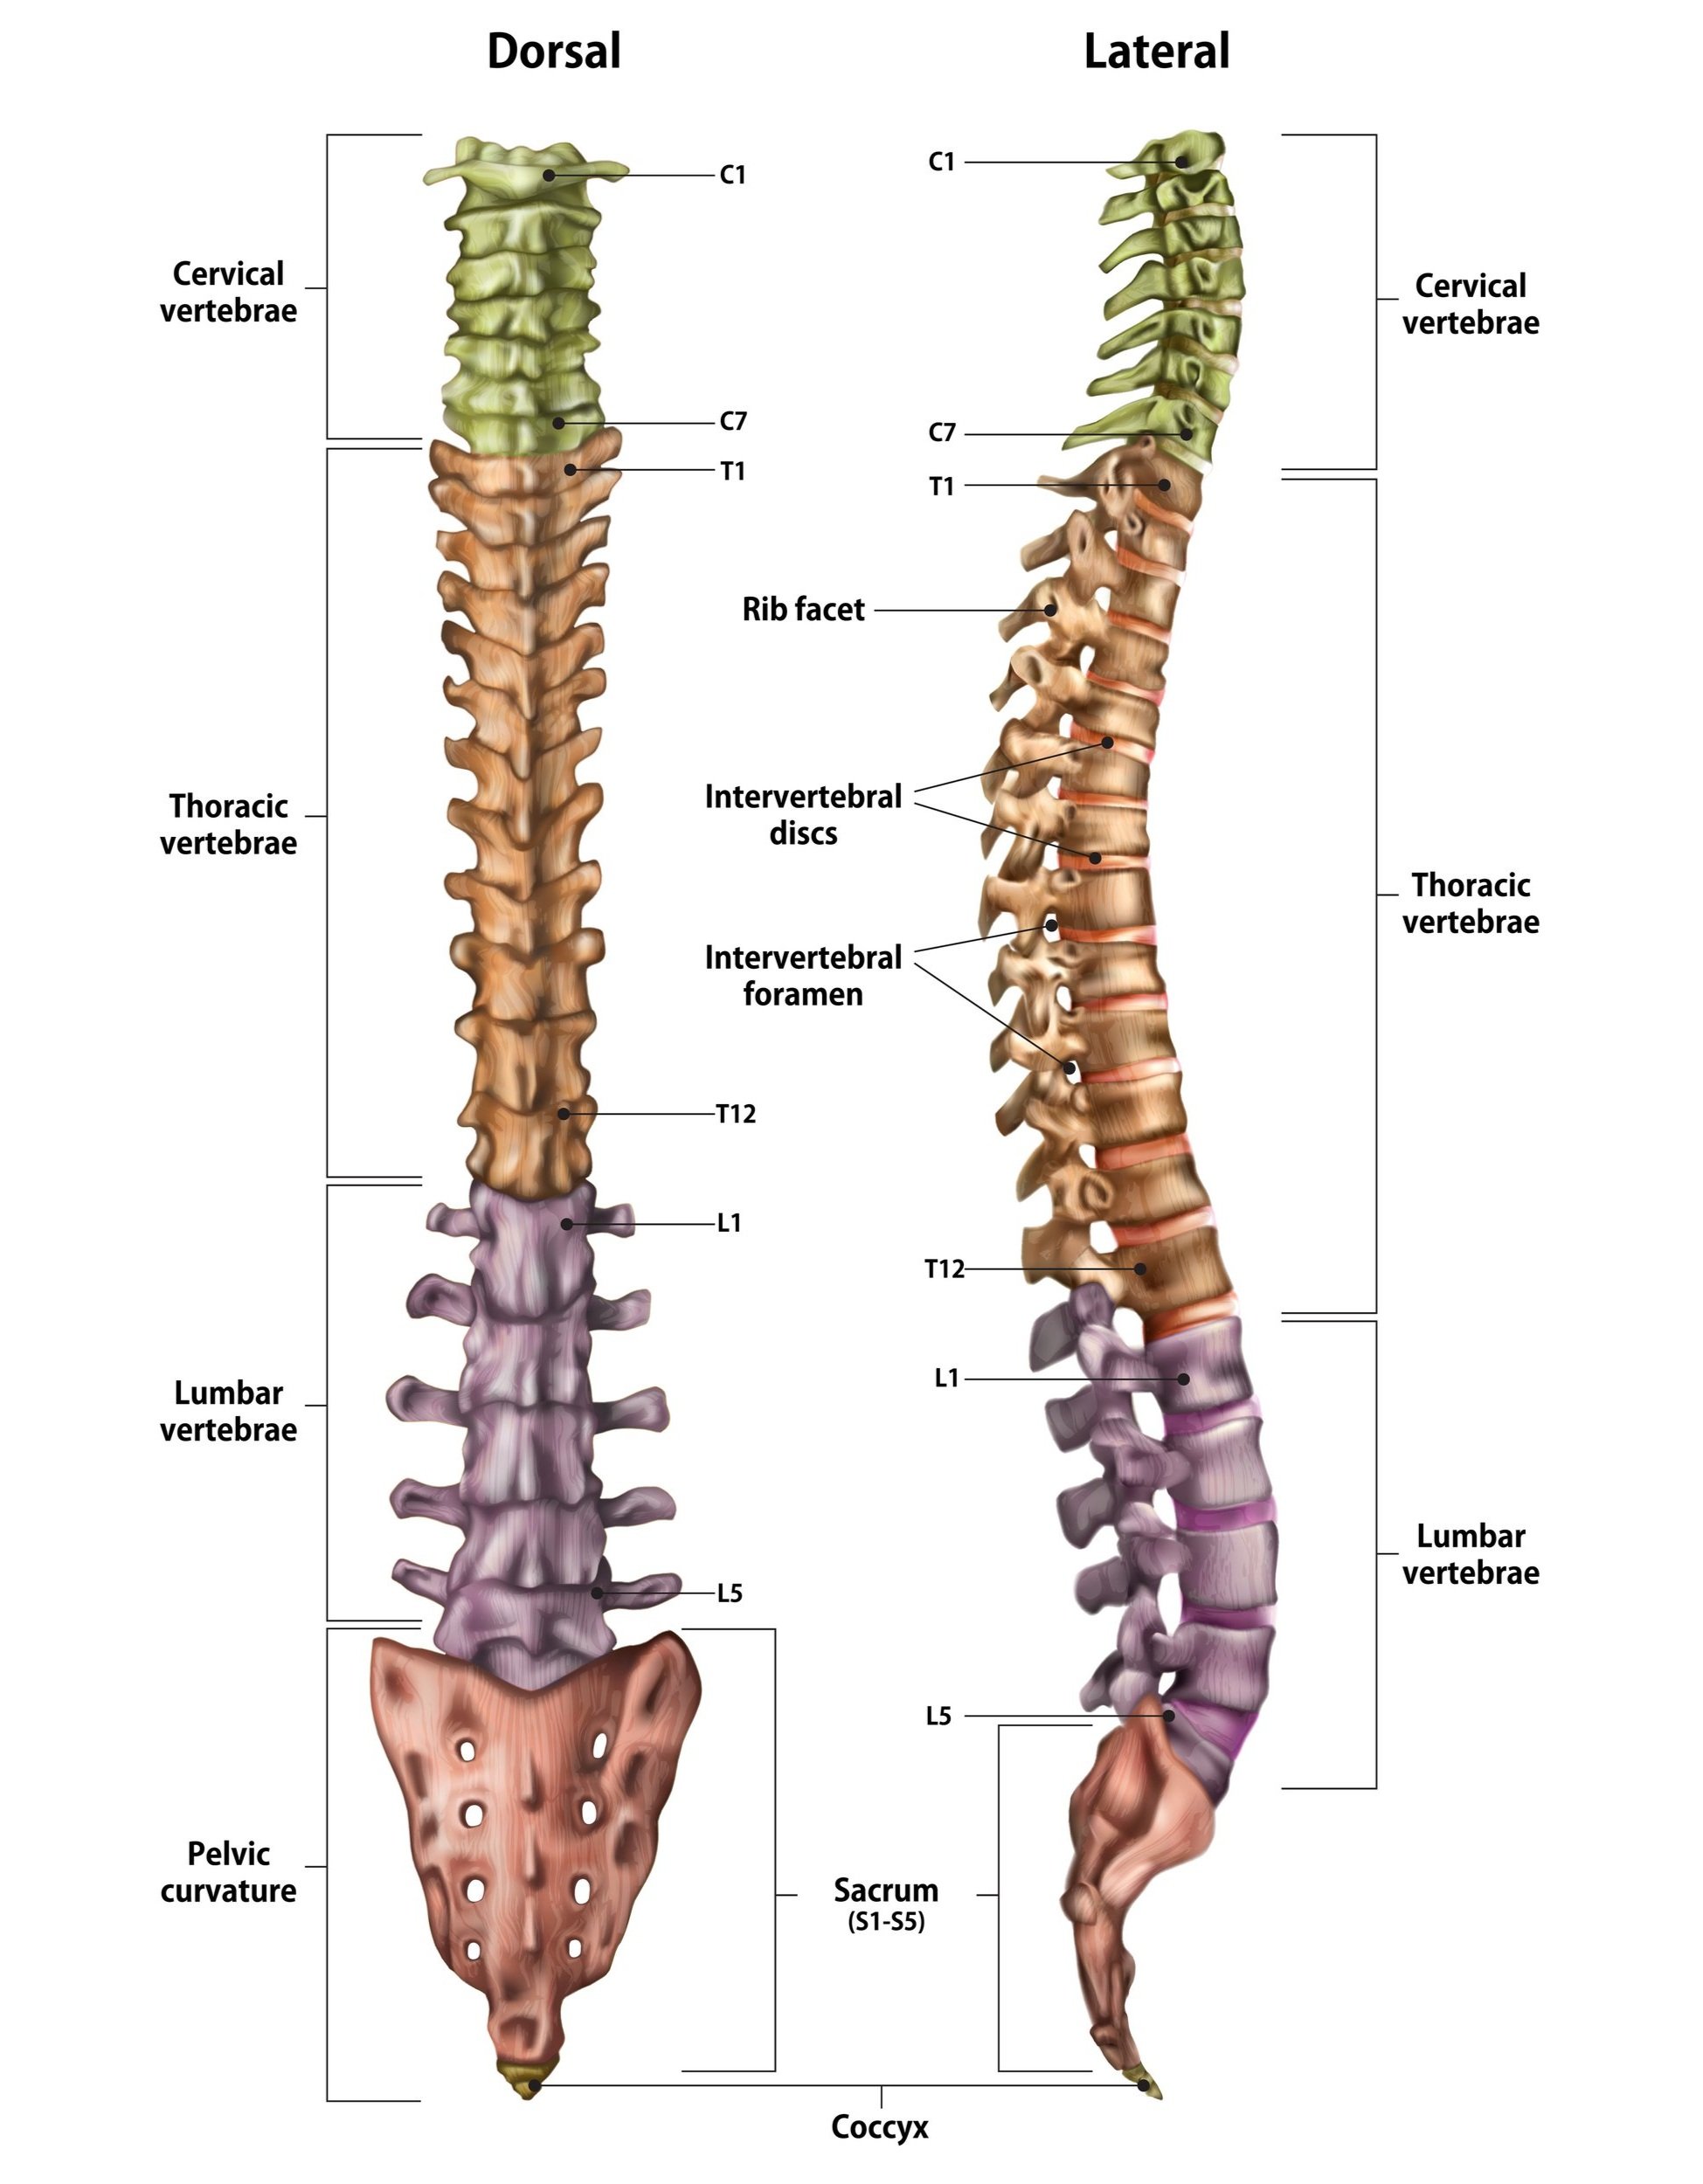
Our spine is organized into 5 main regions. From the head down, these regions are:

  • cervical spine - 7 vertebrae that make up the neck

  • thoracic spine - 12 vertebrae in the upper and mid-back, all of which attach to ribs

  • lumbar spine - 5 vertebrae of the low back

  • sacral spine - 5 vertebrae fused to form the sacrum, the triangular bone that helps make up the pelvis

  • coccyx - also known as the tailbone, located at the very bottom of the spine

The spine has three main jobs:

  1. Central supporting structure - the spine acts as a scaffold for your body. Muscles, ligaments and connective tissue attach to each vertebra of the spine and to the limbs. The rigidity of the spine also holds us up against gravity.

  2. Protector of the spinal cord - millions of nerve cells travel up and down your spinal cord, sending signals up to the brain and out to the entire body. Without the bony protection of the vertebrae, the spinal cord would be much more vulnerable to trauma and injury.

  3. Movement - the multiple joints of the spine allow a lot of movement to occur including sitting, standing, walking, bending forward and twisting around.

Keeping your spine healthy is critical to your overall health - the stronger and more mobile you are, the better!

Kheya’s Top Five Mobility and Stretching Exercises

The Mobility Exercises

What is it:

Mobility refers to the ability of a joint to move actively through a range of motion (see our previous post on flexibility vs. mobility for more on this). Improving mobility helps increase the range of motion available in the joints, leading to improved function and decreased pain.

1)      Thoracic spine openers

Begin by laying on your side with your legs slightly bent and stacked on top of each other. Stretch your arms out straight in front of you. Keeping your bottom arm on the floor, roll on your back and sweep your arm up and over to the other side, opening the chest. Keep your eyes on the top hand, rotating your neck as your arm rotates over your body. Once you have reached your end range, bring your arm back across your body.

Repeat 5-10 times per side.

2)      Lumbar rotation

Begin on your back with your knees bent, feet flat on the floor and your arms stretched out on either side of you like a “T”. Keeping your back flat on the ground, drop both legs out to one side. Hold this position for 5-10 seconds. Bring your knees back to the middle and then repeat the same movement on the opposite side.

Repeat this movement 10 times for 2-3 sets.

3)      Cat cow

Begin on all fours. With the hands underneath the shoulders, lift your head and chest while simultaneously letting your stomach sink and lower back arch. After this, switch and round the back and let the head and neck drop while rounding your back as much as possible.

Repeat these alternating movements 10 times and then repeat this for 2-3 sets.

The Stretches

Stretching is the ability to move muscles through a range of motion passively. In other words, pushing to get to the joints through the end range using assistance from your hands, the wall, a strap, or anything else (see our previous post on flexibility vs. mobility for more on this). Stretching is useful for back pain as it can help loosen sore and tight muscles.

1)      Childs pose

Begin on your hands and knees and drop your bum back onto your heels. Reach your hands forwards, dropping your head and shoulders down towards the floor.

Hold for 20-30s and repeat 2-3 times.

2)      Knee hugs

Begin laying on your back and hug one leg in towards your chest.

Hold this for 20-30s. Repeat on both sides and complete 2-3 sets.

Next up, the strengthening exercises! Head over to Part 2 for my favourite exercises to make your body stronger.

If you are unsure of where to start, our registered kinesiologists would be happy to work with you to create an exercise program which matches your exercise goals and injury specific recovery needs.

Give us a call today give us a call at (778) 630-8800, email us or book online to seek treatment from a physiotherapist or to work with a registered kinesiologist.

Headaches - The New Guidelines

AdobeStock_273175249.jpeg

When I came across these clinical practice guidelines, I was a little giddy - you may have noticed the excitement in my instagram post. When the Veteran’s Affairs/Department of Defence Clinical Practice Guideline For The Primary Care Management of Headache dropped a few weeks back, I poured myself a glass of wine and settled into my favourite patio chair for a quiet evening of evidence-based practice. Here are some facts I pulled out of the 150 page document:

  1. 66% of people will experience a headache disorder in their lives. Sixty-six. SIXTY-SIX. That number blew my mind. I knew it was a common thing to experience, but I never would have guessed THAT common.

  2. Women are more likely to experience migraines (15-18%) than men (6-10%). These migraines are often triggered by hormone fluctuations and are most prevalent in women of childbearing age.

  3. The three most common types of headaches are:

    1. Tension-type headaches - these can last anywhere between 30 minutes to 7 days and are characterized by pain on both sides of your head and a pressing or tightening feeling. Tension headaches do NOT pulse and are typically not aggravated by life - they just happen.

    2. Migraines - lasting typically from 4-72 hours, migraines usually take over one side of your head with moderate to severe pulsing or throbbing pain, sometimes with a whole host of other symptoms (nausea, vomiting, light and noise sensitivity, visual or auditory auras and more!). Migraines are often triggered by physical activity, such as climbing the stairs, or other triggers in foods or the environment.

    3. Medication-overuse headaches - I’ll be honest, this one surprised me as making the “Top Three” list. These are a result of overmedicating with anything from over-the-counter meds like Tylenol or Advil, or the heavy hitters like opioids and triptans. (If you think this may be you, please speak with your doctor before changing your medication use)

So what kind of headache do you have?

Headache Diary

First things first - you need a headache diary. By tracking the time, medication used, triggers and patterns of your headaches, we can figure out what kind of headaches you’re experiencing and the best method of attack for your headaches. To make an accurate diagnosis, you should track your symptoms for at least a month - this gives us enough data to identify patterns and come to a more accurate diagnosis.

Now, for the big question - what can you do about your headaches? Let’s go through migraines and tension-type headaches separately.

Migraines

The best treatment option for migraines we have right now is the right medication. There are a whole host of them out there with various levels of evidence behind them - in fact, most of them are listed in this clinical practice guideline! If you have a migraine diagnosis or think you should, I urge you to speak with your physician - they can help you decipher your symptoms and figure out the right meds for you.

The other big treatment approach for migraines is trigger modification. Has your headache diary helped you figure out something in your diet is causing your headaches? Or maybe you’ve realized reading in the car can bring one on? Identifying and removing or dealing with these triggers is huge!

Tension-Type Headaches

With tension headaches, medications are also great. We have other non-pharmaceutical options with research behind them, including:

  1. Physiotherapy for your neck - research is supporting more and more the use of manual therapy and exercise for the neck to help reduce headaches. This could mean traction, release of muscles in your neck, strengthening of the deep postural muscles or stretching of the tight muscles in and around your neck - it depends on you!

  2. Aerobic exercise and progressive strength training - it turns out that getting your heart rate up and your body strong is one of the best things you can do for you head. For starters, any exercise that gets your heart rate up also gets your body making new blood vessels including in your brain. Add general body strengthening to that and your head becomes easier to hold up all day, reducing the tension in your neck.

  3. Mindfulness and meditation - we are finally at a place in the medical community where mindfulness is mainstream! We know thought patterns can influence our bodies and the pain we perceive. We also know we can harness this for our own benefit through mindfulness practice. Not sure where to start? Apps like Calm and Headspace are a great place to get your feet wet - I like anything with a body scan!

Wondering about acupuncture and IMS? Right now, the research hasn’t come down on one side or the other, instead saying “more research is needed”. I interpret that as follows: if you’re someone who typically benefits from needling, it’s worth a try. If it doesn’t work for you, we have other options!

If you suffer with undiagnosed headaches, print out the headache diary, fill it out for a month and discuss the results with your family practitioner. If tension-type headaches are the problem, give us a shout - we would love to help you get your headaches under control!

As always, if you’d like to book an appointment you can do so online, via email or by phone at (778) 630-8800.

Ask A Physio: Any Tips for Mouse Finger Pain?

AdobeStock_294358654.jpeg

So I don’t know about you, but COVID has certainly pushed me to using my computer a lot more. A. Lot. More. My body is feeling it, too - my neck is stiffer than it was, my hands are tired and my shoulders make a lot of noise after a long session on the computer.

We know that prolonged postures of any kind - standing in one spot, sitting still - aren’t great for anyone. Our bodies are for movement and all too often we get stuck in postures for hours at a time. When that prolonged posture is on the computer, that finger and wrist pain is often directly related to the position of the neck and shoulder as much as it is the wrist and hand.

So what should you do? The best thing you can do is set an alarm for 30 minutes and make a point of moving and stretching your body. If you have two minutes (or less!), this movement and stretching routine can help combat the stiffness and soreness associated with prolonged computer use.

Without further ado, presenting:

Top Ten Exercises for Computer-Related Pain

AdobeStock_151993350.jpeg

1. Shake it out! - I love a good shake - who doesn’t? Sit up straight, take your wrists and hands and give them a good shake, letting your fingers fly.

2. Chin to chest - Something we often forget is how much posture contributes to pain further down the chain. Sit up straight and tuck your chin into your chest, feeling a stretch down the back of your neck. Hold this for 10ish seconds.

3. Ear to shoulder, then a twist - Still sitting up straight, lean your ear to your shoulder and hold it for about 10 seconds. Then twist your head so your nose gets closer to your armpit; hold this for another 10 seconds. Repeat on the other side.

AdobeStock_264162260.jpeg

4. Shoulder rolls - Still sitting up straight (are you sensing a theme yet??), roll your shoulders up to your ears then squeezing them back and down, pushing your shoulder blades as far down your back as you can. Bring your shoulders forward then back up to your ears. Do this 5 times.

5. Wrist stretch - Stretch your right arm in front of you and bend your wrist and fingers back. Use your left hand to pull your right fingers further back, feeling a stretch in your forearm. Hold for 10ish seconds and repeat on the other side.

6. Prayer stretch - Place your hands together in a prayer position in front of your chin. Lower your hands down, keeping your palms together and feeling a stretch in your forearms. Hold for 10ish seconds.

AdobeStock_331129900.jpeg

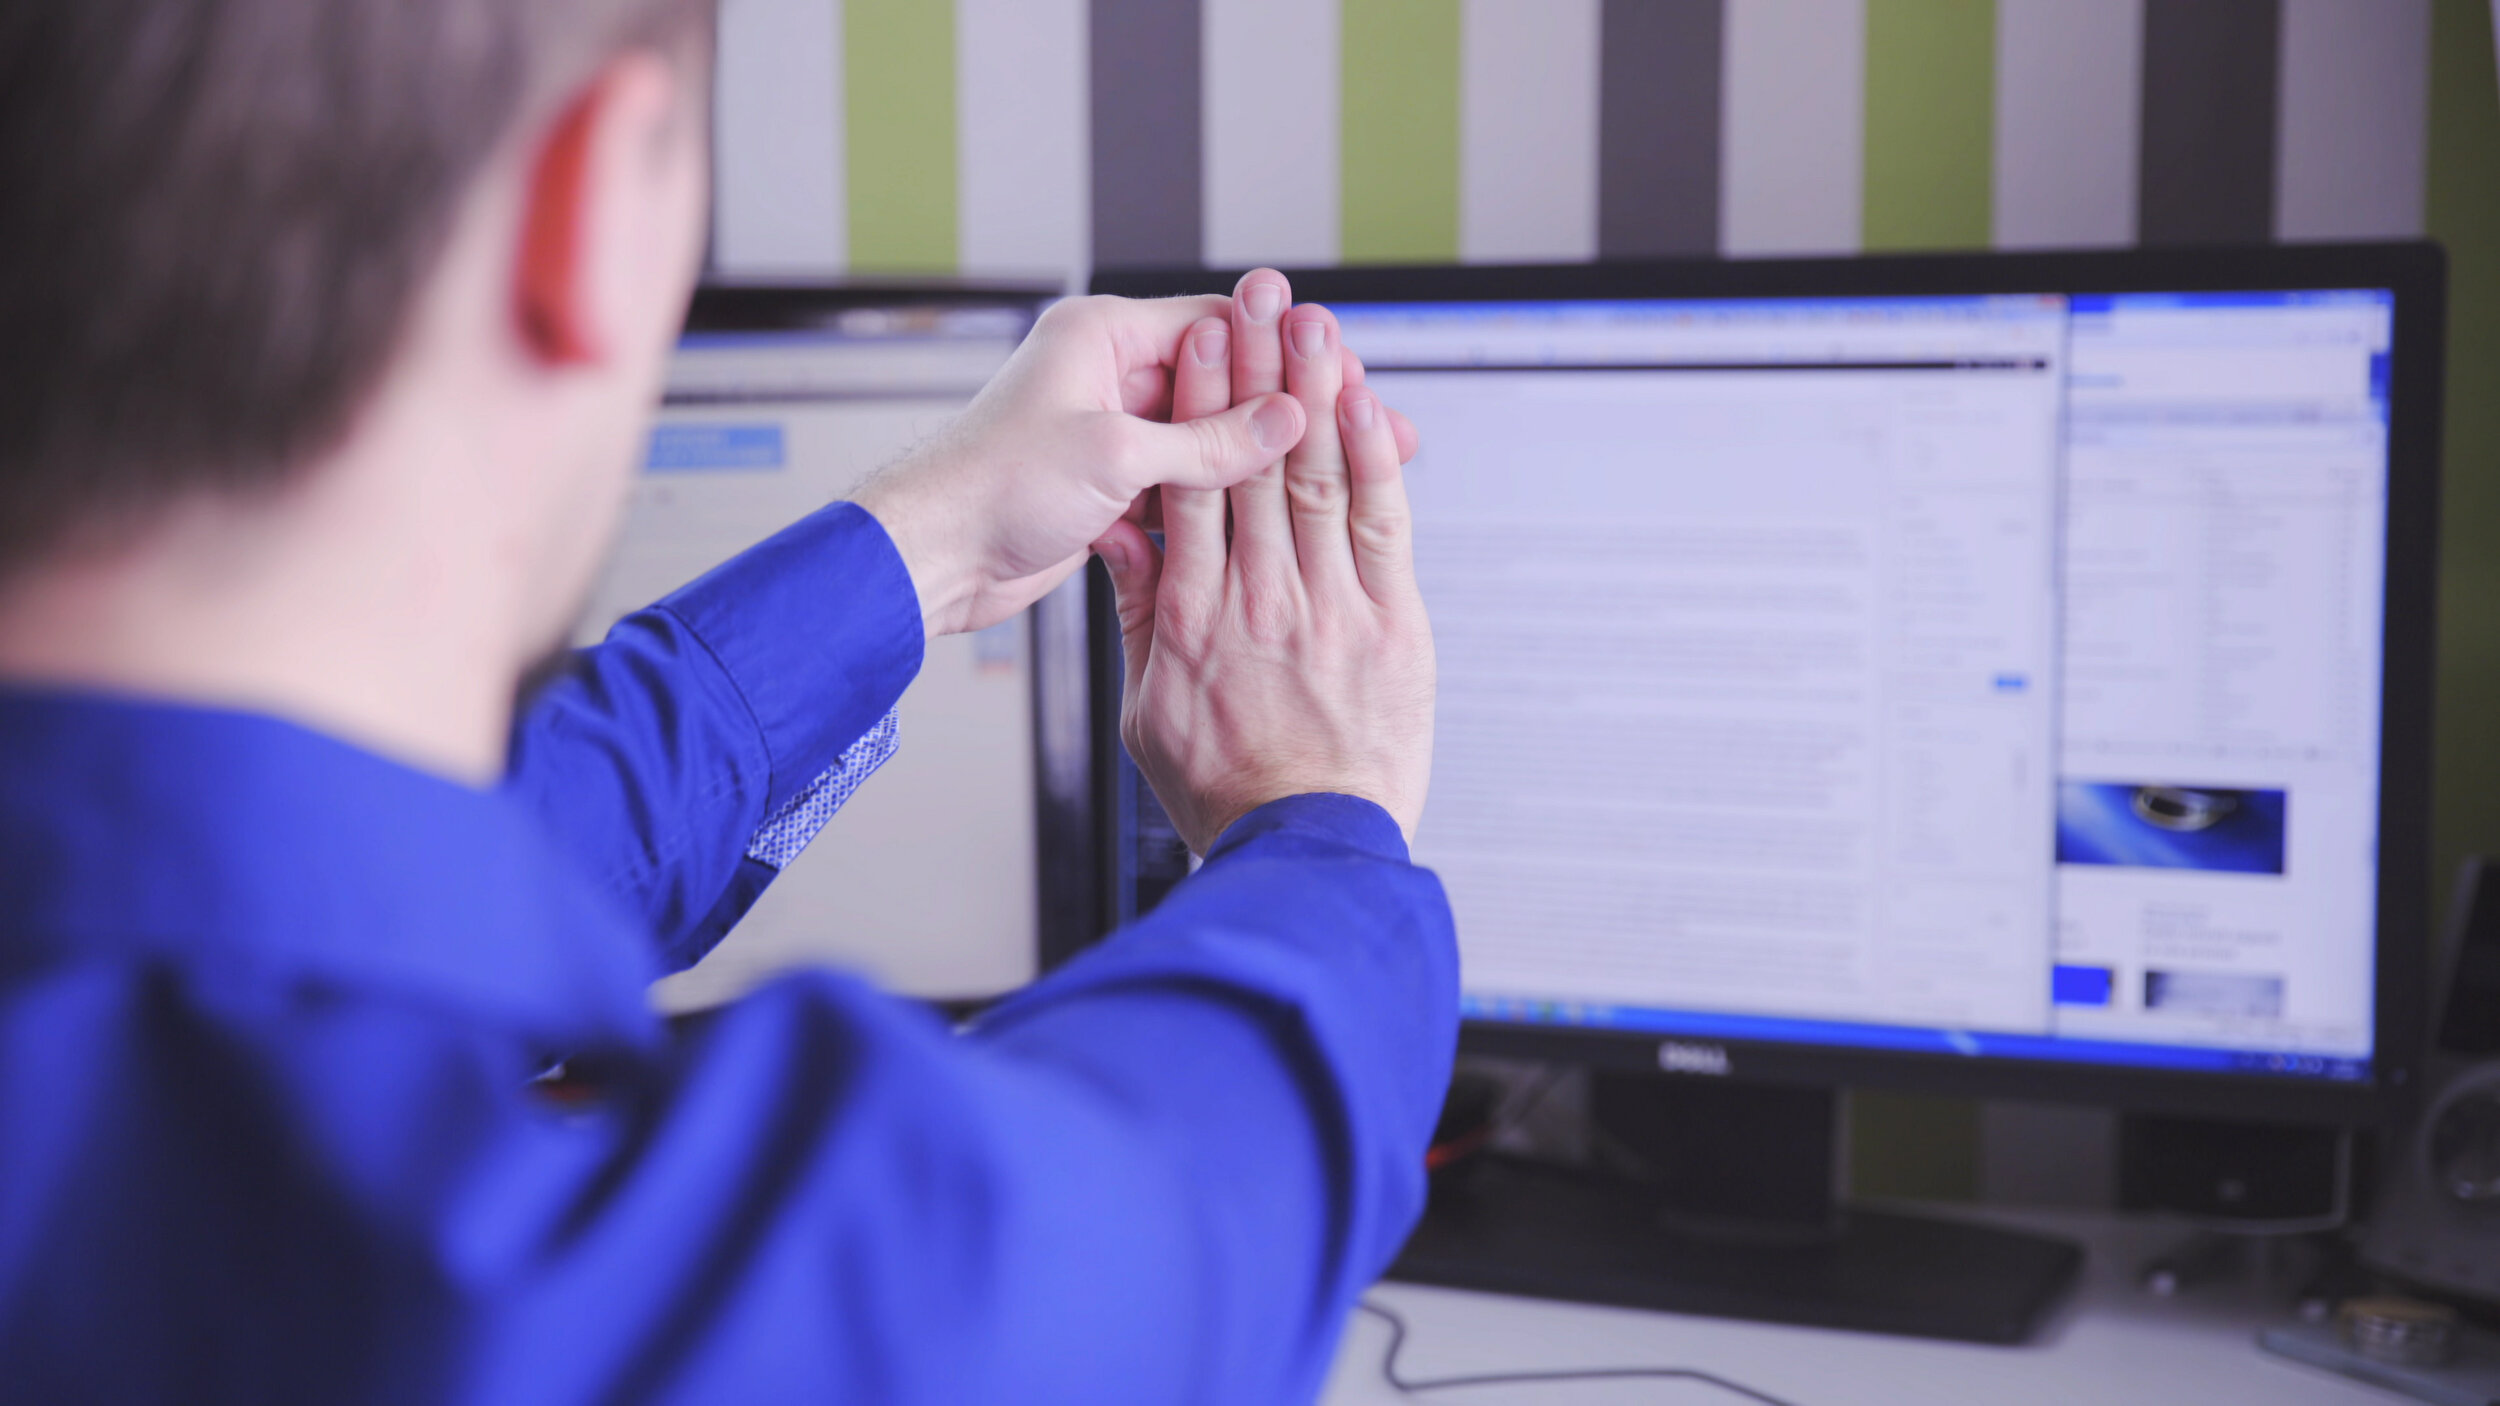
7. Finger stretch - Place all your finger tips together - think Mr. Burns from the Simpsons - and push your fingers together. Keep your fingers together and pull your palms away from each other. Stretch your thumbs away from your other fingers. Feel a stretch for 10ish seconds.

8. Wrist circles - Draw circles with your wrists! 5 in one direction, 5 in the other.

9. Hand fist and open - Squeeze your hands into tight fists for a few seconds. Then stretch your hands out wide, reaching your fingers out as far as you can for a few seconds. Repeat 5 times.

10. Finish this off with a final shake!

Looking for a print out of this program? Here it is in PDF form, with pictures!

The better you support your body with proper ergonomics (see our previous two ergonomic blogs here and here) and frequent movement breaks, the less likely you’ll suffer from computer related pain. So set that alarm, stretch it out and stay pain free!

As always, if you would like to book an assessment with one of our fabulous physiotherapists or our amazing massage therapist, give us a call at (778) 630-8800 or email us at clinic@ladnervillagephysio.com.

Finally - do you have a burning question one of our physiotherapists can answer? If you’d like to #askaphysio, we would love to answer!