#rehab

Don't Call It A Mild Concussion

Devon Konrad, MPT, is one of our physiotherapists at Ladner Village Physiotherapy. She has a special interest in vestibular rehabilitation and concussion management. She also has some opinions, if you couldn’t tell. Read about what’s annoying her in the field of concussion rehabilitation below!

The concussion world moves fast. It wasn’t long ago the first line treatment for someone with a concussion was to sit in a quiet, dark room until symptoms had completely abated. Only then was the sufferer allowed to crawl out of their hiding hole and into the world, often to be bombarded with a complete assault on their senses: everything was BRIGHT, everything was LOUD, and it was all TOO MUCH.

While many advancements have been made in the world of concussion rehab, there are so many myths and old school ways of thinking that still persist. In the past few months, I have heard people say you need to lose consciousness to have a concussion (you don’t), helmets prevent concussions (they don’t) and if the CT or MRI is normal, it’s not a concussion (imaging can’t see a concussion. Yet.).

While these myths annoy me, most health care practitioners now understand they are, in fact, myths. However, I still see too many people that have been given out-of-date and just plain wrong information from health care practitioners.

There Is No Mild Concussion Anymore

Just yesterday, I ran into a very common one: the concept of a graded concussion, either mild, moderate or severe. We used to grade concussions based on a few factors: if someone lost consciousness and for how long; if they had any amnesia; and the presence of certain symptoms that supposedly indicated if the concussion was more or less severe.

In the last few years, this concept has been thrown out the window.

We no longer discuss the grade of the concussion. Instead, we discuss the domains affected by the concussion. The research world still hasn’t figured out exactly how to break this down and different models exist. In general, researchers (see links below) consider these 8 areas to be ones of importance in concussion rehabilitation:

  • Ocular / visual - how your brain is taking in and processing visual information as well as how your eyes are moving. Problems with your visual system may result in blurry vision, difficulty reading or missing objects when you try to grab them.

  • Vestibular - how your brain senses your body’s movement and its relation to gravity. Problems with your vestibular system tend to be dizziness, vertigo or imbalance.

  • Cardiovascular / autonomic - your brain is implicitly involved in heart rate and blood pressure and how these respond to changes in posture and demand. Problems here may show as an elevated or blunted resting heart rate, inability to tolerate exercise or lightheadedness when standing up.

  • Anxiety / mood - emotional lability, irritability and anxiety are very frequently seen after a concussion. Often these symptoms dissipate as brains heal but it’s common for people to see a psychotherapist trained in brain injuries to help treat this domain.

  • Cognitive / fatigue - difficulty thinking, multi-tasking, remembering items and words, and navigating spaces are all common complaints after a concussion. This can be secondary to other domains (for instance, if you are having trouble with your vision, it’s going to be much more difficult to focus on reading a book and thinking about what you’re reading) but it may also be a problem all on its own.

  • Headache / migraine - one of the most common symptoms after a concussion, this is typically caused by any of the other domains or it could be a domain of it’s own.

  • Cervical - also known as the neck, people typically get some type of neck injury after a concussion. If necks aren’t treated properly, they can exacerbate the symptoms from all the other domains.

  • Sleep - this can often be thrown for a loop after a concussion, either with too much sleep, too little, or both at the same time. Sleep hygiene is imperative for a healing brain and, just like the neck, impaired sleep can exacerabte all the other domains.

At this point in concussion rehabilitation, health care practitioners who claim to treat concussions should be very well versed in this concept. They should be doing multi-domain assessments and referring to appropriate health care practitioners because one practitioner cannot possibly treat all these domains. Concussion rehab is a multi-discilpinary field and all practitioners involved in concussion care should understand this implicitly.

Get Out Of The Dark Room

I heard this one a few weeks ago - someone came in with a concussion and one of their health care providers told them to stay in a quiet, dark room until their symptoms went away.

The research on this one is super clear. No one should be living in a dark room for days or weeks on end.

Rest is great for the first 24-48 hours, but that’s it. In this time, people with concussions are allowed to sleep as much as they want and be relatively subdued. Even in these first two days, however, they need to be exposed to some level of stimulation. It is often as simple as a walk around the block with sunglasses and a hat, and that’s ok! But staying full time in a dark room for days and days is simply not allowed anymore.

After those first 2 days, exercise needs to start. However, when I say exercise, I don’t mean go for a 10km run. Here are the parameters I use in returning to exercise after a concussion:

  • Before exercising, take note of your symptom level out of 10.

  • Aim for 20 minutes of movement. Breaks are fine, especially initially!

  • During and after exercise, it is normal and safe for your symptoms to be slightly exacerbated. We want to keep those symptoms within 1-2 points of your baseline.

  • Once you have finished exercising, your symptoms should return to their pre-exercise level within one hour.

If you find that your symptoms went higher or lasted longer than they should have, that’s ok! Use this as a guide for next time and try your best to stay within this range.

Typically, people start exercising with walking around their neighborhood. It’s a great way to keep control of symptoms as well as get some visual and auditory stimluation. As brains heal, people find they can gradually increase their pace, intensity or how long they’re exercising. As long as symptoms aren’t peaking too high and coming down within an hour, then it’s all good!

The Resources Are Piling Up

There are lots of up-to-date concussion resources out there for practitioners, parents and people who have suffered concussions. Here’s my curated and definitely not complete list:

For People With Concussions & Their Loved Ones:

VCH My Guide: Concussion - a wonderful, up-to-date resource that everyone with a concussion should visit.

VCH My Guide: Teen Concussion - the same as above, but focused on adolescents with concussions.

Concussion Online Training Tool - a wonderful tool for athletes, coaches, parents, teachers, medical professionals and anyone who may come into contact with someone who has had a concussion. This one is much more focused on recognizing an acute concussion and what to do immediately after it happens. I recommend everyone take this training.

For Health Care Practitioners Wanting To Get Deeper Into Concussions:

There are so many weekend courses focussed on concussion management as well as units on concussion as part of another specialty (for instance, the CCVR course through 360NeuroHealth has a large unit on concussion from a vestibular perpsective). If concussion rehab is where you want to be, check out these:

Consensus Statement on Concussion in Sport - published in 2023, this is our guiding document in how we currently treat concussions.

University of Calgary Online Concussion Course - run by the world renowned Kathryn Schneider, a free online course that takes a deep dive into concussion pathophysiology and introduces rehabilitation strategies.

Concussion Nerds - a massive course designed to go as deep as possible into concussion rehabilitation as we know it. Facilitated by the amazing physiotherapist Natasha Wilch.

Canadian Concussion Network - for those wanting to stay up to date with concussion research, I implore you to join the CCN. The leading brains in Canada run this organization!


Busting Common Exercise Myths: Part 2 - The Perfect Squat

Is there a perfect squat form for everyone?

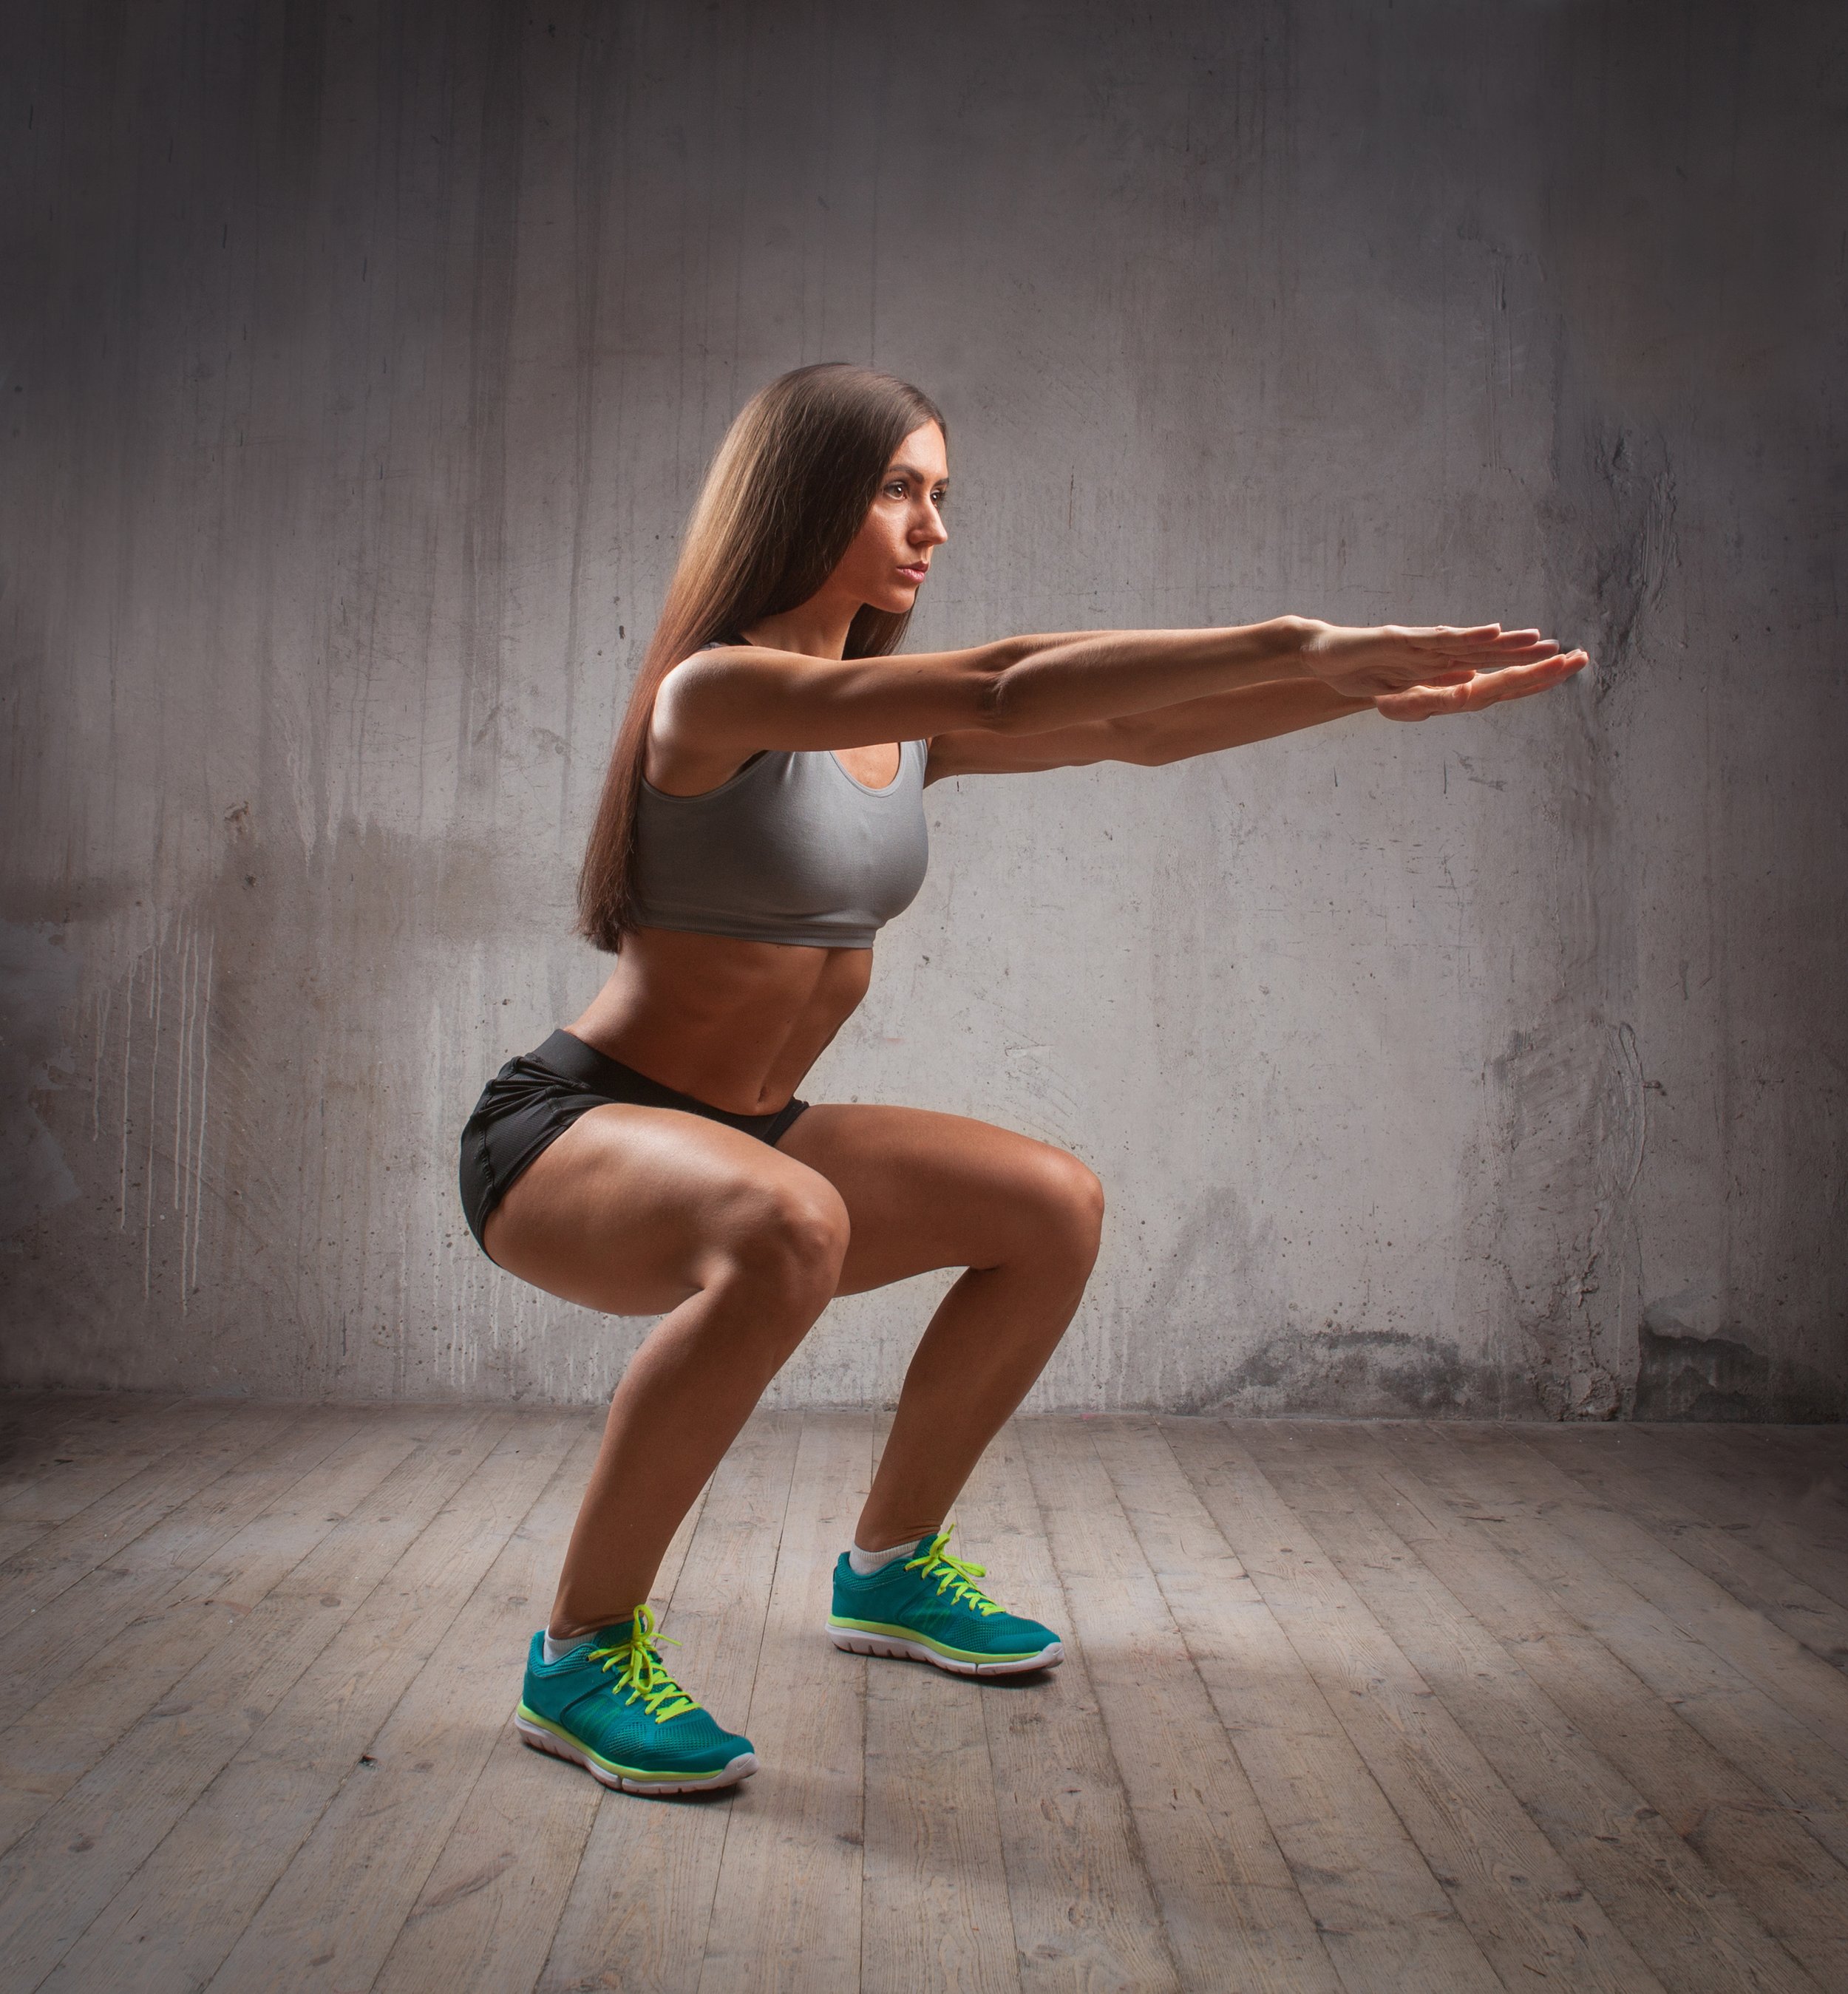
If you’ve been around a gym or done much exercise in your life, it is likely you have tried to adjust your squat form at one point or another. Maybe you have seen videos of fitness influencers on social media and tried to copy what their squat looks like.

In our heads, the ideal squatter often has their toes facing forward, feet shoulder width apart, knees stay behind their toes, chest up, back straight, and no “buttwink” (curving of the low back as it drops at the end of a squat).

Unfortunately, this isn’t the perfect form for everyone, and there isn’t a one size fits all perfect squat form. This is due to the differences in our anatomical build. We all have different anatomy in our spine, hips, knees, pelvis, and ankles, and everyone has different levels of function and mobility at each of these joints.

One of the easiest examples of differing anatomy is the angle at which our legs naturally sit. When in a natural position (I.e., laying flat on your back with your legs down and relaxed), some people’s feet will naturally face straight up and forward while some will naturally sit with their toes pointing outside away from their bodies. By forcing everyone to put their toes forward, we may be putting them in a position which is less natural for their specific body anatomy. Individuals whose feet naturally fall towards the outside when in this position may feel more comfortable with their toes pointed away from their bodies when squatting, rather than having their toes facing forwards.

Another good example of this is ankle mobility. Individuals with tight ankles may have a difficult time going into a deep squat as the don’t have a large enough range of motion through the ankle joint to allow their knees to move forward. There are a couple of ways to adjust this. Firstly, these individuals should be working to improve their ankle mobility. However, some people may not be able to improve their ankle mobility a whole lot, and that is okay! People with tight ankles may benefit from raising their heels when they squat. This may mean using a small wedge or small plate under the heels- this will allow them to squat much deeper as their ankles are less limited.

The last example we will talk about is the length of your femur (aka your thigh bone). Online, we often see individuals being praised for how deep they can go in a squat- but this is not something everyone will be able to do safely or comfortably. Individuals with longer femurs will naturally have to lean forward more in their squat to stay balanced and offset the weight or their body. Individuals with longer femurs also may not be able to squat down quite as deep, as they will be unable to stay upright due to the weight of their body or barbell pulling them backwards.

The important thing to remember here is there are anatomical features that CAN NOT BE CHANGED and that is not a bad thing!

This means no squat form is better than another. The best squat form is the one that is safe and feels right for your body.

We don’t expect you to know the length of your femur, hip angle or ankle mobility. If things aren’t feeling right in your squat, play around until they feel better. Here are some things you can try:

  • Depth - short calf muscles and femur length will affect how deep you can go in your squat, so adjust to find the right depth for you

  • Foot angle - pointed straight ahead or pointed outside? This will often be based on your hip anatomy and the amount of torsion on your shin bone

  • Foot width - femur length and the width of your pelvis play in here as well, so feel this one out. A wider stance is more stable and requires less distance to travel.

  • Type of squat - different types of squats (front squat, barbell back squat, goblet squat, box squat, sumo squat, etc.) demand different body positions, depending what muscle group you want to target

  • Ankle position - tight calves or limited ankle mobility may require doing things a bit differently, such as a heel elevated squat

While there is no perfect squat form that works for everyone, there is absolutely a perfect squat form for your body! If you are unsure of where to start or how to perfect your squat form, our registered kinesiologists would be happy to work with you to create an exercise program which matches your exercise goals and injury specific recovery needs.

Give us a call at (778) 630-8800, email us or book online to seek treatment from a physiotherapist or to work with a registered kinesiologist.

Happy squatting!

General Exercise for Injury Rehab

Most of us can relate to the experience of getting injured and wanting to lounge on the couch for days at a time, letting our bodies heal. However, that is not the best way to recover from an injury.

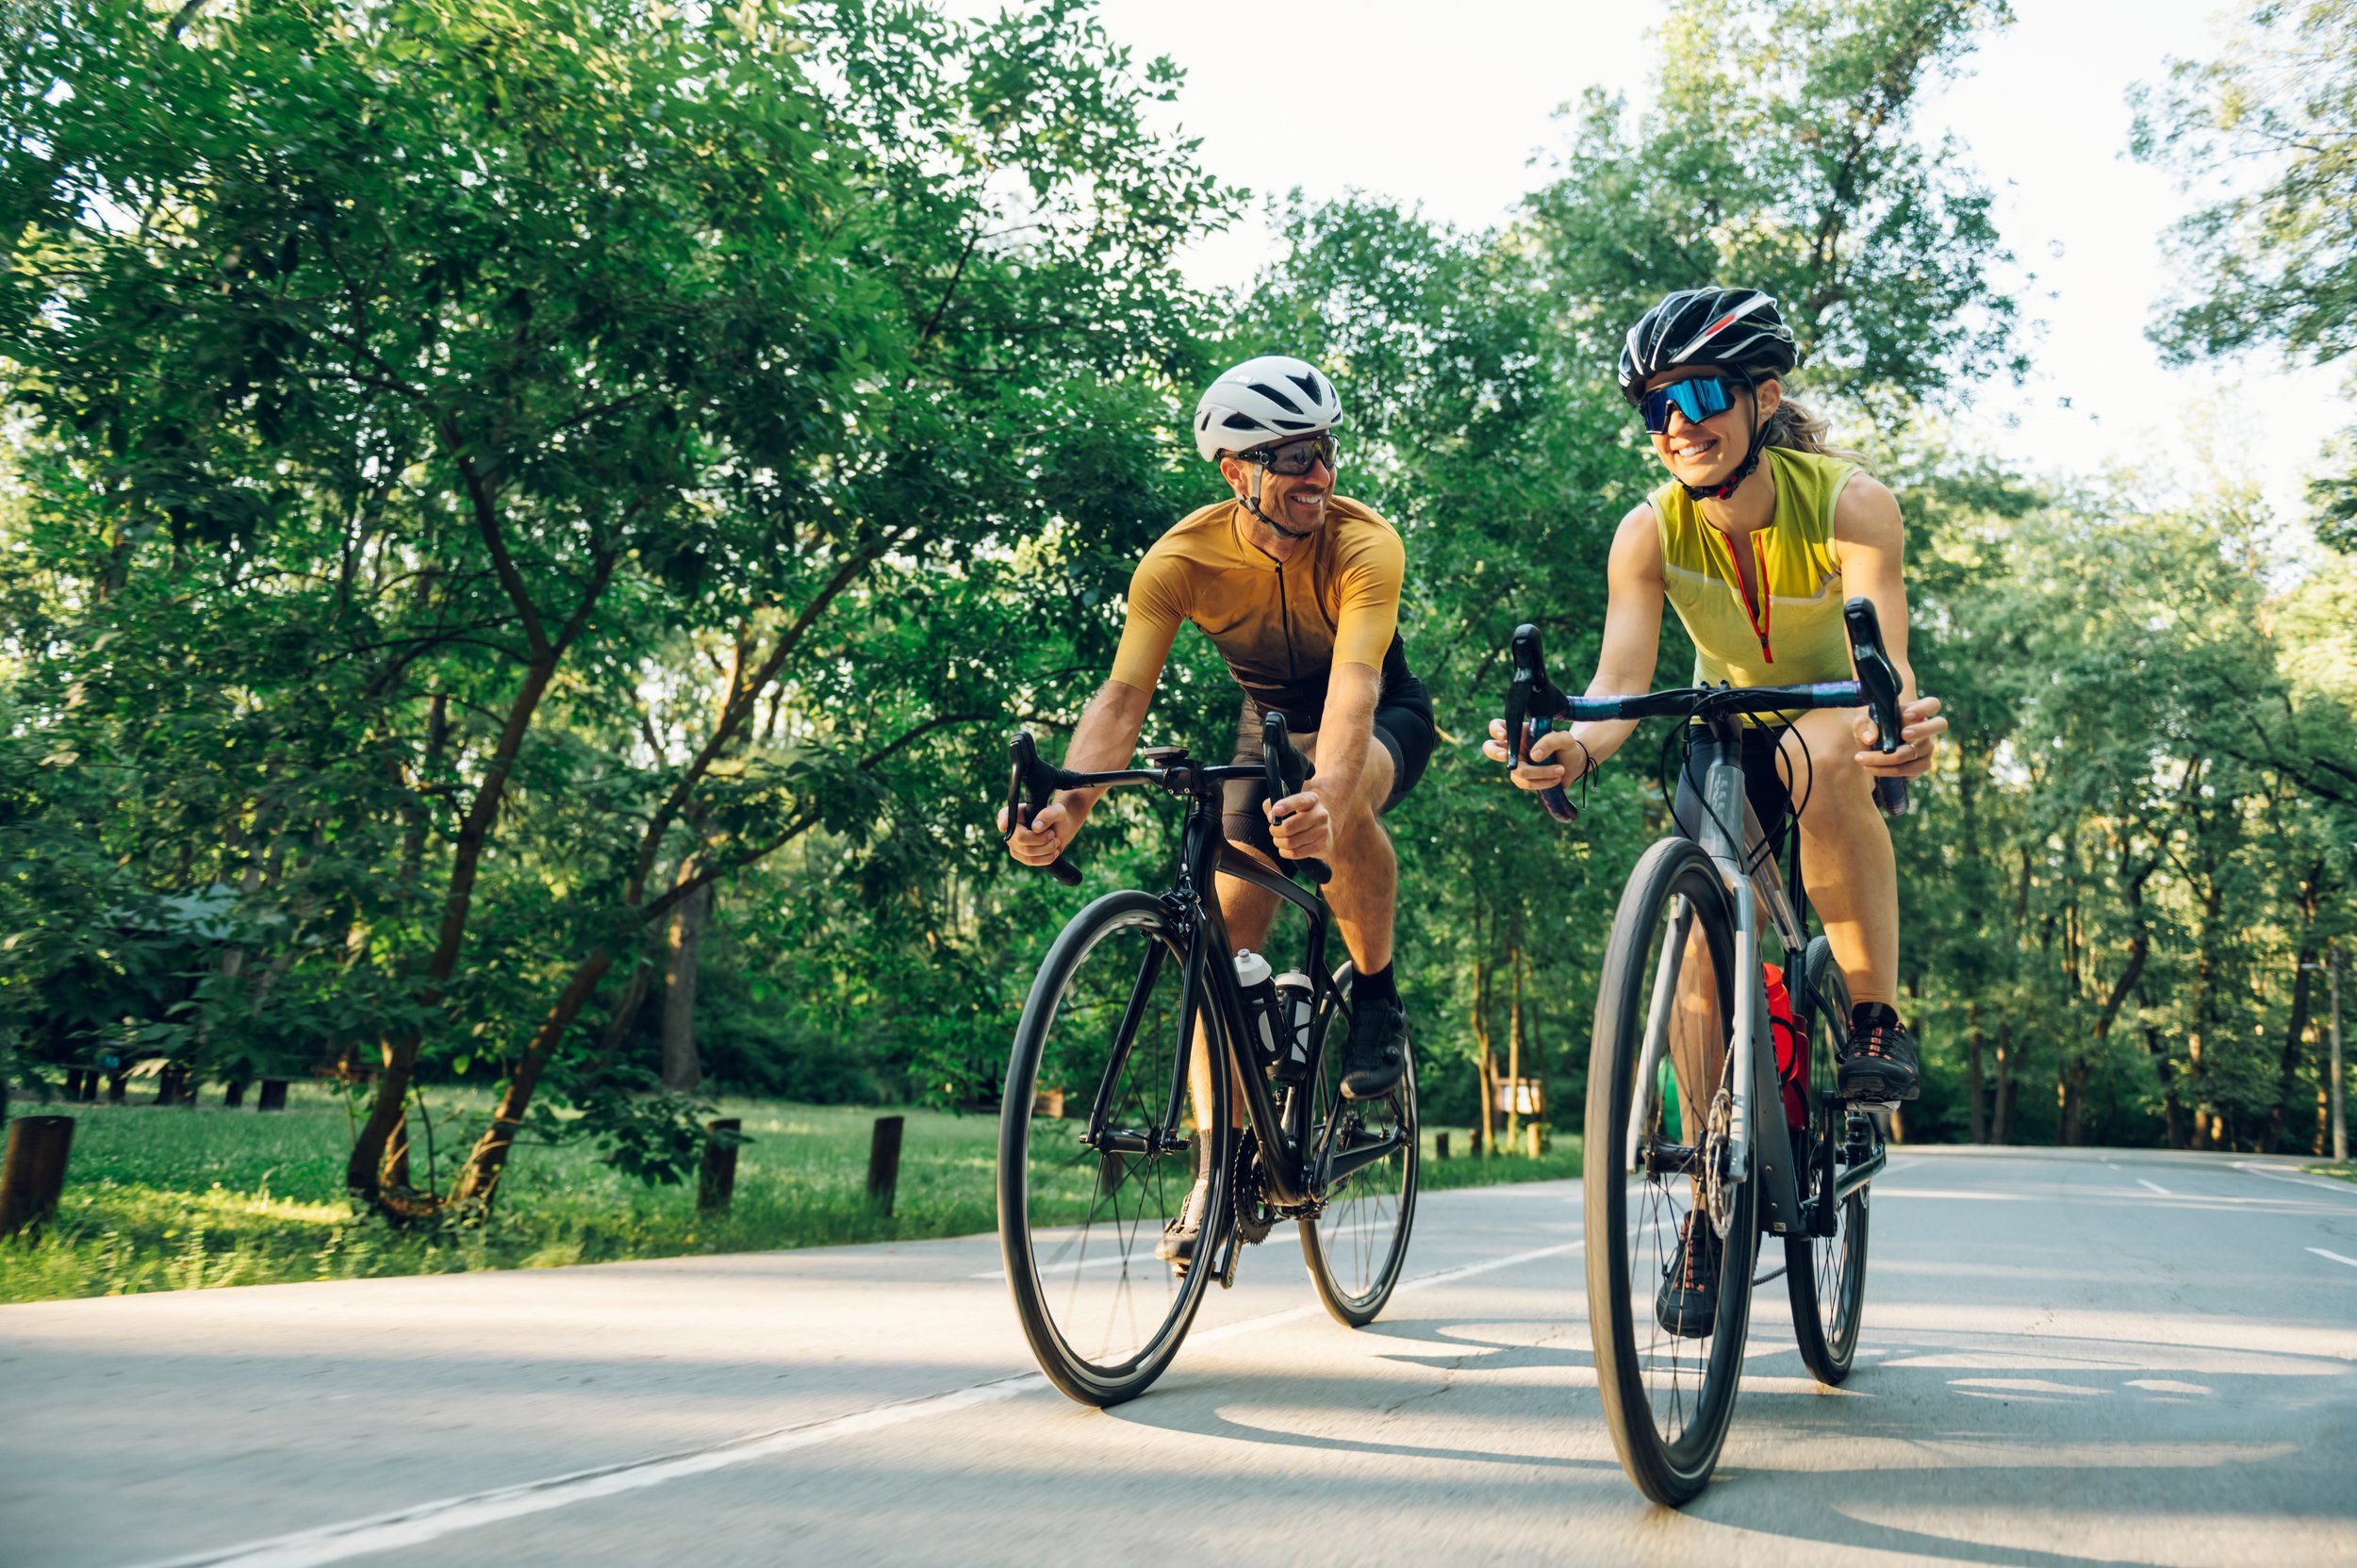
Most people understand there are many benefits to exercise, but did you know whole body exercise can be particularly useful when recovering from an injury? And no, I don’t just mean doing the exercises from your physiotherapist for your specific injured joint - I mean biking to help your shoulder pain, arm workouts to help your ankle injury, and cardiovascular exercise for… well, pretty much everything!

So why is exercise so good for you and what kind of benefits does it provide? Read on to find out!

Top 5 benefits of general exercise for injury rehabilitation:

1. Increased oxygen uptake

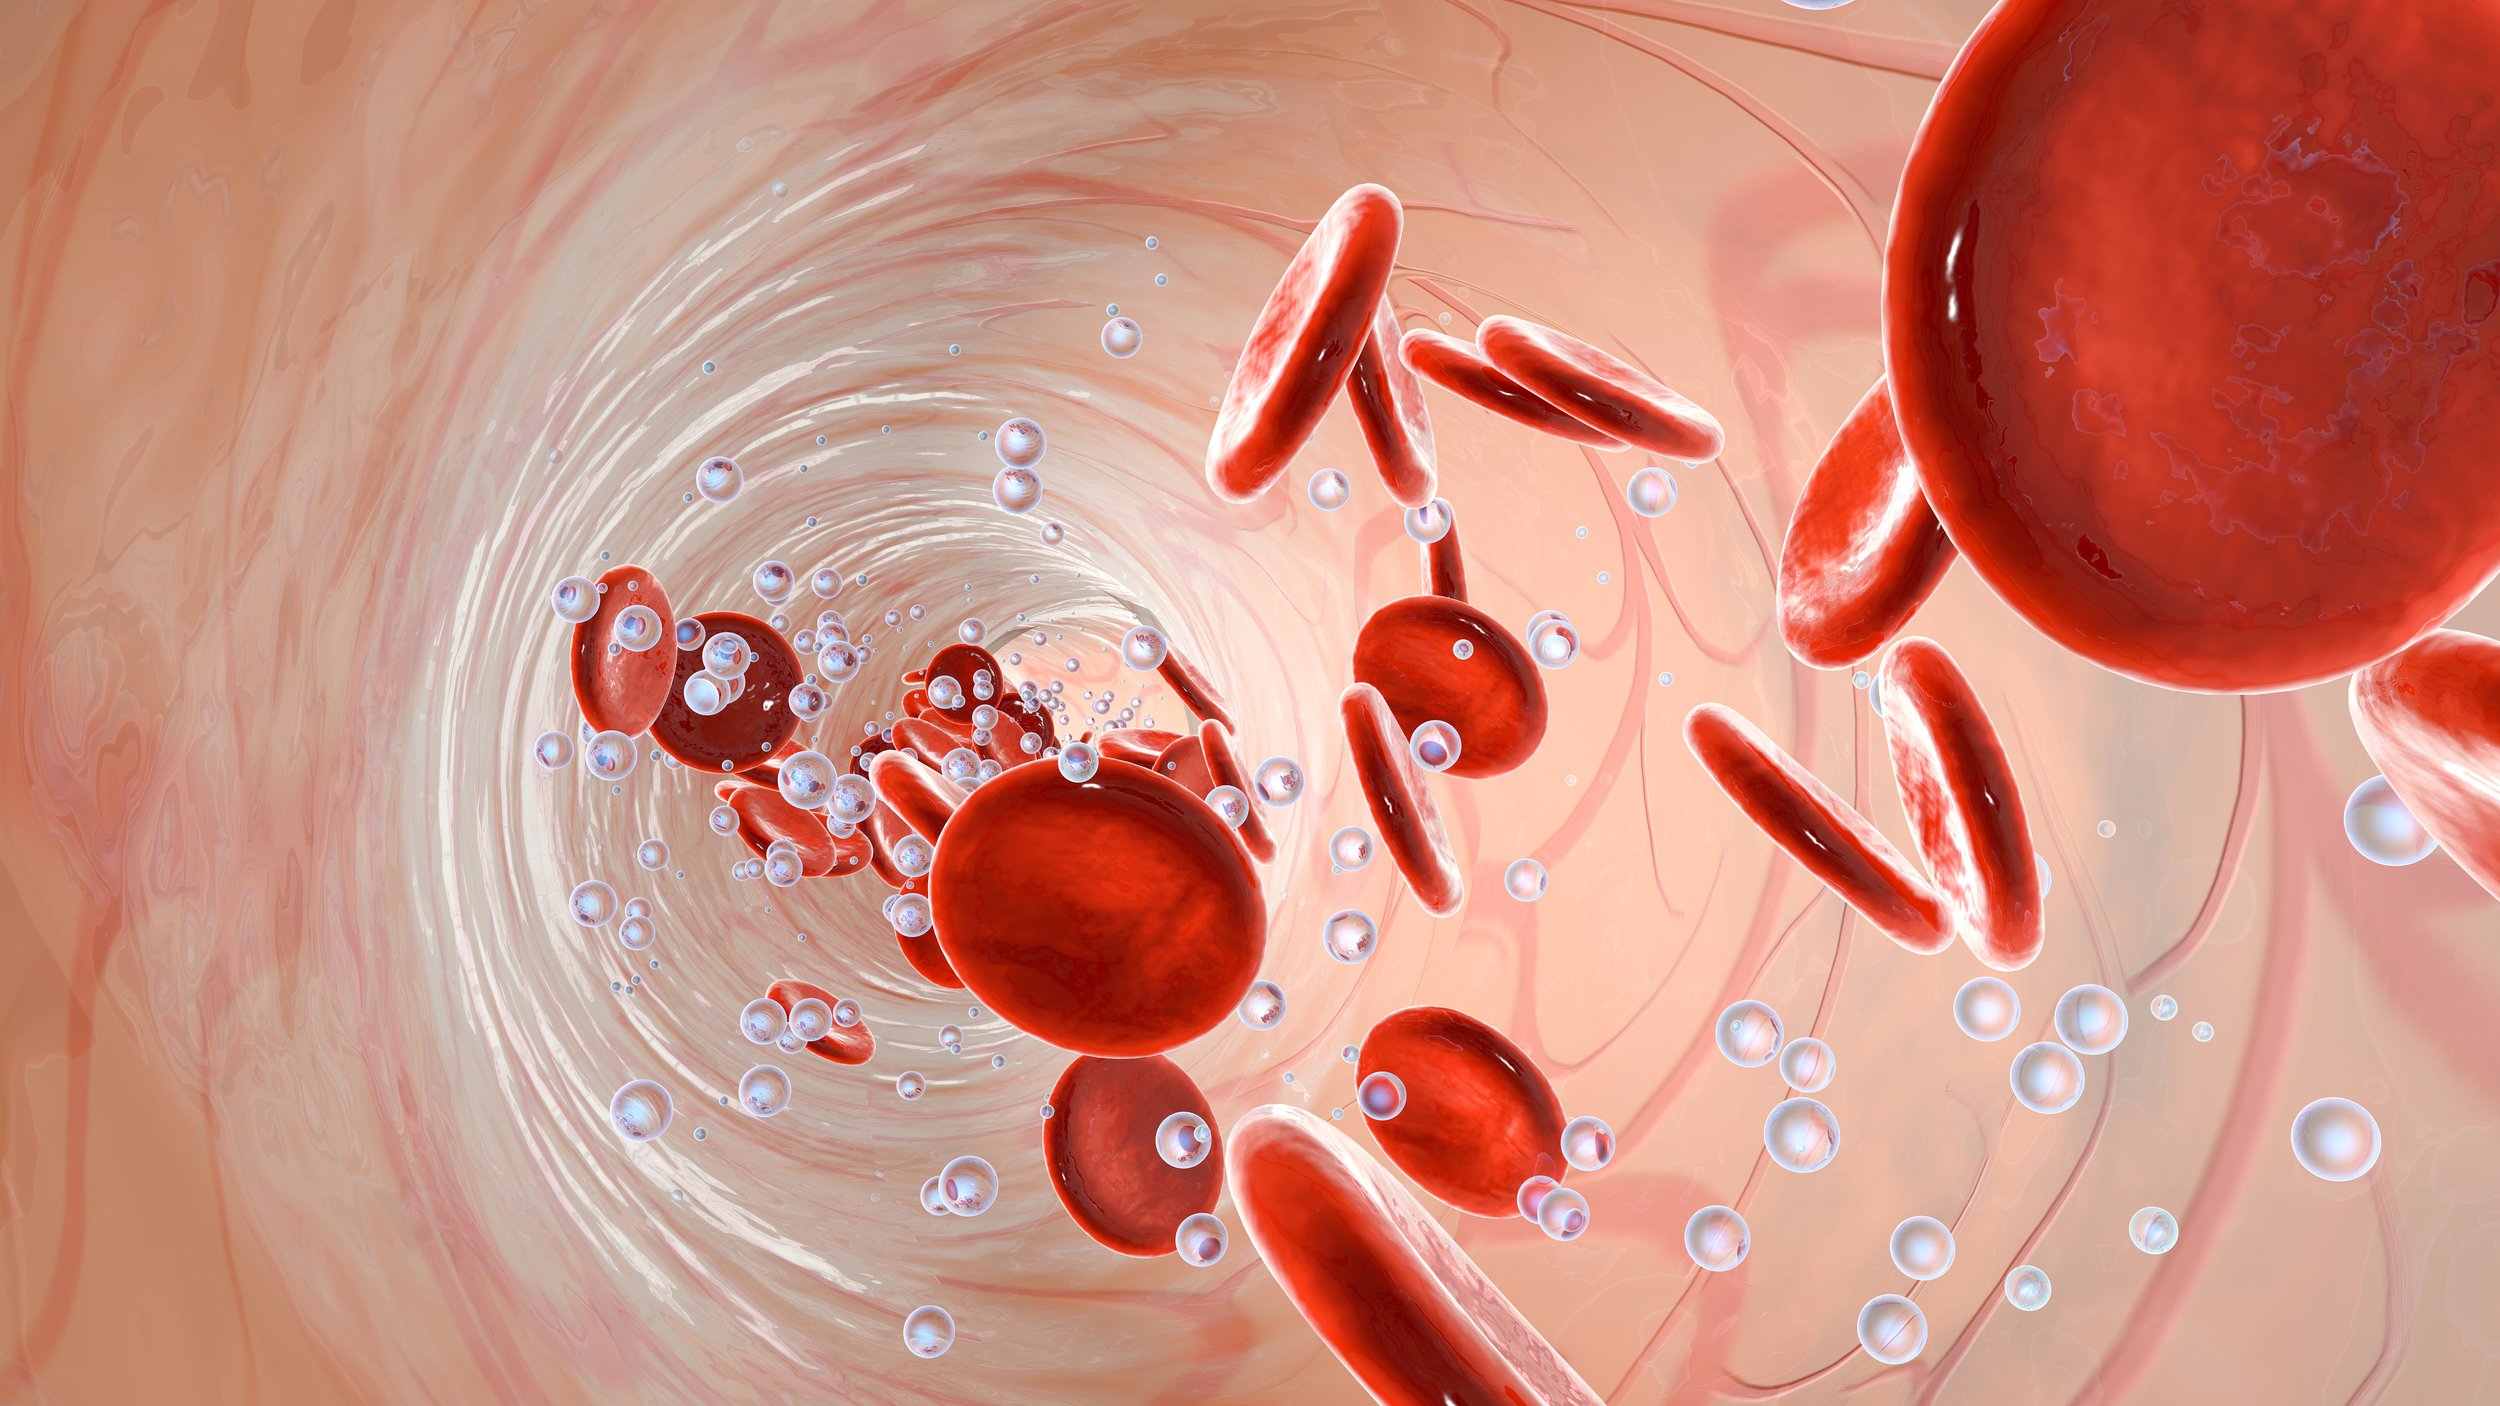
When you exercise, you are increasing blood flow around your body, increasing oxygen to your working cells. This increased oxygen to your cells not only allows your body to make better use of oxygen, but it can also lead to long-term changes by increasing the number of mitochondria in your cells (as you may remember from high school, mitochondria are “the powerhouse of the cell!”).

This means the more we work out, the more mitochondria we have that can turn the food we put into our body into energy. This improves your overall energy, allowing your body to put more energy towards healing and recovery.

2. New blood vessel growth

Aerobic exercises stimulates your body to grow new blood vessels (pretty cool, right!?). This leads to more oxygen and other nutrients that can be transported to the muscles, providing more energy to your body. When you think about this in terms of recovery from an injury, creating new blood vessels can help muscle tissue repair itself more quickly, as it is getting a better supply of nutrients from the rest of the body.

3. Release of endorphins

Endorphins have been called the “feel-good” chemical due to the feeling of euphoria they provide. They are released in abundance when you exercise and are responsible for the famous “runners high”, the boost of energy and “warm fuzzies” felt during a workout. Endorphins naturally help your body cope with pain and stress, meaning they can assist in injury recovery.

4. Improved brain function

When you exercise, your brain releases a chemical messenger called brain-derived neurotrophic factor (aka BDNF), which is thought to play a role in keeping our brains happy and healthy. Increasing BDNF through exercise can help improve cognitive function, mental well-being, and even improve brain recovery, all very important parts of overcoming an injury.

Most research points towards cardiovascular exercise being the best way to increase BDNF so hop on that bike, go for a run, or look into high intensity interval training for some amazing benefits!

5. Improved sleep

Regular exercise can also help improve sleep. Sleep has a huge impact on injury recovery - while you are sleeping, your body is busy repairing itself.

How does this work? When you sleep, your body releases hormones which aid in recovery from injuries. Your body then increases blood flow to muscles, providing them with the oxygen and nutrients they need to repair themselves. Lastly, while sleeping, the chemicals in charge of the stress response decrease. When you decrease stress, your body can put more energy towards recovering from your injury.

How much exercise do you need?

The Canadian government recommends at least 150 minutes of moderate to vigorous activity per week, regardless of injury status. This ideally should include a mix of resistance training and cardiovascular exercise.

However, if you’re not there yet, don’t worry! Here are some tips to getting started:

  • Start with small activities that you enjoy and work your way up towards meeting these guidelines over time. If you prefer walking your dog, gardening, playing sports, or anything else that gets you moving, these are fantastic options to get you started and can provide numerous benefits as well.

  • Set small goals such as 10-minute walks, taking the stairs instead of the elevator, or doing small exercises while doing your normal daily activities (think squats while you’re brushing your teeth or planks during a commercial break).

If you are unsure of where to start, one of our registered kinesiologists would be happy to work with you to create an exercise program which matches your exercise goals and injury specific recovery needs.

Give us a call today give us a call at (778) 630-800, email us or book online to seek treatment from a physiotherapist or to work with a registered kinesiologist.

Overhead Shoulder Pain in Volleyball Players

Kheya McGill graduated from UBC with a Bachelors Degree in Kinesiology. A lifelong Tsawwassen resident, Kheya has recently joined Ladner Village Physiotherapy as a registered kinesiologist. In this article, she reviews the most common causes of shoulder pain in overhead movements common with volleyball players and five great exercises to help combat the pain.

Shoulder pain is common in volleyball players, particularly while arms are in the overhead position. The shoulder is one of the most mobile joints in our body, meaning it is also one of the most unstable joints. If you enjoy playing volleyball (or other overhand activities such as lacrosse, tennis or fly fishing), chances are you’ve experienced shoulder pain at some point whether that be soreness, stiffness or sharp pain.  

What causes overhead shoulder pain?

Common causes of overhead shoulder pain include:

  • Shoulder impingement - A shoulder impingement occurs when tendons get “impinged” or compressed between the head of the humerus (aka the arm bone) and the bony architecture of the scapula (aka the shoulder blade). When you lift your arm overhead, the space between these bones in your shoulder decreases and increases pressure on the tendons. This can cause irritation, which can lead to an impingement. 

  • Rotator cuff injury - The rotator cuff is a group of 4 muscles which surround your shoulder. These muscles help move the arm and scapula, while protecting the shoulder. Rotator cuff injuries are common and can occur for many reasons, including overuse, trauma, or degeneration. (Need more on this? Read our blog on the rotator cuff!)

  • Osteoarthritis - A degenerative joint disease, osteoarthritis causes problems with the cartilage, synovial membrane, ligaments and bone in a joint. Osteoarthritis can cause tissue loss, remodeling, inflammation and lead to loss of normal joint function. A history of shoulder injuries leads to a higher risk of developing osteoarthritis here. Remember, arthritis isn’t just seen in “old” people!! (For more on osteoarthritis, read our blog!)

How can I improve my shoulder pain?

Although these injuries are all quite different, the good news is all of them can be improved with the right exercises! Here are a few of our favourite exercises and stretches to add to your routine: 

1. Internal and external rotation with band 

Using a band, secure one end of the band to a stable point (we suggest tying a large knot in one side and securing the band behind a door).

Internal rotation: 


  • Grab the band with your hand so that the band is pulling your hand away from your body

  • Bend your elbow and tuck it gently into your side

  • Move your hand from the outside of your body towards the inside, bringing your hand closer to your belly

External rotation: 


  • Turn your body around so the band is now going in front of your body and pulling your hand towards your body

  • Bend your elbow and tuck it gently into your side

  • Move your hand away from your belly while keeping your elbow tucked in

2. Shoulder flexion with resisted external rotation 

  • Put a band around your forearms and bend your elbows at 90 degrees 

  • With your arms shoulder width apart, place small amount of tension in the band, and lift your arms up from the shoulder

3. Thoracic spine openers

  • Start laying on your side, with your hips and knees bent in front of you 

  • Place both arms straight out in front of your chest 

  • Keeping your bottom arm on the floor, reach your top arm across your body and towards the floor on the other side, opening the chest 

  • Follow your top hand with your head and eyes, and then slowly return to starting position

  4. I, Y, T, W’s 

  • Laying on your stomach, face down, with your arms overhead, thumbs pointing upwards (You may want to place a folded dish towel under your forehead - this helps you keep a neutral neck and breathe!)

  • Pick a position (I, Y, T or W) and raise your arms, pulling your shoulder blades together

  • Lower your arms back down to the ground, and repeat

  • Try in each position to target different muscle groups

5. Pectoral stretches 

  • Standing next to the corner of a wall, place your forearm against the wall, with your arm and shoulder at 90 degrees

  • Lean your body forward until you feel a stretch across your chest

  • Play around with the height of your arm to stretch different portions of your pectoral muscle

There you have it! Five simple exercises you can do at home or add to your daily workout routine to improve shoulder pain and scapular stability. 

If you’re suffering from shoulder pain, give us a call at (778) 630-800, email us or book online to seek treatment from a physiotherapist or to work with a registered kinesiologist.  

What is Kinesiology?

Kinesiology, also known as human kinetics, is the study of human movement, performance, and function. Kinesiologists work with people of all ages and physical abilities to help them achieve their health and wellness goals as well as improve their quality of life. 

A kinesiologist (kin for short) uses knowledge of anatomy, physiology, neurology and biomechanics to maximize the effectiveness of exercise rehabilitation. A kinesiologist can implement your exercise program, provide support in your rehab,  and help improve physical performance in sport, work or daily life.

In more simple terms, kinesiologists are exercise rehab rock stars!

Kins use exercise to get you back to the things you love. They will discuss your goals and current treatment plan with you and your physiotherapist (if you have a physio) and help develop an exercise program to meet your needs. They work with you for one-on-one exercise sessions to ensure your technique is perfect while they help progress you through your recovery process. Strength, endurance, balance, and general fitness goals will all be addressed - there will be no stone left unturned!

What kind of training does a kinesiologist have?

Kinesiologists have completed a 4 year bachelors degree from an accredited university. Both UBC and SFU have fabulous programs! Our kinesiologists are also active members of the British Columbia Association of Kinesiologists (BCAK).

Is a kinesiologist like a personal trainer? 

The primary difference between kinesiologists and personal trainers is education level. Kinesiology requires a four year university degree whereas personal training education is generally a few weekend courses. The increased scientific knowledge base and use of evidence-based research translates to a higher quality of care, a more comprehensive approach to your exercise, and more capability of helping you troubleshoot issues that may arise.

What can a kinesiologist do for me?

There are many reasons people can find kinesiologists valuable. Kins can:

  • Create an exercise plan that is safe and realistic

  • Identify muscle imbalances through assessment of your movement

  • Help with maintaining fitness while you deal with an injury

  • Develop an exercise rehab program to address an injury

  • Ensure proper exercise technique to avoid unnecessary injury

  • Provide motivation and accountability to stick with your exercise program

  • Help you have fun while achieving the results you want!

Is kinesiology covered by my extended health benefits?

Usually yes! For most people kinesiology, active rehab, and physiotherapy assistant appointments (which are, for this purpose, mostly interchangeable terms) are included within your physiotherapy coverage. Some plans have separate categories for “Physiotherapy” and “Kinesiology”. It is always best to first check with your insurance provider to confirm your coverage.

Do I have coverage if I was in a car accident?

Yes! With ICBC coverage, within the first 12 weeks of a car accident you are automatically approved for:

  • 12 visits with a kinesiologist

  • 25 visits with a physiotherapist

  • 12 visits with a registered massage therapist

If your accident was more than 12 weeks ago or you have had treatment for your accident at another clinic, please let our front desk know so we can help you sort out the logistics.

Do I have coverage if I have a WorksafeBC claim?

Yes! Our kinesiologists works closely with our physiotherapists to aid in the delivery of your recovery program.

What will my session look like?

Your first visit with your kinesiologist will be an hour long. Your kinesiologist will meet you and begin the session with a quick chat. They will ask you about your reasons for coming in, your goals and your current exercise program. They will then take some time to assess your movement, strength and capabilities before taking you through an appropriate exercise program.

The kinesiologist is in constant collaboration with your physiotherapist to ensure your exercise sessions are as effective and pleasant as possible. Follow up sessions can be 30 minutes, 45 minutes, or 60 minutes long. If you are a WSBC or ICBC client your appointments will always be 45 minutes.

If you want to learn more or you would like to book a session with a kinesiologist please contact the clinic via:

We look forward to meeting you!

Low Back Pain in Dancers and Gymnasts

AdobeStock_113315705.jpeg

For dancers and gymnasts, low back pain can come in many forms and can involve the spine itself. Two of the most common spinal injuries are:

  1. Spondylolysis - a stress fracture of the pars interarticularis, a thin area of the vertebra that is more vulnerable to injury.

  2. Spondylolisthesis - occurs if stress fractures are on both sides of the vertabra and allow a slippage of one vertebrae over the other to occur.

Dancers and gymnasts are at a higher risk of developing these spinal injuries due to repetitive hyperextension-type movements such as back-bending. These movements put significant load on the pars interarticularis, a thin part of the vertabra that connects the main part of the vertebra at the front with the bony bits at the back.

When you combine hyperextension with forceful dismounts and landings (gymnasts, we’re talking to you), it increases the risk of both spondylolysis and spondylolisthesis significantly. As more and more dancers are combining gymnastic skills into their routines, I expect to see more dancers with these conditions as well.

AdobeStock_275778261.jpeg

A slippage of less than 50% (a Grade 1 or 2 spondylolisthesis) is often treated with physiotherapy including hands on treatment techniques and exercise. A slippage of greater than 50% (a Grade 3 or 4 spondylolisthesis) is considered more serious and usually involves the care of a specialist.

Both spondylolysis and spondylolisthesis can happen at any spinal level. It most commonly occurs in the L5 vertebra, with L5 slipping forward over S1 (see the photo above). The second most common site is L4. 

What do spondylolysis and spondylolisthesis feel like?

Athletes will often complain of the following:

  • Dull pain that can be sharp with movement

  • pain with extension type movements including arabesque, bridges, back walkovers, back hand springs etc.

  • Focal pain in the low back but may radiate into the buttock or down the legs

  • Symptoms that are worse with activity and better with rest

How is it diagnosed?

Diagnosis starts with a thorough subjective history. If a spondylolysis or a spondylolisthesis is suspected, imaging via X-ray, CT or MRI will be ordered to confirm a diagnosis.

It is important that athletes with suspected spondylitic conditions be medically cleared before beginning an exercise program. This is crucial for the health and well being of the athlete as the wrong exercises can aggravate and worsen the injury.

AdobeStock_260380135.jpeg

How do we treat it?

Spondylitic conditions can cause instability of the low back. Spinal stabilization through core stability training is a key component in prevention and rehabilitation in these young athletes. Often, athletes focus on the large muscles and neglect the little guys that are responsible for stabilization. Core stability training targets the little muscles that directly support the spine including the transversus abdominis, multifidi, paraspinal, and internal and external obliques.

Appropriate flexibility is also important after a spinal injury. Tightness of certain hip muscles can increase the extension of the low back which can exacerbate symptoms.

If you’re suffering from back pain, give us a call at (778) 630-800, email us or book online

Soft Tissue Injuries Just Need Some PEACE & LOVE

AdobeStock_438490019.jpeg

You may have heard the acronym RICE before (rest, ice, compression, elevation). This protocol was developed by Dr. Gabe Mirkin in 1978 and remained the primary recommendation for management of acute soft tissue injures (like ankle sprains).

In 1998, it was adjusted to PRICE (protection, rest, ice, compression, elevation). PRICE was en vogue from 1998 until 2012 when the research evolved yet again and we were given the newly named POLICE protocol (protection, optimal load, ice, compression, elevation).

POLICE had some positive changes, especially as it included active participation and appropriate loading rather than just several passive treatments.

But now there is a new kid on the block:

PEACE and LOVE 

The researchers behind PEACE and LOVE are Blaise Dubois and Jean-Francois Esculier. They identified how the previous RICE/PRICE/POLICE strategies ignored the subacute and ongoing stages of healing*. Because the subacute and ongoing stages compose the majority of the post-injury timeline, we welcome suggestions for this phase with open arms.

*We classify injuries as acute in days 0-4 after the injury, subacute from days 4-14, post-acute is after 14 days.

Without further ado, I present to you a protocol that emphasizes the PEACE-ful stages of immediate care, which emphasizes doing no harm, and the subsequent management that gives the soft tissues some LOVE.  

  • P is for PROTECTION: Avoid activities that increase pain during the first few days after an injury.

  • E is for ELEVATION: Elevate the injured limb higher than the heart as often as possible. 

  • A is for AVOID ANTI-INFLAMMATORIES: These medications can reduce tissue healing. Avoid icing. 

  • C is for COMPRESSION: Use elastic bandage or taping to reduce swelling. 

  • E is for EDUCATION: Your body knows best. Avoid unnecessary passive treatments and medical investigations and let nature play its role. 

  • L is for LOAD: Let pain guide your gradual return to normal activities. Your body will tell you when it’s safe to increase load. 

  • O is for OPTIMISM: Condition your brain for optimal recovery by being confident and positive. 

  • V is for VASCULARIZATION: Choose pain-free cardiovascular activities to increase blood flow to repairing tissue.

  • E is for EXERCISE: Restore mobility, strength and proprioception by adopting an active approach to recovery. 


Most of the above is self explanatory but there are a few points which are new or warrant some further explanation. Below are some key points for each factor. 

A for Avoid Anti-Inflammatories

  • Inflammation is a natural and beneficial process to repair damaged soft tissues. 

  • Using anti-inflammatory medications may negatively affect long-term tissue healing.

  • Ice is analgesic but can interrupt regeneration and can lead to impaired tissue repair via disrupting angiogenesis, delaying macrophage and neutrophil infiltration and increasing immature myofibrils. 

E for Educate

  • An active approach to recovery is better than a passive approach. 

  • We want to avoid people feeling therapy-dependent or “needing to get fixed.” 

  • Better education and correct load management can decrease the need for unnecessary injections or surgery.

  • There is no “magic cure” and expectations should be realistic. 

O for Optimism

  • Optimistic clients have better outcomes and prognosis. Beliefs and emotions are thought to explain more of the variation in symptoms following and ankle sprain than the degree of pathophysiology.  

  • Catastrophisation, depression and fear can represent barriers to recovery.

V for Vascularisation

  • Cardiovascular activity is important for the management of musculoskeletal injuries and should be completed in a pain-free way to boost motivation and increase blood flow to the affected area. 

  • Early aerobic exercise and mobilisation improve physical function which can aid with successful return to work and decrease the need for pain medication. 

  • Further research needs to be done for recommendations on dosage. 

E for Exercise

  • Exercise can help restore mobility, strength and proprioception. It can also reduce prevalence of recurrent injuries such as ankle sprains. 

  • Avoiding pain to ensure optimal repair during the subacute phase. Progress exercise as tolerated. 

For the full paper, download it here!

Are Your Nerves Limiting Your Mobility?

Our dance physiotherapist Anh is back! Here, she discusses neural mobility and tension - what it is, why it occurs and why dancers especially should know about its wide-ranging effects.

Hey dancers! Are you or do you know someone who stretches for hours a day, every day of the week and still can’t get into their splits? As dancers we often think about stretching our muscles to improve mobility. But what if it isn’t your muscles that are preventing you from touching your toes or achieving the splits? What if the problem is your nerves?

Your nerves are meant to move freely throughout your body. They connect our brains to our big toes and everything in between.

Neural tension occurs when a nerve’s ability to move has been impeded.

AdobeStock_355420182.jpeg

You can think of your nervous system as a tangle of ropes, extending from your brain to all areas of your body. Imagine one of these thick ropes starting at the top of your head, running down your spine, behind your glutes, down the back of your leg and all the way into the bottom of your foot and toes (this would be your sciatic nerve). If there is a restriction anywhere along the line of this rope, you won’t be able to move your leg the way you should.

Like rope, nerves do not like to be stretched or squeezed - both affect the ability of the nerve to do its job. In order to achieve full range of motion, nerves need to glide back and forth in the body. If a restriction is present and not removed, further stretching can cause irritation of the nerve over time.

So how do I know if it's neural tension that's preventing my mobility and not muscle?

  1. If you are experiencing burning, tingling, numbness, or shooting pain that radiates past the muscle that is being stretched

  2. If the sensation of stretching changes with different head and neck positioning

  3. If the sensation of stretching changes with a change in position of a joint unrelated to the muscle being stretched (ie. stretching your hamstring feels better when your feet are pointed vs when your feet are flexed)

How do I get rid of neural tension?

AdobeStock_332498788.jpeg

First things first - if there’s neural tension, there’s a reason for it. As physiotherapists, we assess and identify the source of the tension. Is there something squeezing the nerve in the back? What about in the glutes or behind the knee? Finding the source of the problem is always the first step.

We then use a combination of techniques including manual therapy, soft tissue massage and specific exercises designed to help settle the tissue down and not reaggravate it.

Without a doubt, nerve flossing comes into play. Nerve flossing is a dynamic stretching technique that mobilizes the nerve. Think of a piece of dental floss: when you are flossing your teeth, you pull on one side of the floss and allow the other side to slacken, then reverse directions. Nerve flossing is the exact same idea - it is performed by tensioning one end of the nerve while slacking the other end.

Nerves control your muscles. If a nerve feels unsafe (like when going from sedentary to being over stretched) it will send signals to the muscle to contract and stiffen. This puts the dancer at risk of muscle strain. It is important to incorporate nerve flossing techniques and movements into your warm and stretch routine. 

For more information on neural tension and its effect on mobility, book online or give us a call at (778) 630-8800.

Ask A Physio: When Can I Go Back To Sport After An Ankle Sprain?

AdobeStock_89378251.jpeg

Ankle injuries are one of the most common acute injuries we see, especially amongst athletes. Pretty much everybody who has played a sport has sprained an ankle before, leading to a lot of people minimizing the injury and not taking it seriously.

There is often pressure from coaches (and ourselves!) to make a quick return to sport because “it’s just an ankle sprain.” Just because ankle sprains are common does not make them insignificant. We know that only about half of people who experience an ankle sprain seek help. We also know that up to ONE THIRD of individuals experience chronic ankle instability after an ankle sprain.

It is in your best interest to handle ankle sprains correctly. Otherwise, they come back to bite you again and again.

Below is a list of factors that physiotherapists consider while gradually returning you to your activity of choice. It’s not just about going back to practice and taking it easy for a day or two then going to play a game next week. In the clinic we test and re-test all of these aspects and gradually help people progress up to their top level of functioning.

If you want to manage your sprain yourself you absolutely can, especially it’s not your first time and you know what to expect. But please know that going back too soon is a really good way to get re-injured and everything that is listed below is relevant no matter who is doing your rehab.

(Looking for what to do immediately after an ankle sprain? Read our Top Ten Tips for Acutely Sprained Ankles in our blog!)

Factors to Consider in Ankle Sprain Rehab:

Pain:

  • Do you have any pain?

  • Does it hurt while exercising or afterwards?

  • How intense is the pain and where is the location?

  • How long after the pain starts will it subside and return to baseline?

AdobeStock_139924818.jpeg

Swelling:

  • Is there swelling?

  • Is it old or new swelling?

  • How does the swelling fluctuate with activity?

Physical Aspects:  

  • Does your ankle move in all directions as well as the other foot?

  • Is the strength equal in all directions?

  • How is the endurance?

  • What about the power?

  • How about your sensorimotor control - do you have complete proprioception back (a fancy word for knowing where your body is in space)?

  • Is your balance as good on that side?

  • How about your dynamic control - can you maintain stability and balance while moving and doing other things?

  • Do you need a brace? Which kind of brace? When should you wear the brace? Can you wean off of the brace?

Mindset:

  • How do you feel about your ankle?

  • Are you confident that it will be fine?

  • Do you feel that your ankle is stable?

  • Are you psychologically ready to go back?

  • In contact sports, does the thought of someone checking you from behind make you nervous?

Functional and sport performance:

AdobeStock_293619619.jpeg
  • Can you hop? Jump? Change directions?

  • Can you jog? Run? Sprint? Run a gentle curve? Cut to the side? Slam to a stop?

  • What about things specific to your sport? For example if you are a soccer player can you pass? Receive a pass? Shoot? Tackle?

  • Are you fast enough to react to another player?

  • Can you do all the drills in practice? What about a scrimmage?

We want you to be able to do all of these things and do them well before you fully return to your sport. It’s a long list to consider and not always easy to answer every question, but it’s important to run through this list and make sure you are really ready to return to sport.

If you suffer with ankle sprains, get it checked out by a physiotherapist - we are the experts at this! We are always happy to see you and will do our best to get you back out there as soon and as safely as possible.

Need to book an appointment? Book online, send us an email or call us at (778) 630-8800. Happy healing!

Ask A Physio: If My Knee Hurts, Why Are You Looking At My Hip?

AdobeStock_200432432.jpeg

As physios, we see bodies differently than most people. This is a good thing - you want your body specialist to see beyond the obvious! But what is often obvious to us is a mystery to others.

You may have heard one of us talking about the kinetic chain, a concept borrowed from the engineering world and repackaged for health care. The basic idea is the movement in one joint will create and affect the movement of the next joint, and so on. If your pain is in your elbow, we would be doing you a disservice if we didn’t also look at your wrist, shoulder, neck and upper back as well.

The kinetic chain is a big reason why one-size-fits-all approaches don’t work.

We don’t tell you to simply Google your symptoms and treat yourself. One person’s treatment approach for sciatica will be completely different than the next. My grandma’s elbow pain often has a completely different cause than my daughter’s elbow pain, even if they are in the same spot. Looking at the body as a whole is imperative to proper treatment.

A Case Study in Kinetic Chains: Runner’s Knee

A great example of this is someone with runner’s knee, also known as patellofemoral syndrome (PFPS). To understand how PFPS develops, an understanding of knee biomechanics is crucial.

The patella (aka the kneecap) rides in a groove on the femur at the front of the knee and is critical for proper knee movement. The patella acts as the attachment point for ALL your quads - think of how much muscle that is! To stretch out your leg, your quads first contract and pull on the patella. The force is transmitted through the patellar tendon (or ligament, depending on who you read) and pulls on the tibia, the main bone of your lower leg. Without the patella, the amount of force required for the quads to unbend the knee is simply too great. The patella acts as a fulcrum, giving the quads a mechanical advantage.

Need a visual? Check out this fantastic video:

Muscle imbalance is one of the main causes of PFPS. The patella is held in its position by a fine balance of muscle and connective tissue. Muscles that attach to the patella directly - we’re talking about the quads here - are obviously a main focus. But there’s many more muscles to consider. Consider these two examples:

AdobeStock_348335712.jpeg
  1. One cause of PFPS is tight calf muscles. The gastrocnemius, one of the calf muscles, attaches at the back of the leg above the knee and can have a great effect on knee function. When these muscles are too tight, people tend to walk more in a pronated foot position (see photo on the right), increasing the forces at the back of the knee and adding to the compression and irritation of tissues around the patella.

  2. The IT band runs the length of the thigh on the outside of the leg and attaches to the outside of the patella. The gluteus maximus, the large muscle in your buttock that controls hip extension, attaches into the top of the IT band. If the glutes aren’t doing their job, you can experience knee pain even if it isn’t the source of the problem.

We don’t expect you to know the ins and outs of this - that’s our job! When you come in for a little rehab, don’t be surprised when we start checking out your other joints - you may be surprised by what we find.

If you need to see a physiotherapist, give us a call at (778) 630-8800, email us or book online. We would love to work with you!

Cognition and Vestibular Disorders - So Much Brain Fog!

Anyone who’s had any kind of vestibular dysfunction knows this simple fact: your brain leaves you. It’s like someone has taken out the best parts of your brain and replaced it with air. You cannot pay attention or multi-task, things are more confusing and memory has taken a vacation. Yet somehow it feels like your brain is working overtime.

As someone who has experienced this, I can tell you first hand it is one of the most frustrating parts of vestibular dysfunction - the feeling of stupid. There’s no other way to describe it.

You just feel dumb.

AdobeStock_63650518.jpeg

Luckily, we finally have that research that shows what vertigo sufferers have known for years - it DOES affect our cognition! It DOES affect more than just our sense of balance! Vestibular dysfunction affects so many different parts of the brain involved in cognition.

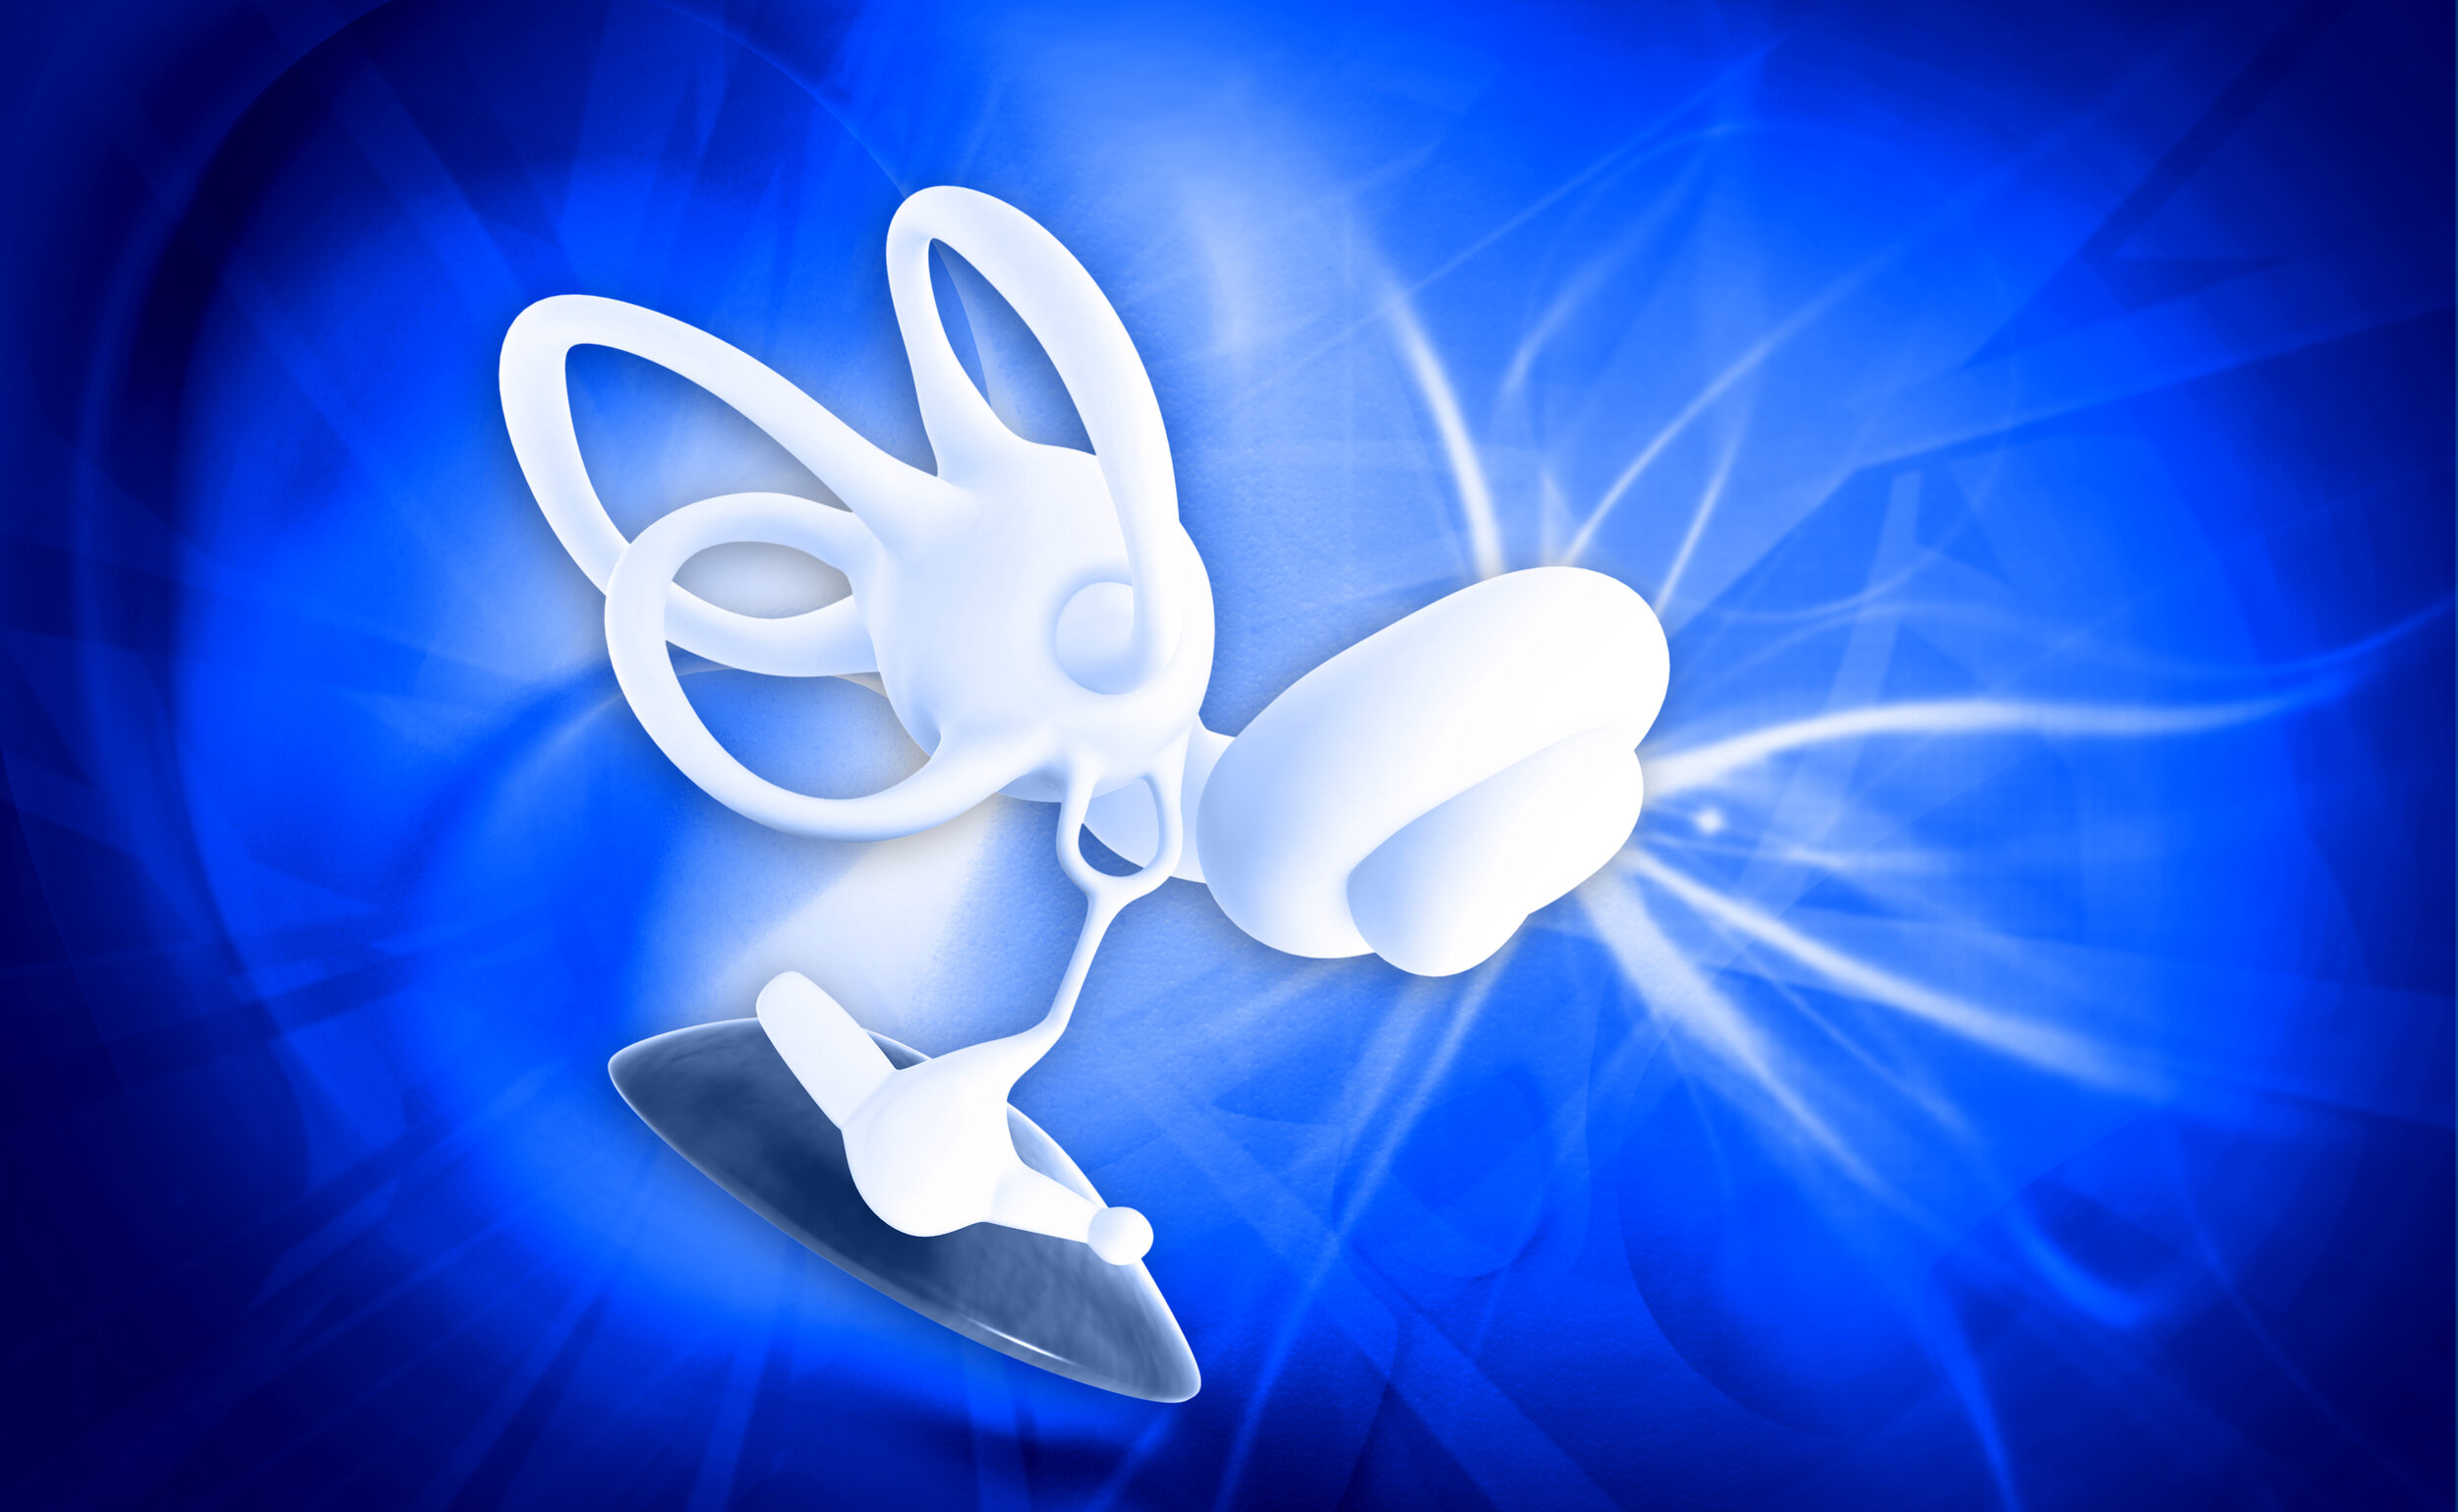
When we talk about the vestibular system, we usually just think of the snail-looking thing in the inner ear - the semicircular canals and vestibule that make up the vestibular end organ. What we don’t usually discuss is where this information goes - and let me tell you, it goes far and wide. The brain lights up like a Christmas tree on an MRI when stimulated with vestibular input. There are projections to the hippocampus, thalamus, parietal cortex, the cerebellum, the midbrain… I could go on!

When you boil it all down, the vestibular system is directly involved in four main cognitive processes:

  1. Memory - short term memory is especially impaired with vestibular dysfunction.

  2. Attention - those with vestibular dysfunction show difficulty both with staying on task as well as accuracy with the task at hand.

  3. Executive Function - the planning, organizing and prioritizing part of your brain is heavily influenced by the vestibular system. This is why those with vestibular dysfunction have so much difficulty multi-tasking!

  4. Spatial Navigation - this is the brain’s ability to digest and manipulate information in 2D and 3D. You use this skill when reading a map or manipulating shapes to go into a puzzle.

These four areas are crucial to functioning in our world. It’s so difficult to get the kids to school, get yourself to work, figure out what’s for dinner and remember that dentist appointment when your vestibular system is throwing wrenches into the system. While your brain recovers, it’s important to use some strategies (and not beat yourself up about temporarily needing them!):

AdobeStock_400113598.jpeg
  • Write It Down - Whatever it is, get it in writing. Put it in a calendar, jot down a list or put that post-it somewhere easy to see. If you don’t have a system, now is the time to create one! If you’re not one for technology, get an old-fashioned agenda and take that thing with your everywhere. If you’re like me and attached to your phone, use it to your advantage by using the reminder and alarm functions.

  • Take Brain Breaks - A great way to encourage attention is to give yourself scheduled breaks, preferably with some physical activity involved. Set an alarm for a period time - when that alarm goes off, get up and away from the task at hand. Do a quick set of yoga, dance in the kitchen or go for a brisk walk. Whatever it is, move your body!

  • Remove Visual Distractions - Not only does a busy environment have a negative effect on focus, symptoms of vestibular dysfunction are often triggered by busy visual fields. Do yourself a favour and create a calm, relaxing space free of clutter.

Vestibular dysfunction doesn’t just affect your ears and vestibular rehabilitation doesn’t just help your balance. The right approach to rehabilitation will challenge your entire brain (aka neuroplasticity - never heard of it? Check out our blog on neuroplasticity). The challenge should always be hard for you - not impossible but outside your comfort zone. Symptoms should be triggered and then brought back down.

If you have any questions about vestibular rehabilitation, feel free to contact us through email or phone us at (778) 630-8800. If you would like to book an appointment, you can do so online.

Stephanie's Top Tips For Managing Your Sore Shoulder

IMG_8112.jpg

Stephanie Yip is one of our physiotherapists here at Ladner Village Physiotherapy with a passion for treating shoulder injuries. In her latest blog post, Stephanie shares her top tips for acute shoulder management.

The shoulder joint is the most mobile joint in our body, but that also makes it the most unstable joint and prone to injury. Chances are you’ve experienced an achy shoulder at some point in your life. With rock climbing and paddle boarding being my two favourite activities, I have definitely had my share of annoying shoulder pain. I get it - you can’t sleep, easy tasks feel impossible, and you just want to get back to life.

To learn more about shoulder anatomy and the muscle of the rotator cuff, check out this blog post. Today, I am here to share some practical, easy-to-implement, everyday tips for managing your sore shoulder in the early days of your rehab journey.

EVERYDAY LIFE

If your shoulder is in pain, you will automatically want to hold your arm to your side and not use it as much. This will only increase the stiffness and tension in the surrounding muscles, and add to your discomfort.

AdobeStock_178583612.jpeg

Instead, follow these tips:

  • Continue to use your arm in pain-free ways throughout the day - The best way is to use it for easy tasks like turning a page in your book, picking up your keys, or taking out your credit card.

  • Keep tasks within an easy arm’s reach - Avoid long levers. Carry loads close to your body. Avoid reaching far away for items by moving your body closer to what you need.

  • Avoid repetitive overhead motions - The most unstable and (muscle-speaking) demanding position for your shoulder is overhead. When your shoulder is healing, avoid being up here as much as you can.

PAIN MANAGEMENT

So your shoulder is sore and bugs you all the time – now what?

  • Avoid compensating movements - The most common one is hiking your shoulder up to reach items overhead. This will create more tension and discomfort in the muscles around your shoulder.

  • Try heat or cold to ease the pain - This is 100% your choice; pick the one that feels better for you.

POSTURE

Your posture plays a huge role in where your shoulder is positioned and as a result, how much pain you experience while at rest.

  • Don’t let your shoulder poke forward - This means no slouching!

  • Support your arm when resting - If you’re chilling on the couch or at your desk for a while, support your arm with a cushion/pillow/armrest so that it’s in a neutral, stable position

  • Use the “fish hook” rule - Imagine there’s a fish hook pulling you up by your sternum. This will help set your back in a better position.

SLEEP

AdobeStock_78207150.jpg

It is normal to feel more pain or discomfort at night while trying to fall asleep. When sleeping, you aren’t aware of where your arm is in space and are much more likely to put it in a position that can get quite painful.

  • If you’re a back sleeper - Place a rolled up tea towel under your elbow. This will help keep your shoulder in a more neutral position.

  • If you’re a side sleeper - Sleep on your unaffected side and hug a pillow with your injured arm so that it is comfortably supported.

  • DO NOT TUCK the injured arm under your pillow

EXERCISE

You get some shoulder rehab exercises, and you’re super excited to get started. Remember these key points:

  • Do your exercises in small, but frequent bouts - Your shoulder is like a young puppy: it wants to get exercised regularly but gets tired quickly.This means it’s better to do your exercises 3 times per day for 5-10 minutes, rather than doing just one session for 30 minutes.

  • Use pain as a general guide - It’s okay to feel mild discomfort while performing your exercises (think 3-4/10 on an imaginary pain scale) but it shouldn’t feel excruciating. It’s normal to feel a bit of soreness afterwards for a couple of hours but it shouldn’t leave you in agony for days.

If you need this as a printable tip sheet, download it here - Shoulder Management 101


Are you experiencing shoulder pain? Book an appointment online, through email or by calling (778) 630-8800 - we will help get you started on your own rehab journey to getting back to what you love to do most!

Getting Rid of Plantar Fasciitis

AdobeStock_148003092.jpeg

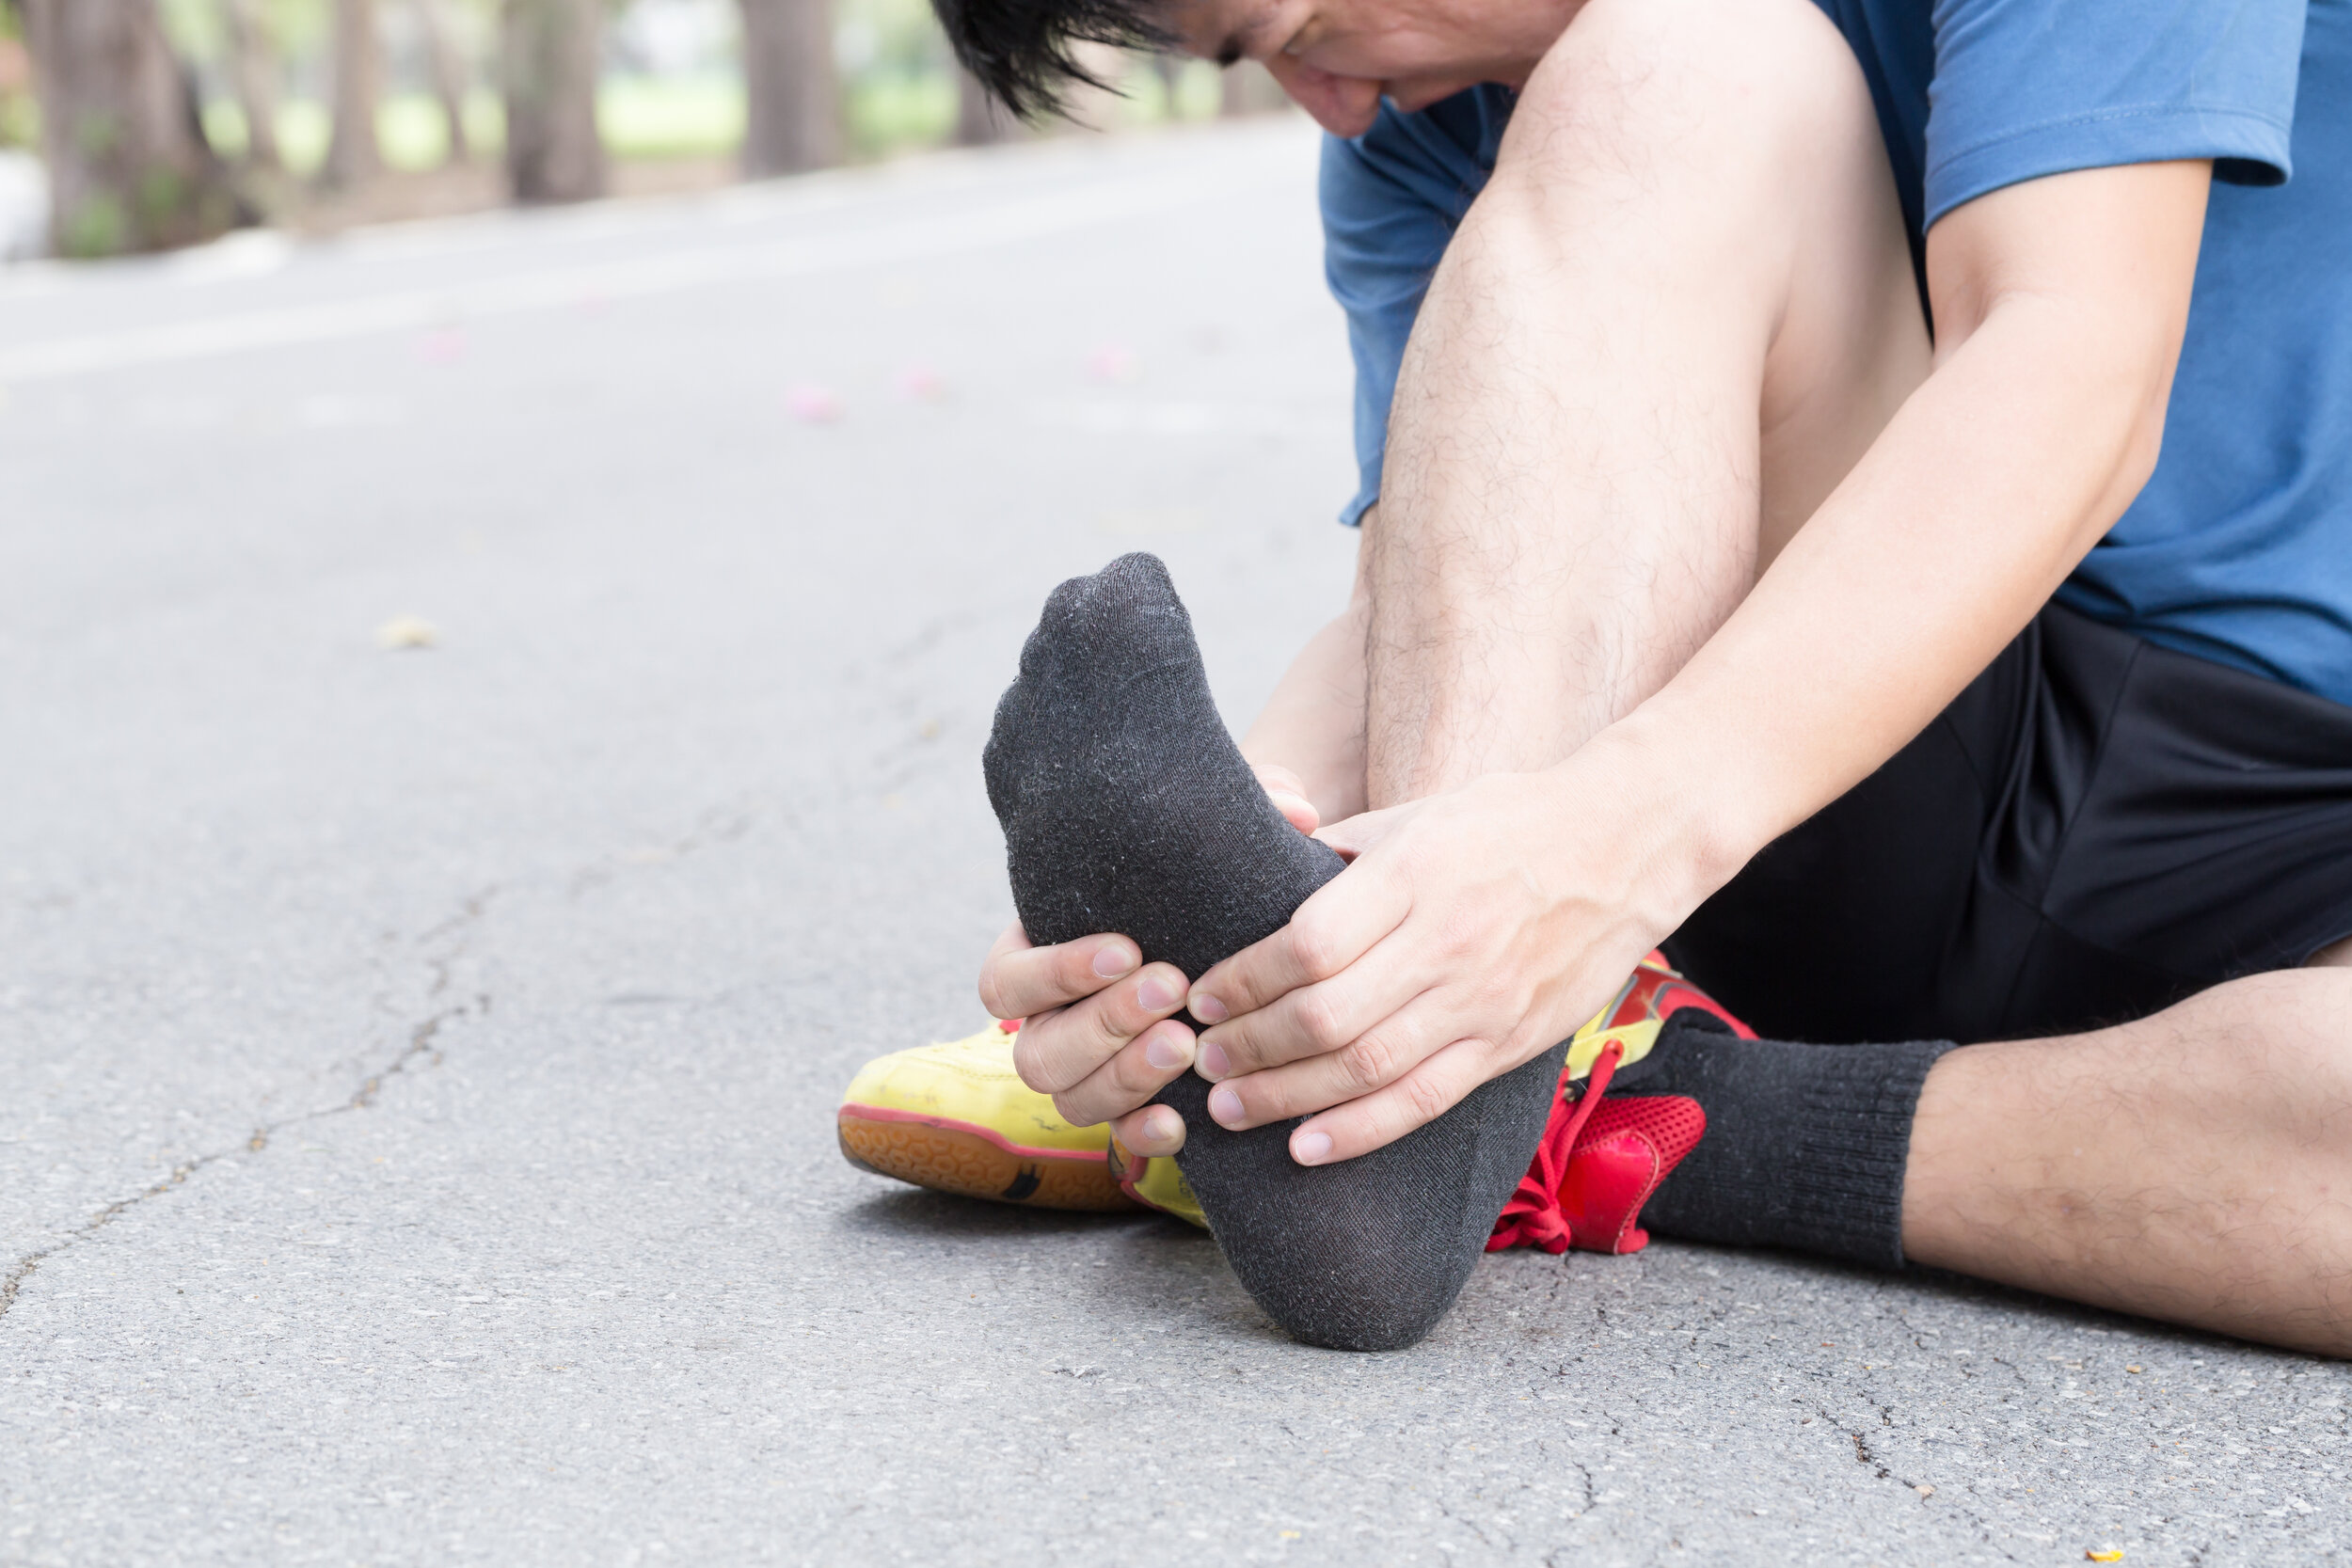
It’s coming up to that season - heel pain season! When we all go from wearing our supportive boots and shoes throughout fall and winter to popping on those flip flops as soon as it hits 15 degrees. Every summer we see an uptick in people complaining of heel pain: a stabbing pain smack in the heel first thing in the morning that sometimes lessens with walking, sometimes not. And when we touch that point on your foot that hurts? You go through the roof.

Read all about plantar fasciitis - the hallmarks of the condition, how we treat it and our top five tips on how to prevent it from coming back.


Plantar fasciitis is the most common cause of heel or “rearfoot” pain. It is most commonly the result of overuse of the plantar fascia (aka plantar aponeurosis), a thick band of connective tissue that runs from the heel to the toes on the bottom of the foot. The plantar fascia has a lot of important jobs in the foot:

AdobeStock_164854183.jpeg
  1. Protection of blood vessels and nerves - like any part of your body, the network of vessels and nerves is dense and required to keep your tissues healthy. The plantar fascia lines of the bottom of the foot and acts as a suit of armour for anything you may step on.

  2. Site of muscle attachment - a bunch of the little muscles that control the toes attach directly onto the plantar fascia.

  3. Helps to maintain your arch - take off your shoe and admire the curves of your foot. Some of those curves are brought to you by the plantar fascia!

  4. Shock absorption and distribution of forces when standing and walking - arguably the most important role of the plantar fascia, it is integral to a healthy foot when walking and running.

AdobeStock_355114152.jpeg

Think of the plantar fascia as the string on a bow - the tension on that string maintains the integrity of the whole bow and provides explosive force for the arrow.

With every step you take, that downward force is absorbed by your plantar fascia. When you roll over your foot and propel off your big toe, your plantar fascia recoils and transfers some of that absorbed energy into forward momentum. Your foot is then returned to its curvy shape, ready to absorb the next step.

But if your bow is only as good as your bowstring, what happens when it starts to fray?

Hallmarks of Plantar Fasciitis

The person with plantar fasciitis will generally complain of the following:

  • A gradual onset of pain

  • Pain in a specific spot on the heel that is tender when palpated

  • Worse in the morning, especially when getting out of bed for the first few steps

  • Pain typically decreases with activity unless it’s been going on for awhile, in which case it just hurts all the time


There have been several risk factors associated with developing plantar fasciitis. These include:

  • Increased training volume and/or number of practice days per week - this is the big one. Overuse injuries happen when the tissue is stressed too much and isn’t allowed to rest and regenerate.

  • Anatomical variations - Varus knees (aka bow-legged) and high-arched feet both lead to a higher incidence of plantar fasciitis.

  • Use of spiked athletic shoes or cleats

  • Standing work - those who stand at work all day are a bit more likely to develop plantar fasciitis.

  • Lack of flexibility and strength in the lower extremities - Tight calves? Weak toe muscles? What about your hamstrings and glutes? All these contribute to how to walk and how those forces go through and are absorbed by your feet.

One area of debate in the risk factor world is the link between BMI and plantar fasciitis. While it has been suggested in several studies that those with a higher BMI are more likely to develop plantar fasciitis, additional studies of athletes with a range of BMIs have not found a significant difference in likelihood of developing plantar fasciitis. A sedentary lifestyle is associated with a higher BMI and therefore weaker muscles so it may be that instead of weight being a risk factor for plantar fasciitis, it’s the lack of strength and flexibility that’s the issue at play.

Getting Back to Function

Plantar fasciitis is something we see in the clinic every day. Typically, rehab goes a little something like this:

AdobeStock_130931215.jpeg
  1. Settle the tissue down - like every overuse injury, we have to settle it down before we build it back up. This may mean LASER or ultrasound. This may mean massaging the tissue, either with a frozen golf ball or with our hands. This may mean supporting the foot with a gel heel pad or heel lift to temporarily provide some of that cushioning. There are lots of options to settle it down, we just have to figure out the combination that works for you.

  2. Tape it - supporting the foot through tape, especially when its aggravated, can be really helpful. There are a variety of tape jobs that are used depending on your specific issues.

  3. Ice it - I’m a fan of frozen golf balls. You can pop them on the ground and roll the bottom of your foot out on them, giving yourself a soothing ice massage.

  4. Stretch the tight things - without a doubt, this means calves. If you come in for physiotherapy for a plantar fasciitis, expect this from day one. The plantar fascia can be thought of as a continuation of the Achilles tendon, which connects the bulky calf muscles (the soleus and gastrocnemius) to the heel. Stretching and maintaining the length of the calf muscles helps cut down on the stress through the plantar fascia - loosening the bowstring, in a way. There may be more things tight as well, from your quads and hamstrings to other muscles up the chain.

  5. Strengthen the weak things - again, we need to look at the whole chain. How are your quads? What about your glutes? Is your core working the way it should? We also need to look at those little muscles in your foot that support your arch and attach into the plantar fascia as they likely need some attention of their own.

What About Footwear and Orthotics?

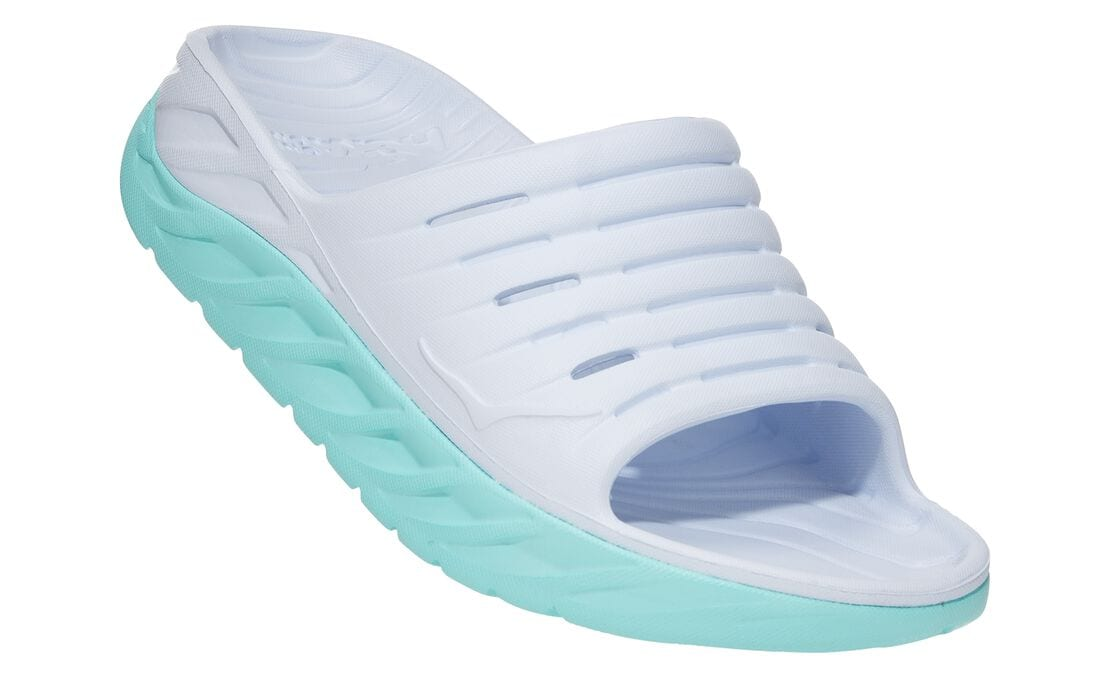
Proper footwear is incredibly important in the prevention and management of plantar fasciitis. With summer coming, we reached out to our friends at the Run Inn for their recommendations on plantar fascia-friendly sandals for the summer:

 
  • Hoka Slides - another great option for warmer weather, Hokas are nicely cushioned with great support for those with plantar fasciitis.


Once the pain settles down, getting appropriate footwear for your feet will help keep plantar fasciitis and other foot problems at bay. There are several factors that go into finding the right shoe for you - the last, the toe box, the rise… I could go on.

As with anything shoe-related, do not buy them online without being fitted first! Go to a local store that knows their stuff - for us, that’s definitely the Run Inn - and get fitted properly. Different bodies and different feet demand different support! They also have a range of over the counter orthotics that may help as well.

For some, custom orthotics is the way to go. Finding a local pedorthist - someone who is an expert in the foot and all things foot orthotics - is key. We are lucky enough to have a great group in Ladner, West Coast Pedorthics. They are fantastic, informative and thorough - we highly recommend them!

It’s Gone! How Do I Stop It From Coming Back?

Plantar fasciitis can take months to finally go along its merry way. Once it’s gone, these habits will help keep it that way:

Top Five Tips For Preventing Plantar Fasciitis

  1. Wear good shoes all year round - make sure the sandals you choose to wear in the summer are just as supportive as the shoes you wear the rest of the year. Cheap flip flops are not your friend! Remember that all feet are different and demand different supports - get your feet fitted properly by shoe experts.

  2. Keep your calves long and supple - a tight calf is plantar fasciitis’s best friend. Download this PDF for instructions on how to stretch both your gastrocs and soleus.

  3. Untuck your bed sheets at night - when the sheets of your bed are tucked at the bottom, it forces your feet to be more pointed and shortens your calves. Sleeping with loose bed sheets allow your ankles and feet more freedom of movement.

  4. Plan and pace your running and walking - Nicole did a great three part series on injury prevention in running, all of which can equally be applied to walking. Follow her tips on adjusting your running and walking volume, foot strike and strength training.

  5. Maintain a healthy weight and exercise routine - it is clear that a healthy BMI combined with a regular exercise program helps keep the plantar fascia healthy.


Are you experiencing foot pain? Book an appointment online, through email or by calling (778) 630-8800 - we will help you figure out what’s going on and how to get it under control.

Ask A Physio: How Can I Get Rid Of My Sciatica?

AdobeStock_270090264.jpeg

We’ve all heard of sciatica - that awful, weird pain that runs down the back of your leg. It’s often fairly vague pain and hard to pinpoint but there’s no mistaking its presence.

Lately, we have seen a serious uptick in clients complaining of sciatica and its good friend, low back pain. So, what is sciatica and what exactly can we do about it?

What Is Sciatica?

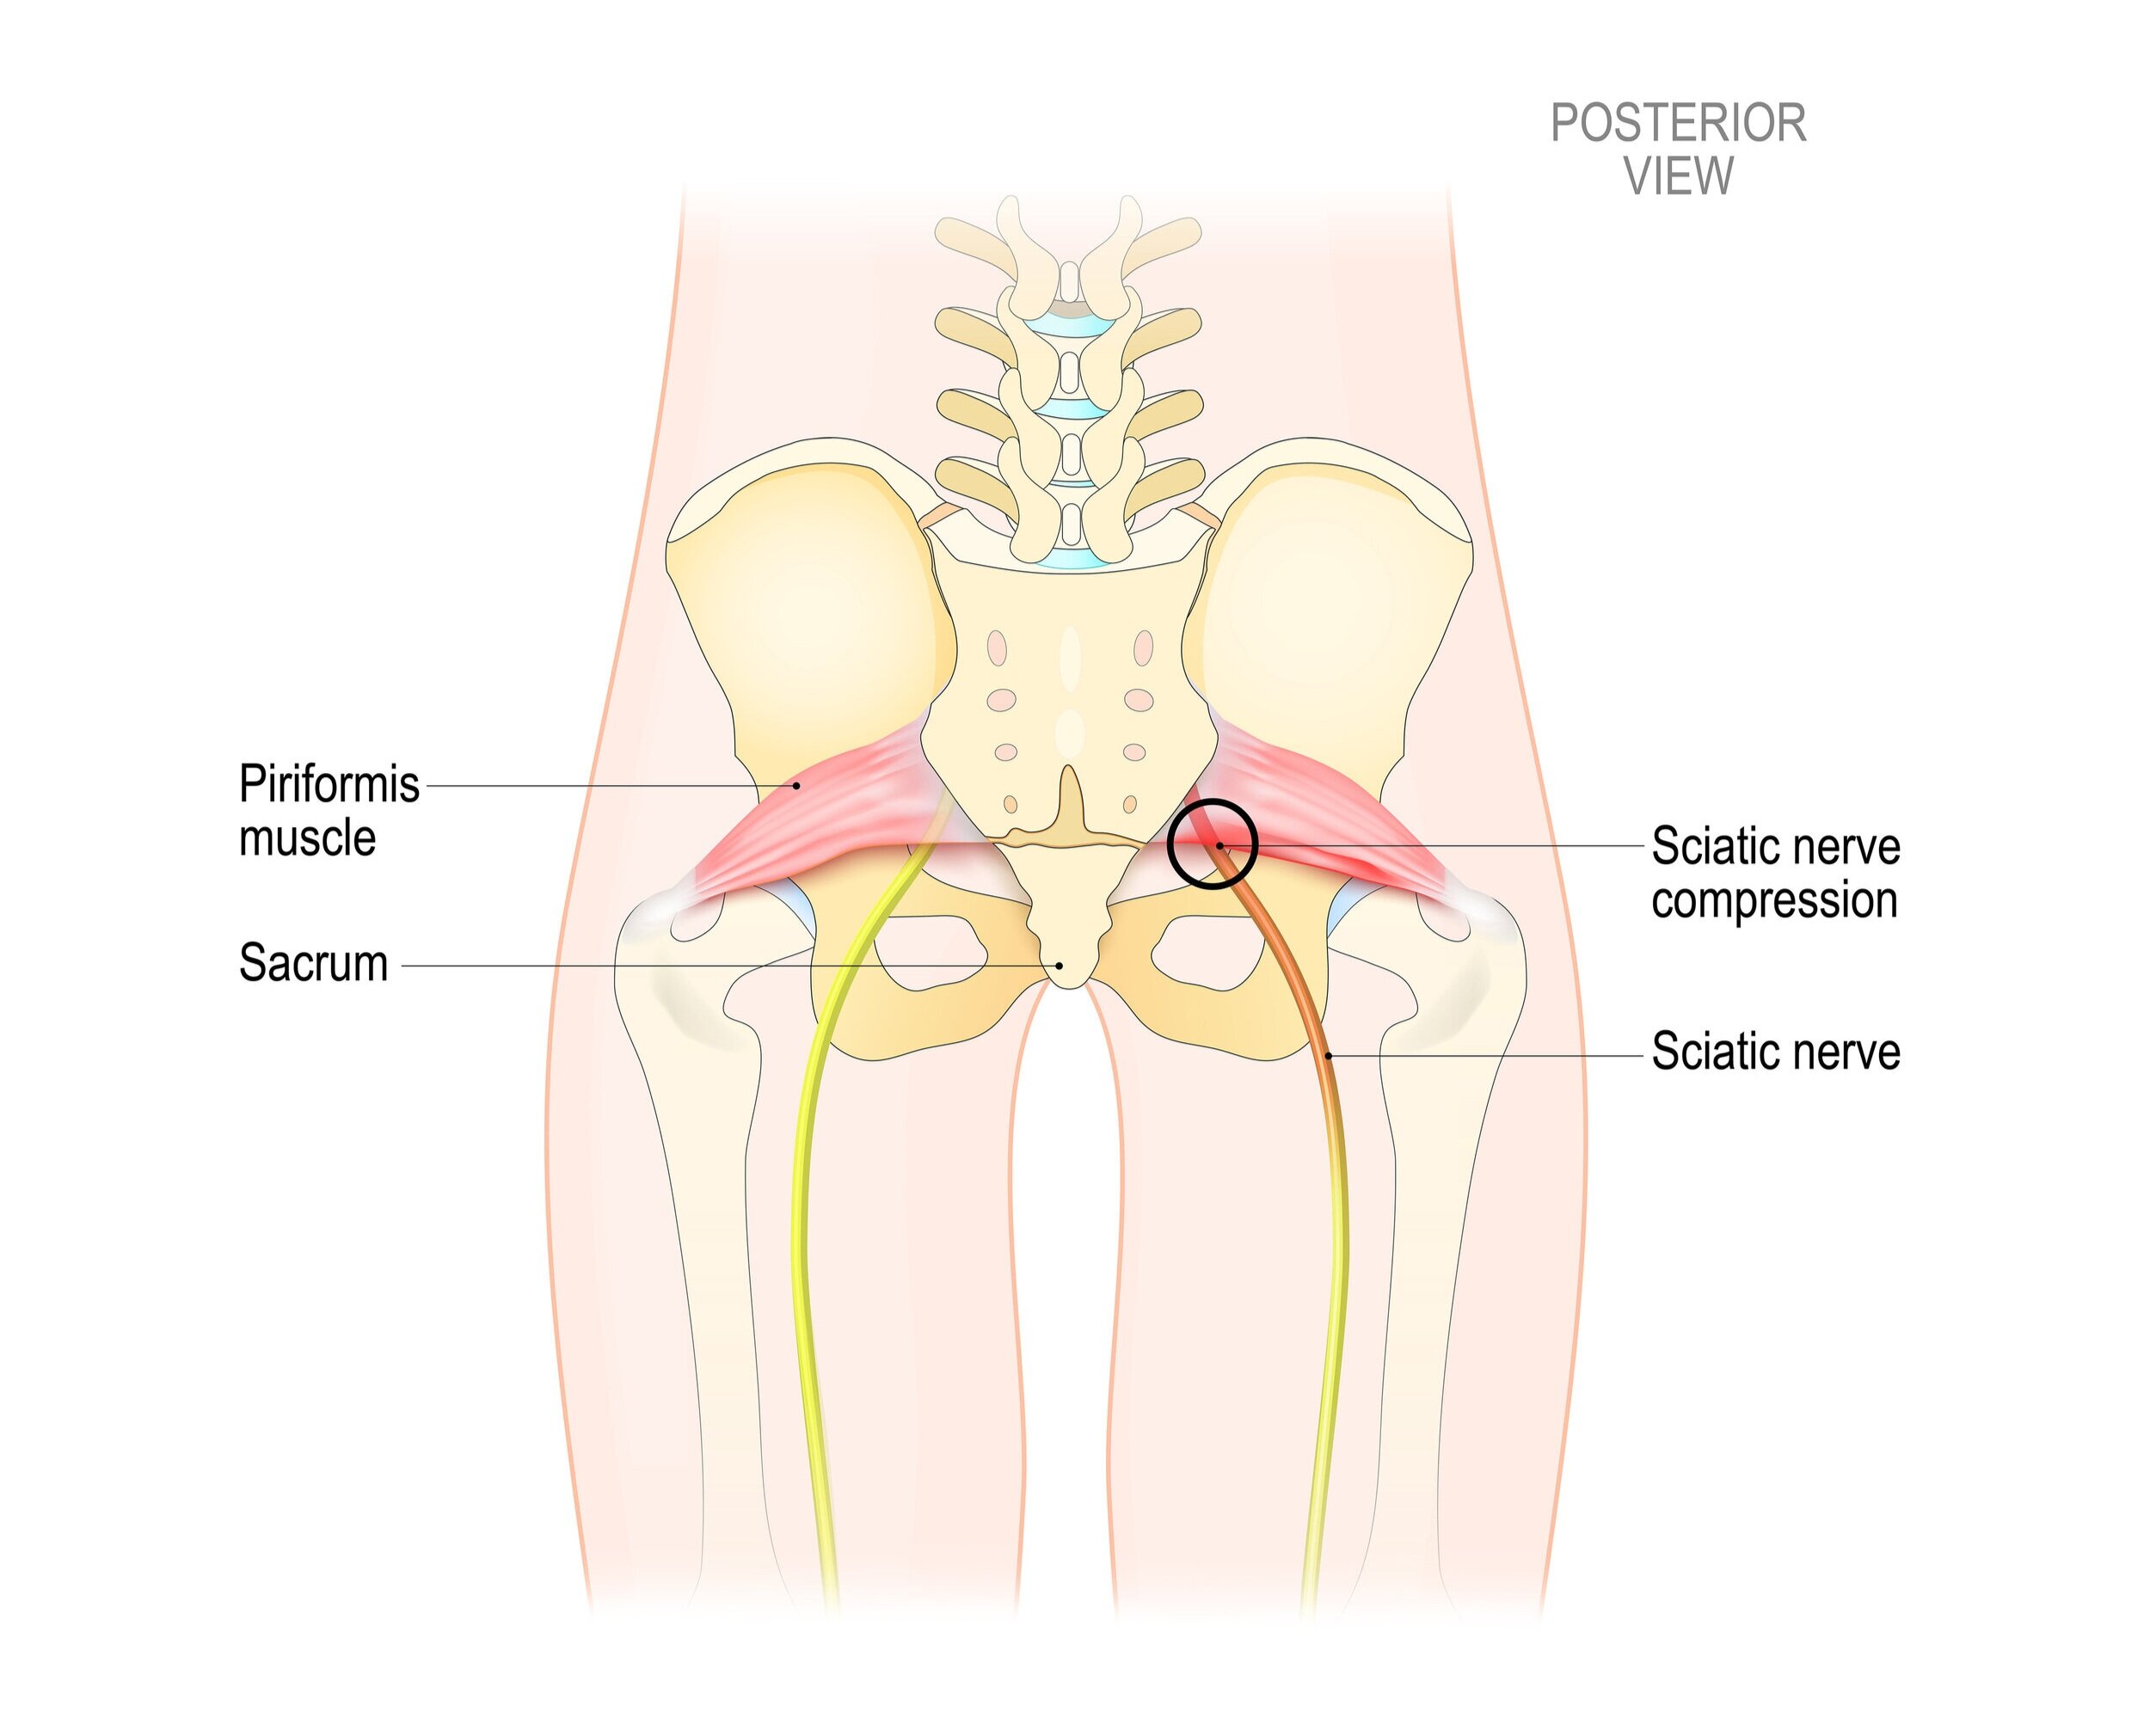
Sciatica refers to in irritation of the sciatic nerve which runs down the back side of your leg and innervates the hamstrings and all the muscles below the knee. The sciatic nerve is HUGE - about the width of your thumb! It passes through, around and beside some major structures including the spine as well as the glutes and piriformis in the buttocks.

The classic profile of someone with sciatic-related pain can include:

AdobeStock_216462525.jpeg
  • Pain in the low back that radiates down the back of the leg, described as anything from dull and achy to sharp, burning or electrical

  • Tingling and/or numbness in the lower spine, buttock, back of thigh, calf and/or foot

  • Increase in pain with certain postures - often sitting with the legs stretched out or driving a car is terrible, but standing, walking or lying down eases pain

  • Electrical and/or shock-like pain down the back of the leg

  • In extreme cases, weakness of the muscles in the lower leg and hamstrings

Usually, the pain is just on one side as it’s only one nerve that’s affected, not both at the same time.

How Do We Treat It?

At the root of it, sciatica is a symptom, not a diagnosis. When the sciatic nerve is pressed on or irritated by other structures, sciatic pain is the result.

Before addressing the sciatica itself, we need to figure out what’s causing the pressure on the sciatic nerve in the first place. The likely candidates include:

AdobeStock_258197710.jpg
AdobeStock_329897389.jpg
  1. Herniated Disc - the nerve roots that exit the spinal cord to form the sciatic nerve can be compressed by a herniated disc, leading to sciatic pain. This is the most common cause of sciatica.

  2. Spinal Stenosis - literally meaning “narrowing”, stenosis occurs when the tunnel of bone that allows the nerve roots to escape shrink, often by bone spurs or a loss of disc height.

  3. Arthritis - When arthritis hits the spine, it usually leads to bone spurs around the exiting nerve roots, similar to stenosis.

  4. Pelvic and/or SI Joint Hypermobilities - most of the muscles that lie over and around the sciatic nerve are attached to some point of the pelvis. When the pelvis is moving more than it should, these muscles often tighten down to try and stabilize the pelvis. When this occurs, an unintended consequence is pressure on the sciatic nerve. Pregnant women with sciatica: this is likely you!

  5. Piriformis tightness - this deep muscle lies right over the sciatic nerve. If it’s too tight, it can squeeze the sciatic nerve.

The treatment approach is defined by the source of the sciatic nerve irritation. Is the problem at the spine? Is it a muscle imbalance or spasm causing the problem?

We see a lot of “one size fits all” fixes for sciatica online. These often don’t work because the root problem isn’t identified and addressed. If your sciatic pain isn’t going away, your best bet is to be assessed by your medical practitioner and figure out what’s driving your sciatica.

My Sciatica Is Gone! How Can I Prevent It From Coming Back?

There are loads of ways to keep sciatica at bay! The top tips:

  • Stay active - Look at all those causes of sciatica listed above. All of them benefit from exercise - strengthening, stretching, MOVING. In fact, one of the biggest risk factors for sciatica is prolonged sitting. So if you don’t want sciatica, move more!

  • Maintain a healthy weight - a normal weight keeps your spine healthier with less disc pressure and a lower chance of degenerative changes, both of which contribute to sciatic pain.

  • Sit properly - I’m talking feet on the floor, bum at the back of your chair with a lumbar support properly. Not sure what that looks like? Check out our blog on proper ergonomics.

  • Strengthen your core - A strong core means a supported spine and pelvis, preventing sciatic nerve compression.

  • Use good body mechanics - Considering a disc injury is the leading cause of sciatica, protect those discs! Lift with your legs and try to not twist as you lift a heavy load. Hold those heavy loads close to your body and find a friend if it’s really heavy.


If you’re dealing with low back or sciatic pain, give us a call at (778) 630-8800 or book online.

Hip Pain in Dancers

LVP-Final-6.jpg

Anh Duong grew up in Prince Rupert and was a competitive dancer for years, training in ballet, jazz, tap, contemporary, modern, hip hop and acrobatics. She is a member of the Dance Health Alliance in Canada and she now works with dancers at all levels. Whether it’s dealing with an injury, preparing the feet for pointe or improving performance, Anh has the experience and expertise to help you reach your goal. Read Anh’s latest blog on hip pain and overstretched hip flexors.

Dancers, do you really have tight hip flexors?

For years, I suffered from hip pain, especially with movements involving kicks (i.e. grand battement, developé, rond de jambe en l’aire, etc). I always thought it was because I had tight hip flexors. So naturally, I would get down into a deep lunge and stretch and stretch and stretch... but nothing changed.

Little did I know that it wasn’t a hip tightness issue. The opposite, actually - my hip flexors were long and weak likely from years of being overstretched.

AdobeStock_341976408.jpeg

Think of that hair elastic that you have been using for 3 months, the one that has kind of lost its shape, doesn’t really hold your bun up. Similarly, my hip flexor muscle was overstretched and was not strong enough to hold my leg up.

The hip flexors are a group of muscles that are responsible for lifting your hip and leg up in front of you. They also play a role in bringing your trunk towards your legs (i.e. doing a full sit up). When these muscles are long and weak, they often have to work harder and strain to do their job resulting in that pinching or gripping feeling in the front of the hip. When this happens your body will often recruit different muscles to compensate for the weak hip flexors, often causing even more problems.

For many dancers with hip pain, the solution is often not stretching but strengthening the hip flexors through the whole range of the muscle. 

So what do you do?

AdobeStock_106460279.jpeg
  1. Settle it down and avoid painful movements. This may include marking exercises for a period of time. 

  2. Strengthen the hip flexors. Start with small ranges and slowly work towards larger ranges. Do floor exercises and floor barre before progressing to standing. Use weights and therabands to further build strength.

  3. Core core core! Avoiding compensation movements through the pelvis and spine is key to long term success with overstretched hip flexors. A strong core is the best way to achieve this goal.

Should you stop stretching your hip flexors?

No! Flexible hips are required for many dance movements BUT you need to ensure that you are doing the proper stretches and combining stretching with strengthening. The goal is a strong muscle at any range!

Overstretched hip flexors are one of the many causes for hip pain but certainly not the only cause. Make sure you are assessed by a professional before getting back into the studio. Treating any injury correctly the first time saves you a lot of time and pain in the long run.

If you are a dancer experiencing hip pain, book with Anh online or give us a call at (778) 630-8800. You can either visit us at our Ladner location or book a virtual appointment.

Motion Sensitivity - Part 2: Top Ten Exercises!

Stephanie.jpg

Stephanie Yip is one of our vestibular therapists here at Ladner Village Physiotherapy. In Part 2 of her two part series on motion sensitivity, Stephanie gives some great exercise options for motion desensitization.

If you read my last blog post on what motion sensitivity is, and have now realized that this is what has been plaguing your existence, do not fret! Like I emphasized in my last post, this does not have to be your reality! I am here to share with you 10 easy exercises that you can start doing today to finally get over your motion sensitivity! 

Before we start, here are some disclaimers:

  1. As mentioned, motion sensitivity rehabilitation DOES require triggering those icky symptoms. I know, so not fun. However, we only want to trigger mild symptoms that resolve within 3-5 minutes. Therefore, it’s really important that for all of these exercises, you start at a small enough dose that you aren’t making yourself sick for the next several hours. This may mean just trying the exercise for 15 seconds to start, and then gradually increasing the amount of time you expose yourself to the stimulus.

  2. Motion sensitivity exercises work best when individualized to the person. You’ve probably already realized that the way you experience motion sickness is very different from your friends. Some people get really sick riding elevators/escalators but have no issues in the car. Others can’t stand being a passenger in a car, but have never had any issues with those spinny rides at amusement parks. In order for your motion sensitivity rehab to be optimal, the exercises you do should be as similar to your personal triggers as possible. Since this is just a generalized list of exercises, you may find that some of them do nothing for you, while others may make you feel awful.

With this in mind, here are some great ideas of motion sensitivity exercises that are easy to fit in to your day-to-day life!

My Top 10 Motion Sensitivity Exercises

1) Look out the side window of your car next time you’re the passenger

If you are one of my fellow car sick sufferers, you have probably noticed that you feel a lot better if you sit in the front seat and look straight ahead. This is because when you are looking straight ahead, your visual and vestibular systems are in agreement and saying the same thing. On the flip side, if you look out the side window, your visual system is seeing all sorts of quickly moving trees and street poles making you feel like you’re moving while your vestibular system is telling the brain you’re just sitting in your car; a mismatch that creates the icky feeling you get. It may not feel great, but if you start with just 15-30 seconds of looking out the side window, then resume looking straight ahead, settle your symptoms, and repeat – you’ll gradually increase your tolerance until sitting in the backseat will no longer be impossible. All your tall friends will love you for it!   

AdobeStock_246579099.jpeg

2) Play on the swing set

Next time your kids beg you to push them on the swings, see if you can take a turn on the swings instead! The world around you will blur as you swing through, really messing with your visual system, and really helping you with your rehab!

3) Go on the see saw

Since you’re already at the playground, having a blast on the swings, why not take a whirl at the see saw? This exercise is particularly helpful for those of you who get a horrible lurch in the stomach every time you take the elevator, aka those who can’t stand vertical motion.

4) Play some Mario-Kart or any other video game with a lot of looking around

Ever tried playing a first-person shooter game, tried to look around while walking forward and just felt queasy? If yes, and you need an excuse to play some video games guilt-free, you can now tell the world that you’re actually training your vestibular system and being very productive.

5) Watch the clouds while you walk

Do this one responsibly and do check that your coast is clear first! As you walk, your vestibular system will be telling your brain that you are moving forward, but the clouds floating about will be telling your visual system something totally different. Use this mismatch to your advantage and get training.

6) Log roll down a hill

This one is pretty self-explanatory and is definitely for those looking for an advanced level exercise. Be warned – go slow with this one and build up gradually.

AdobeStock_290217744.jpeg

7) Read while walking, as a passenger in the car, in a hammock or while sitting in a rocking chair

If you’re focused on non-moving words on a page, your visual system won’t be able to correlate with the vestibular system which is telling your brain you’re moving. You can adjust how much you move to make this one easier or harder.

8) Play some focused catch

If you watch a ball being thrown very closely, keeping the ball in focus the whole time, the background behind the ball will be both blurry and moving. This can confuse your brain and bring on those feelings of motion sickness.

9) Do some eyes closed yoga or t’ai chi

You wouldn’t expect something as simple as yoga or t’ai chi to really amp up your motion sickness. If you’re a regular yogi or t’ai chi practitioner, this is often a really nice way to slowly start tackling those gross feelings. When you take away your vision and add some movement, your brain really has to work overtime to figure out where you are!

10) Do some chair spins

That office chair you spend most of your day in? Give it a good twirl every once in awhile! Not only can this one be done quickly, you likely can do it a LOT throughout the day without too much effort.


What are your favourite exercises to combat motion sickness? Add some ideas in the comments below!

If you’re suffering from motion sickness, we can help - book online, send us an email or give us a call at (778) 630-8800.