Orthopaedic Physio

Knee Arthritis 101: The Basics

Arthritis is a big topic and there is no way I could cover it all so today I am just going to cover some of the basics to help you understand what is going on with your body.

First of all, it’s important to note that there are many types of arthritis. The two most common types are:

  1. Degenerative arthritis, also known as osteoarthritis (OA for short)

  2. Inflammatory arthritis such as rheumatoid arthritis, ankylosing spondylitis, and psoriatic arthritis

Today we will be discussing osteoarthritis of the knee.

AdobeStock_305678564.jpeg

Here are the top five things you absolutely need to know about arthritis:

  1. Arthritis is not a catastrophic diagnosis. You can continue to thrive and lead an active lifestyle with an arthritic knee and it’s not the end of the world. 

  2. Exercise is your best friend. Say this with me, three more times!

  3. X-Ray findings are not proportionate to functionality or pain levels. Someone who describes “occasional stiffness” in their knee might have a “severe” x-ray, while a “mild” x-ray might belong to someone who describes unbearable pain that keeps them awake at night. X-rays do not give the whole picture!

  4. Most knee pain from arthritis is from structures around the joint, and that pain can settle. It’s not the cartilage nor is it the outer compact bone causing the pain in your knee. 

  5. There are things you can do to slow the progression and maximize your function.

Let me say this loud and clear:

Maintaining an active lifestyle is one of the best things you can do if you have arthritis!

AdobeStock_303555159.jpeg

Let’s look at a classic scenario.

Meet Stacy. She’s 62 and tweaks her knee while out for a run. That weekend she goes away for a vacation with her family. They play golf, tennis, and even go kayaking! Now her knee is quite sore and even swollen. Stacy decides to rest for a few weeks figuring she just over-did it while away. But it’s still swollen two weeks later.

She goes to her doctor, who orders an x-ray. The x-ray uses technical terms like “osteophytes” and “joint space narrowing”. She is told she has arthritis in her knee. That night Stacy has company for dinner and a friend, let’s call him Gary, said he has the same thing! Gary says his knee is “bone on bone” (and demonstrates grinding with his knuckles together while making an awful scraping noise) because all his cartilage has “worn away” and that his friend Steve had to have a knee replacement and limped for months.

Now Stacy is devastated. She doesn’t want arthritis and she certainly doesn’t want a knee replacement. She feels doomed. 

What happens next? 

Option A: Stacy is scared and wants to protect her knee. So Stacy stops playing tennis and stops golfing, she hires someone to do her gardening and doesn’t even really walk the dog anymore because if running hurts than walking probably isn’t great either right? (I want you to know it hurts me deep down inside to type that). But when Stacy suddenly stops exercise and spends many hours per day sitting her knee gets stiffer and her muscles get weaker.

In her mind this has confirmed her worst fears that her knee is in awful shape (look how quickly it’s deteriorating!) and tries to protect it further by resting even more. This cycle of inactivity can is bad news bears. 

It also doesn’t have to be this way. 

Option B: Stacy doesn’t worry about Gary or his friend Steve because she knows nothing about their situations and her doctor didn’t mention surgery at all. Stacy’s knee is still a bit stiff and sore so she modifies her activities for a few weeks. Runs on the dyke become walks with the dog and she tries pickleball with a few friends instead of tennis. To her delight the knee pain improves! Her muscles have stayed strong from her modified activities and she still enjoyed her time out and about. Now Stacy is in a position to gradually rebuild and reintroduce activities she enjoys as she is able. (This scenario is a lot better if you ask me). 

I will say it again: exercise is your best friend.

You are not wearing out the joint further by exercising. It is the most effective treatment for early and moderate knee OA (not to mention other health benefits). Exercise helps you maintain range of motion and strength. It is a lot easier to maintain strength and range than build it back up again after it has been lost.

Also, do not underestimate the benefits of exercise for the rest of your body. Many people who get an arthritis diagnosis self-impose activity restrictions and become more sedentary. This can have detrimental health benefits including increased risk of high cholesterol, heart disease and diabetes. Further, muscle weakness and joint stiffness can be contributing risk factors to falls. People with osteoarthritis experience 30% more falls than those without.

There is no use going too hard all day every day and being in extreme pain just for the sake of it but don’t stop all activity completely. You have to find a middle ground between activities that are challenging vs. aggravating (which is easier said than done). A physiotherapist can give you recommendations on which activities can be modified and help you figure out strength and range of motion exercises that are appropriate for you specifically. 

Ok, so I hope you get it by now. If you have arthritis you should exercise. But let’s keep going, shall we? Let’s discuss why this diagnosis doesn’t have to be all doom and gloom.

What causes the pain in knee arthritis?

The cartilage that degenerates has no nerve endings nor does the hard compact bone beneath it. So they cannot be the source of the pain. So which structure is actually responsible? 

The three main causes of knee pain associated with arthritis are:

  1. Periosteum - the thin lining of tissue around the bone, it has nerve endings and supplies blood to the bone. If it tears it will hurt. 

  2. Synovitis - Synovium is the connective tissue lining of the joint itself. It can become inflamed and very painful. Synovitis can feel like joint tenderness or pain, swelling, and nodules (hard lumps). 

  3. Bone edema - This is more common in women who have underlying osteopenia or osteoporosis since the bones are already weaker. When stress on the bone increases, as is the case with arthritis, the deeper central layer of the bone can become swollen, which feels like a deep and intense ache. 

Remember:

  • Not everyone with OA has these issues.

  • If you do experience pain from these structures it will likely settle down over a few weeks or months and your knee pain and function will return back to baseline. It’s not forever.

  • Like I mentioned above, the severity of an x-ray does not correlate with pain or disability.

  • Treatment should not be based off of the x-ray.

  • Do not let a bad x-ray be the reason you stop your favourite activity.

  • Do not let a bad x-ray make you afraid of feel doomed.

  • Please please please do not get surgery just because the x-ray is bad especially if everything else is great! (Disclaimer: obviously I am a physiotherapist and not your surgeon, so I’m not the one making calls on surgery. But if a surgeon is pushing for you to get surgery and you feel completely fine I would be asking why they feel it is necessary. They might have an excellent reason - that’s cool, making calls in grey areas is what they do all day every day so their opinion should be considered - I just don’t want you getting surgery because a friend of a friend had their knee done so you figure you might as well join the club). 

The Arthritis Foundation provides a very general list of things you can do to slow down the arthritis progression and keep you are healthy and active as possible. These include:

  • Maintain a Healthy Weight: Excess weight worsens OA. Combine healthy eating with regular exercise to maintain a healthy weight.

  • Control Blood Sugar: Many people have diabetes and OA. Having high glucose levels can make cartilage stiffer and more likely to break down. Having diabetes causes inflammation, which also weakens cartilage.

  • Maintain Range of Motion: Movement is medicine for joints. Make a habit of putting your joints through their full range of motion, but only up to the point where it doesn’t cause more pain. Gentle stretching, raising and lowering legs from a standing or seated position, daily walks and hobbies such as gardening can help.  Listen to your body and never push too hard.

  • Protect Joints: Make sure to warm up and cool down when doing exercise. If you play sports, protects joints with the right gear. Use your largest, strongest joints for lifting, pushing, pulling and carrying. Watch your step to prevent falls. Balance rest and activity throughout the day.  

  • Relax: Find ways to reduce or avoid stress through meditation, listening to music, connecting with friends and family, doing fun activities, and finding ways to relax and recharge.

  • Choose a healthy lifestyle: Eating healthy food, not smoking, drinking in moderation and getting good sleep will help you to feel your best.

I really hope you feel slightly better about an arthritis diagnosis. This is something that can be managed.

If you have any questions about your arthritis or are looking for some specific suggestions to help your daily life please contact the clinic via email or phone us at ( 778) 630-8800. We look forward to meeting you!

Ask A Physio: Any Tips for Mouse Finger Pain?

AdobeStock_294358654.jpeg

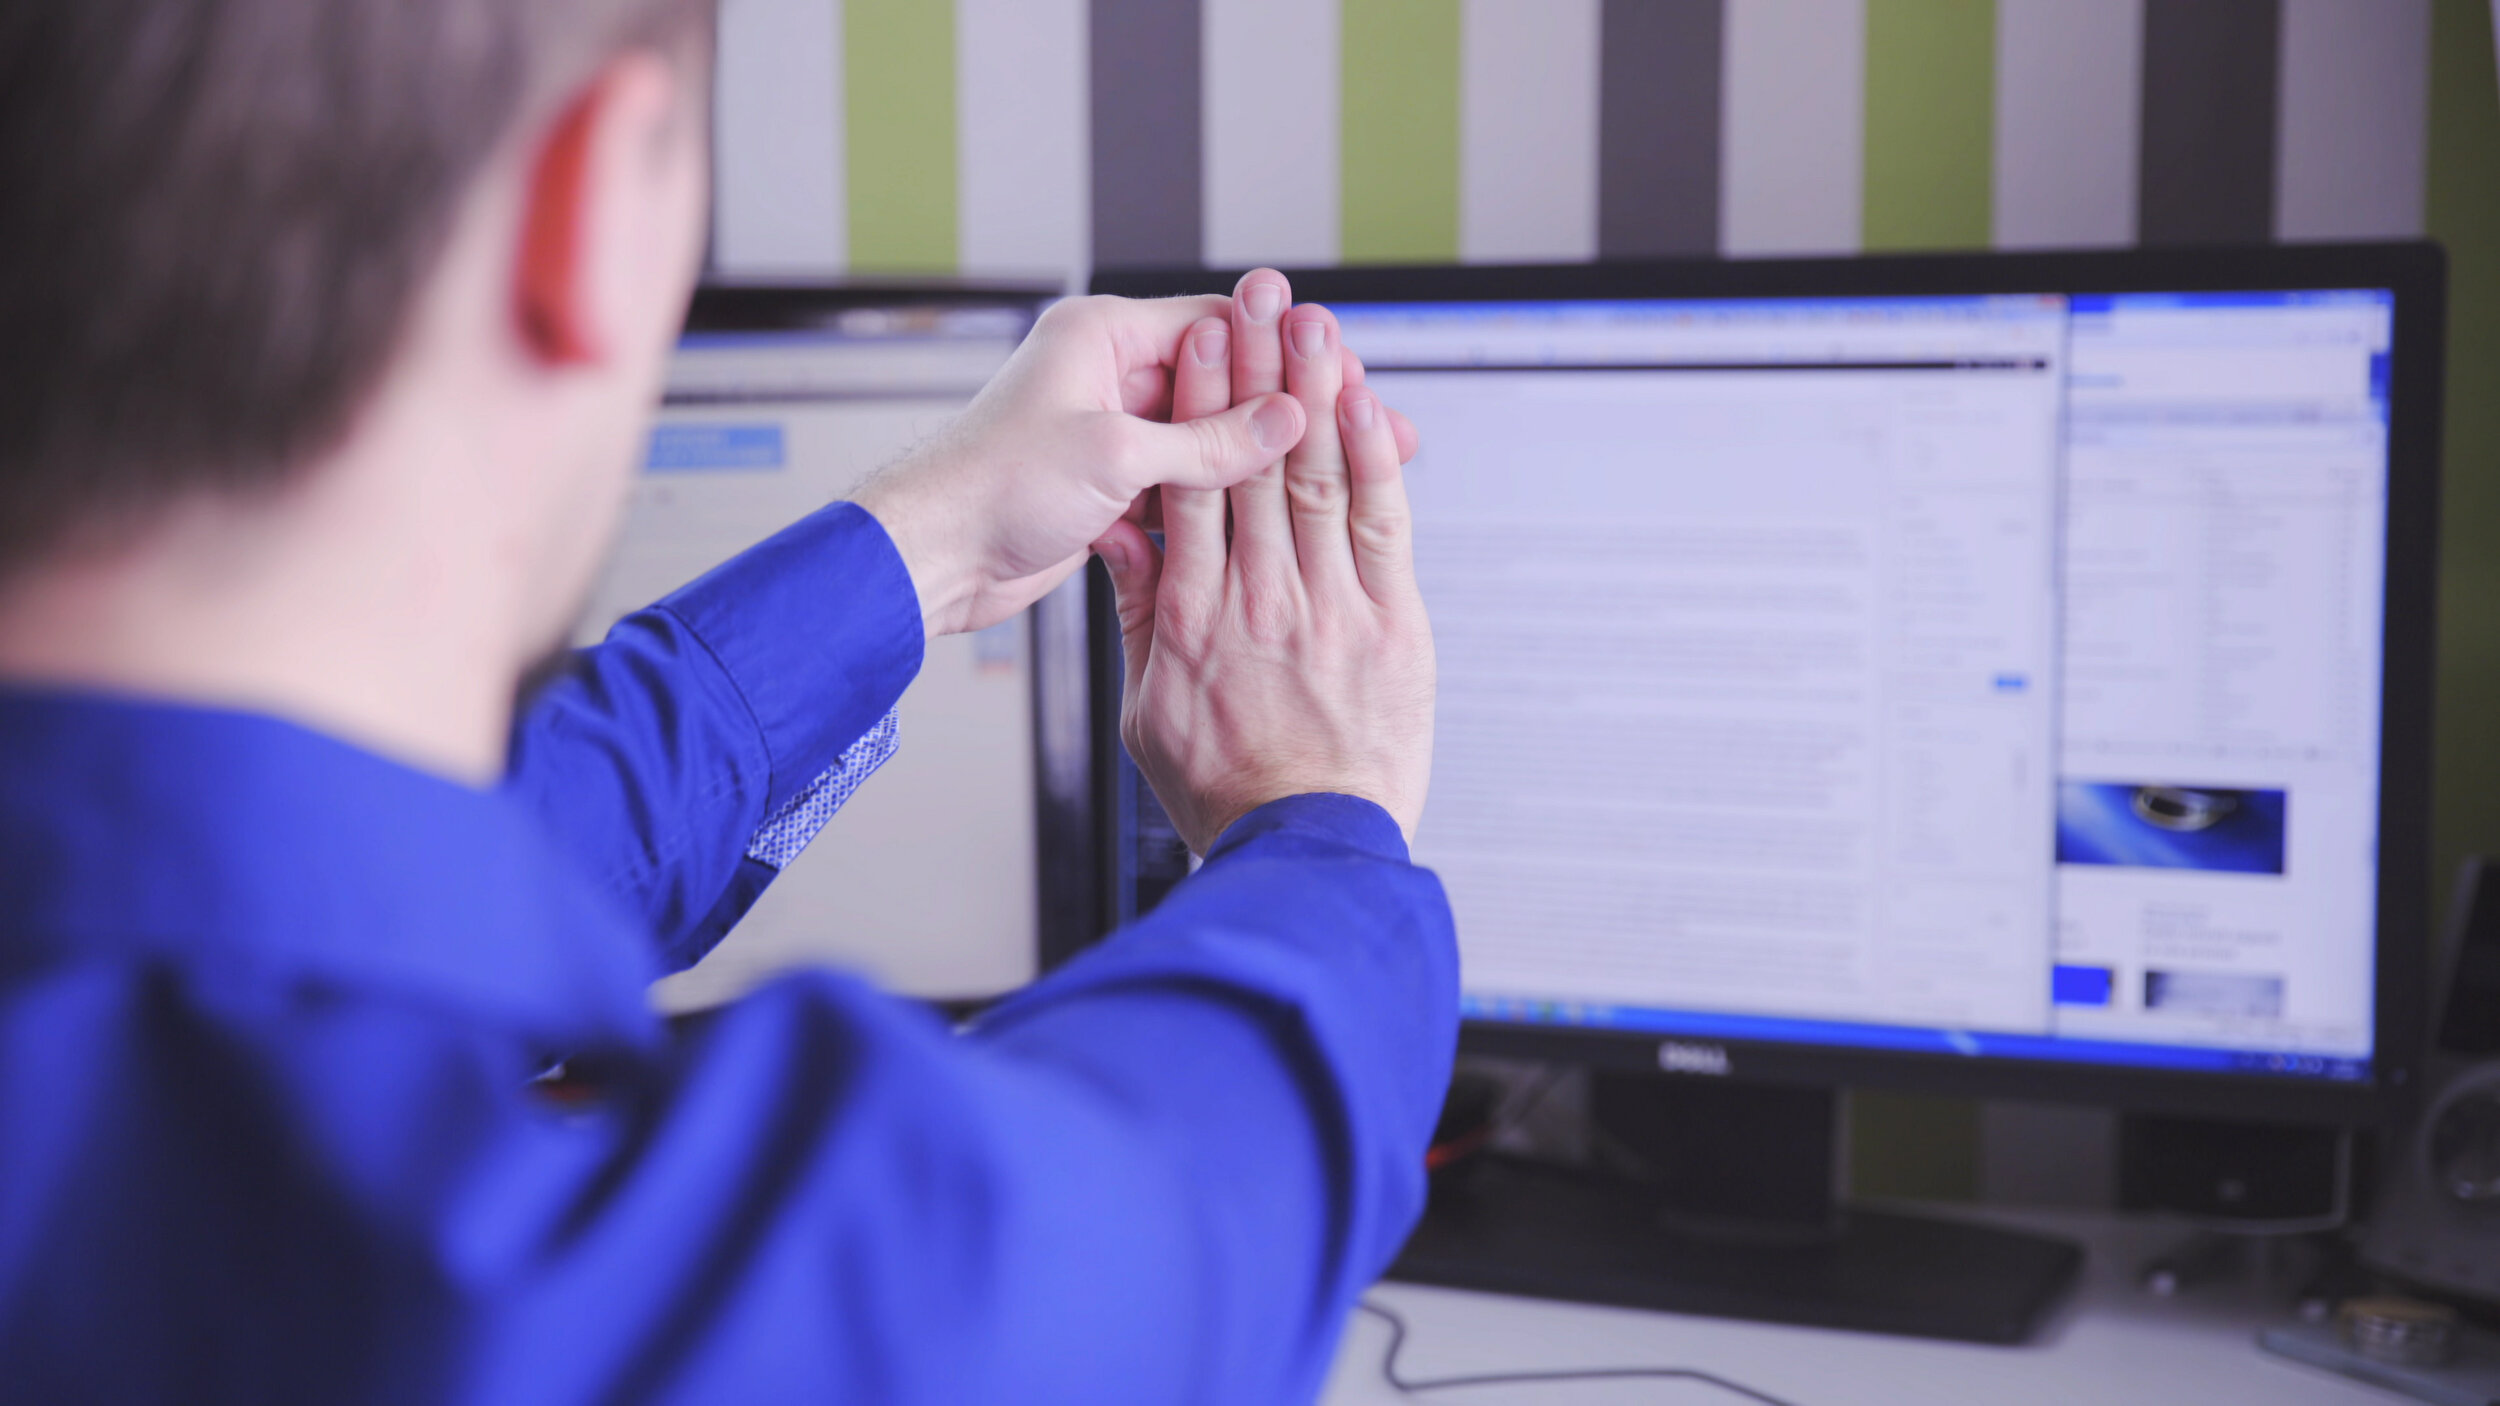
So I don’t know about you, but COVID has certainly pushed me to using my computer a lot more. A. Lot. More. My body is feeling it, too - my neck is stiffer than it was, my hands are tired and my shoulders make a lot of noise after a long session on the computer.

We know that prolonged postures of any kind - standing in one spot, sitting still - aren’t great for anyone. Our bodies are for movement and all too often we get stuck in postures for hours at a time. When that prolonged posture is on the computer, that finger and wrist pain is often directly related to the position of the neck and shoulder as much as it is the wrist and hand.

So what should you do? The best thing you can do is set an alarm for 30 minutes and make a point of moving and stretching your body. If you have two minutes (or less!), this movement and stretching routine can help combat the stiffness and soreness associated with prolonged computer use.

Without further ado, presenting:

Top Ten Exercises for Computer-Related Pain

AdobeStock_151993350.jpeg

1. Shake it out! - I love a good shake - who doesn’t? Sit up straight, take your wrists and hands and give them a good shake, letting your fingers fly.

2. Chin to chest - Something we often forget is how much posture contributes to pain further down the chain. Sit up straight and tuck your chin into your chest, feeling a stretch down the back of your neck. Hold this for 10ish seconds.

3. Ear to shoulder, then a twist - Still sitting up straight, lean your ear to your shoulder and hold it for about 10 seconds. Then twist your head so your nose gets closer to your armpit; hold this for another 10 seconds. Repeat on the other side.

AdobeStock_264162260.jpeg

4. Shoulder rolls - Still sitting up straight (are you sensing a theme yet??), roll your shoulders up to your ears then squeezing them back and down, pushing your shoulder blades as far down your back as you can. Bring your shoulders forward then back up to your ears. Do this 5 times.

5. Wrist stretch - Stretch your right arm in front of you and bend your wrist and fingers back. Use your left hand to pull your right fingers further back, feeling a stretch in your forearm. Hold for 10ish seconds and repeat on the other side.

6. Prayer stretch - Place your hands together in a prayer position in front of your chin. Lower your hands down, keeping your palms together and feeling a stretch in your forearms. Hold for 10ish seconds.

AdobeStock_331129900.jpeg

7. Finger stretch - Place all your finger tips together - think Mr. Burns from the Simpsons - and push your fingers together. Keep your fingers together and pull your palms away from each other. Stretch your thumbs away from your other fingers. Feel a stretch for 10ish seconds.

8. Wrist circles - Draw circles with your wrists! 5 in one direction, 5 in the other.

9. Hand fist and open - Squeeze your hands into tight fists for a few seconds. Then stretch your hands out wide, reaching your fingers out as far as you can for a few seconds. Repeat 5 times.

10. Finish this off with a final shake!

Looking for a print out of this program? Here it is in PDF form, with pictures!

The better you support your body with proper ergonomics (see our previous two ergonomic blogs here and here) and frequent movement breaks, the less likely you’ll suffer from computer related pain. So set that alarm, stretch it out and stay pain free!

As always, if you would like to book an assessment with one of our fabulous physiotherapists or our amazing massage therapist, give us a call at (778) 630-8800 or email us at clinic@ladnervillagephysio.com.

Finally - do you have a burning question one of our physiotherapists can answer? If you’d like to #askaphysio, we would love to answer!

Runner's Knee

AdobeStock_314356800.jpeg

Patellofemoral Syndrome is a classic injury that causes pain around your kneecap. It is also something that I myself am dealing with right now. Also known as “Runner’s Knee,” it’s usually a dull achy pain that is worse with going up and down stairs, running, jumping and squatting. It can also get cranky when you sit with your knees bent for a prolonged period of time such as watching a movie. It is very common and the cause can be multifactorial, so I am hoping that this post will give you a basic understanding of what may be going on with your knee.

Inside The Knee

First, let’s go over the anatomy of your knee shall we? Your knee is actually more than one joint! There is the big joint between your femur (thigh bone) and your tibia (shin bone), but there is also a joint between your femur and your patella (kneecap). In fact, your patella sits in a little groove at the base of the femur and when you bend or straighten your knee the patella glides up and down it’s little groove.

knee.jpg

This is all fun and games until it starts to hurt. There are generally a few contributing factors for patellofemoral pain, I have listed a few of the more common culprits below:

  • Overuse: Activities that require high levels of repetitive stress on your joints are more likely to cause Patellofemoral Syndrome. All of that running and jumping can cause irritation underneath the kneecap as it rubs up and down over the femur.

  • Alignment Issues between your hips, knees and ankles: If your hip muscles are weak then your form can suffer. Have you ever done a squat and noticed that your knee kind of collapsed into the midline rather than staying aligned and straight? That is hard on your knee. People with that technique error have a higher incidence of Patellofemoral Syndrome. If you can’t control your knee when you are standing still you are most likely not in control when you are running or jumping or stepping off of a curb either. If you do something incorrectly for about 30-60 minutes straight & 3-5 times per week, that can result in a LOT of misdirected force.

  • Women are more prone than men to patellofemoral injury: It is speculated that this is because of wider hips (so the knees more naturally bias inwards). Strengthening your outer hip muscles (such as the gluteus medius) can help prevent or correct the inward collapse of your knee.

  • Muscle imbalances: There are four separate parts to your quadriceps (the big muscles on the front of your thigh). If the outer muscle is stronger than the inner muscle (which is often is) then the patella gets tugged toward the strong side. This also can cause it to track improperly in its little groove.

  • Inappropriate footwear:  If you overpronate or have flat feet you could likely benefit from a shoe that has cushion and support rather than a minimalist shoe.

  • Being overweight: When you are going down stairs your knee experiences three times your body weight in forces and pressure. If you weigh 200lbs then each knee is taking 600lbs. The forces are even higher (4-5 times your body weight) when you squat to tie a shoelace or pick something up off of the floor.

  • An injury: Falling on your knee or dislocating a kneecap can increase chances of patellofemoral pain.

What Can I Do About It?

Because patellofemoral pain is multifactorial, there is generally not one simple answer that will give you a quick fix (bummer, I know). For this reason, I strongly suggest making an appointment with a physiotherapist so they can properly assess your personal situation. Treatment will involve the following:

  • Addressing your risk factors and will likely include strengthening your quads and your hips

  • Suggestions for altering your current training program will also be made

  • Tape may also be helpful to alleviate painful symptoms temporarily

FAQ: Is biking instead of running a good option?

The is by far the most common question I get from runners with knee pain who are looking to maintain their cardio and activity levels while they rehab their knees.

My answer? Maybe, but not necessarily.

I know that is an extremely vague answer but here is why. Although biking has less overall force going through your knees compared to running, it is still a repetitive activity that involves a lot of knee bending and straightening. If your seat is too low or too far forward this can make your knee bend too much with each revolution, putting unnecessary excess force through the knee. Also, having the gear of your bike too high can cause increased force through the knee. For some people it is a viable alternative to running while others find that biking is still too aggravating. It really needs to be assessed on a case-by-case basis.

For those who are curious this is how I ended up with my sore knees…

I popped both of my children (40lbs each) into a bike trailer and proceeded to ride for 20+km while hauling them behind me. It was my first time riding my bike in several months, my seat was too low, the load was too high, and the volume was too much. Should I have known better? Probably. Was it a fun day? Absolutely. Will I rehab my knees back up to running the distances I want and get back to squats with resistance? Of course! Will it take some time and patience……. Also yes.

Good luck running out there everybody!

As always, if you find yourself battling a running injury of any kind please call us at 778-630-8800 to make an appointment with one of our skilled physiotherapists so we can get you back on track as soon as possible.

The Rotator Cuff

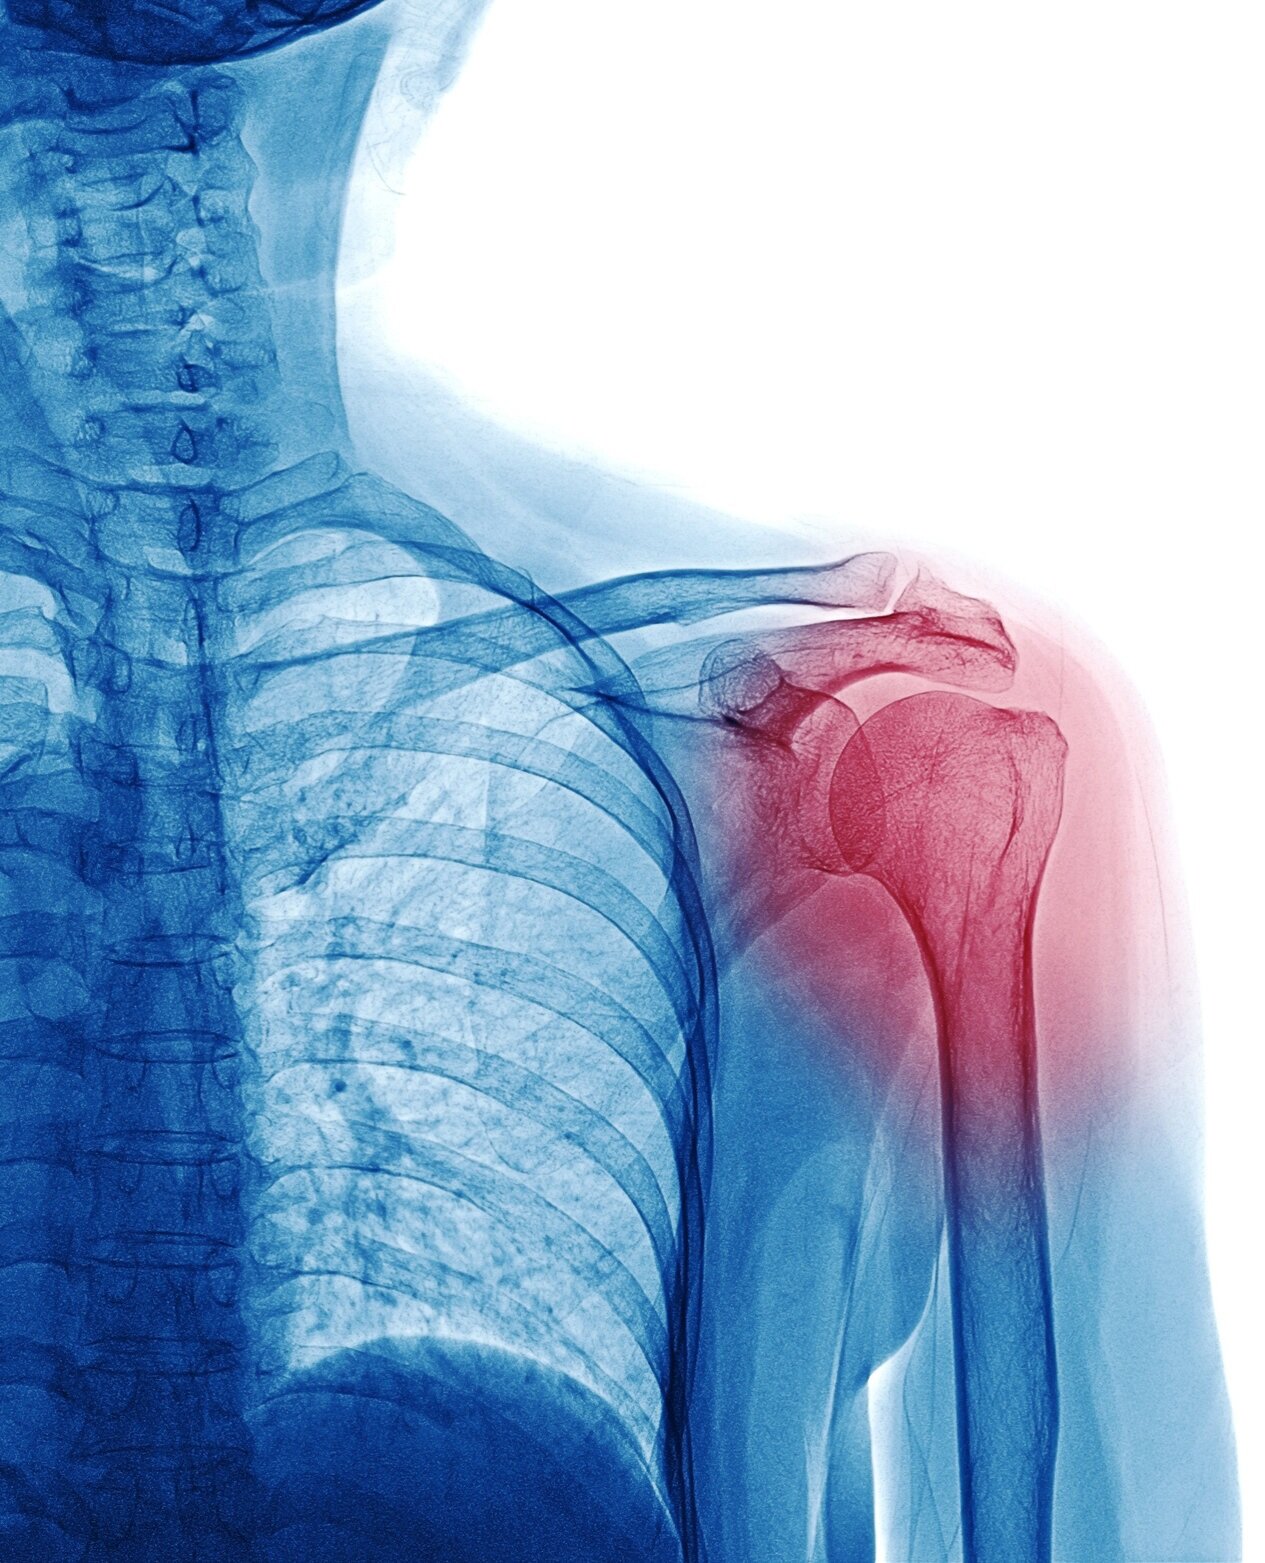
A few years ago, I took my then three year old daughter skiing for the first time. It was exhilarating! I held her between my legs as we swooshed down the hill, both of us giggling the whole way down. On the second run she wanted to try by herself, so I went a bit ahead to catch her. Down she comes and I grab her with my left arm, feeling a crunch and a bit of a snap in my shoulder as I did. Uh oh, I thought - did I just feel that? My shoulder was sore but we skied another run, had some celebratory hot chocolate and went home.

The next morning, I couldn’t lift my arm without intense pain. Washing my hair was next to impossible. It was agony. I knew I had damaged my rotator cuff and it was time to get to work.

What is the rotator cuff?

AdobeStock_160639002.jpeg

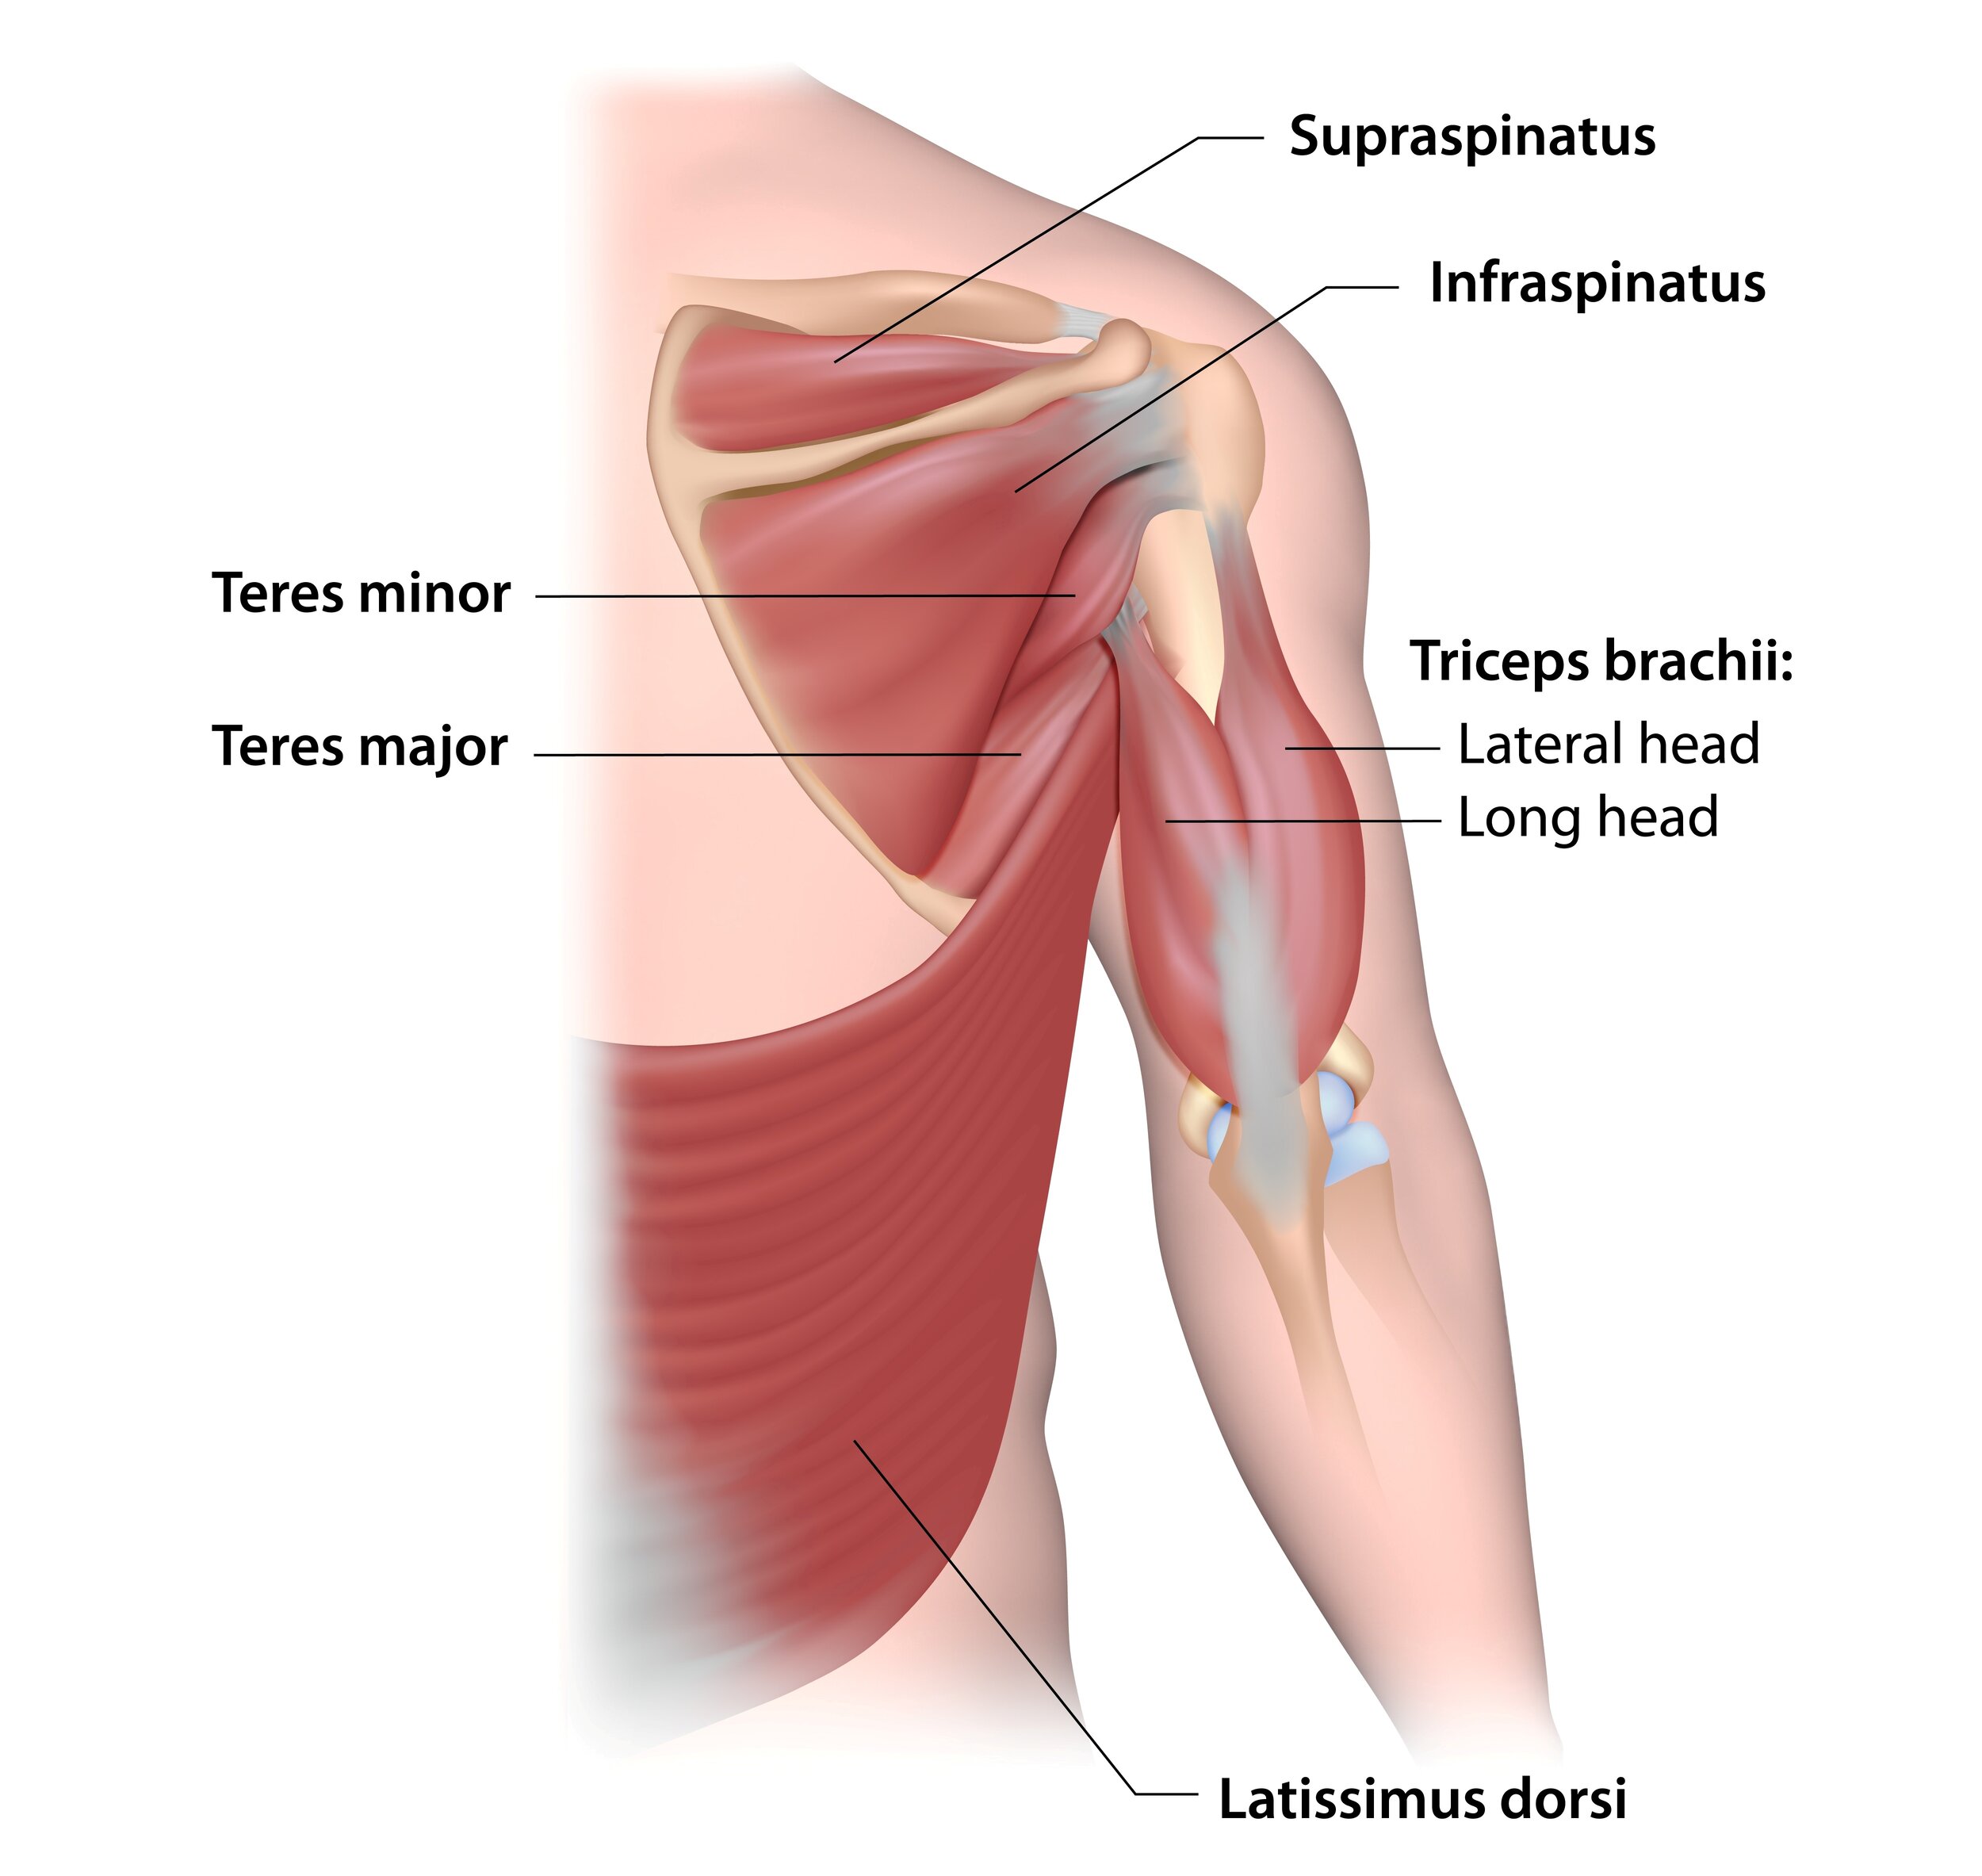
The rotator cuff is a group of 4 muscles - the supraspinatus, infraspinatus, Teres minor and subscapularis (not pictured - lives on the underside of the shoulder blade) - that attach the humerus (aka the upper arm bone) to the scapula (aka the shoulder blade). These muscles aren’t big - the supraspinatus is roughly as thick as my thumb! For the amount of work these muscles do, they certainly aren’t as beefy as you would think.

What does the rotator cuff do?

The rotator cuff has 4 main jobs:

  1. Supports the shoulder capsule - have you ever eaten chicken wings and noticed the white little nubbin that connects the bones? That, dear reader, is a capsule! A capsule surrounds every movable joint in your body, protecting it and making sure the synovial fluid (aka the lubricating fluid) greases those hinges, so to speak. The rotator cuff surrounds and helps support the shoulder capsule, giving it more structural integrity as the shoulder moves through its incredible range of movement.

  2. Keeps the shoulder in its socket - if you look at the bones of the shoulder and strip away everything else, it looks like a really big golf ball on a golf tee. The rotator cuff acts like bungee cords attaching that golf ball down to the tee - a few springs to help guide the shoulder to where it should be.

  3. Moves the shoulder - this is where the “rotator cuff” gets its name from: it rotates the shoulder! These four muscles are key to lifting your arm up to your side and getting your hand to reach up behind your head and your back. If you’ve ever had issues with your rotator cuff, you’ll know things like putting on deodorant, putting on a jacket or reaching for your seat belt in the car are particularly problematic.

  4. Fine tunes the shoulder movements - not only do these muscles move the shoulder but they also act to smooth and fine tune movements. Think of when you’re reaching for that glass of wine - you want your movements to be as smooth and accurate as possible. Your rotator cuff is one reason for your successful wine grab!

How do you injure your rotator cuff?

AdobeStock_200284683.jpg

There are two main ways people injure their rotator cuffs:

  1. Overuse and repetitive strain - anyone who uses their shoulders a lot, especially with overhead movements, are susceptible to rotator cuff strains. Baseball players, electricians, carpenters and hair stylists are perfect examples of people who often have their arms up and aggravate their shoulders over time.

  2. Acute strain - this is just like my story above. It may be your dog pulling unexpectedly on their leash or your toddler jumping into your arms when you weren’t quite expecting them to jump.

Once it’s injured, how do you fix it?

There are two main keys to shoulder rehabilitation:

  1. Posture - posture is key to shoulder health. Remember that the rotator cuff muscles attach the shoulder blade to the humerus. When someone sits with rounded shoulders, their shoulder blades sit further away from their spine and at more of an angle. This means the humerus sits more forward in the socket and puts the rotator cuff muscles in a disadvantageous position - they have to work a lot harder to function. Over time, this leads to degradation of the rotator cuff. When you have proper posture, your shoulder blades are much more likely to sit back where they should, allowing your rotator cuff to work properly.

  2. Strength - this is key to everything, isn’t it? For your rotator cuff to be working, it needs to be strong. But it’s just not the rotator cuff, it’s everything else that interacts with the shoulder - rhomboids, traps, lats, biceps, triceps, I could go on! - as well as everything that’s involved with posture. That. Is. A. Lot. And while it can seem overwhelming, that’s where we as physiotherapists come in. This is where we guide you on what to do and when, with how much weight and when you can move on to harder things.

For more information on rotator cuff rehabilitation, check out Physio-Pedia’s page on the rotator cuff.

AdobeStock_265616407.jpeg

Shoulders are dynamic - they have a huge range of movement and we use them all day. When pain sets in, it can often feel like they will never get better. But with a proper assessment, we can figure out why your shoulder is hurting, get to the source of the problem and do something about it.

If you would like to have one of our therapists look at your shoulder - or anything else! - give us a call at (778) 630-8800 or email us at clinic@ladnervillagephysio.com.

How Do We Learn? Neuroplasticity, Of Course!

One of the biggest myths about physiotherapy is we only work on bodies. It’s true, we do that a lot! We use manual therapy, soft tissue massage, modalities like LASER, ultrasound and dry needling (aka IMS - intramuscular stimulation) - all to help your body heal and perform at its best. However, the most important thing we do is prescribe exercises. Why?

The number one thing we are trying to change is your brain.

Wire+brain.jpg

Whenever we learn a new skill, be it playing a guitar or performing the perfect squat, we need to start with activating the right muscles in the right sequence to get the right outcome. And that, dear reader, doesn’t happen at the muscle level - that all starts from the brain.

So what is this brain change we speak of? How does it work? More importantly, how do we make it work for us?

Neuroplasticity is the brain’s ability to change. This change can be harnessed for good (that guitar chord progression is amazing!) or evil (stop leaning over to pick up that box - squat it out!!).

As a physiotherapist, we harness the power of the brain’s ability to change itself through specific exercises. If I want you to improve the range of motion of your shoulder, I’m going to give you exercises that force your brain to engage a specific muscle and build on top of that. Those silly movements we ask you to do? There’s a method to the madness, we swear!

So what makes for good neuroplastic change? Kleim and Jones wrote THE paper on neuroplasticity back in 2008. This became the guidebook with how we influence neuroplasticity for the forces of good. Here are their ten principles and how we relate this to our exercises:

  1. Use It or Lose It - want to still be able to squat in 20 years? Squat now. Your brain is very good at eliminating circuits that aren’t being used. If you want to keep a skill at a certain level, you need to practice it regularly.

  2. Use It and Improve It - when you practice a task, your brain becomes more efficient at that specific task. It strengthens the neurons and their synapses, prunes off the inefficient pathways and creates a faster circuit.

  3. Specificity - if the goal is to improve your golf swing, working on your tennis form isn’t the best way to do it. Sure, some of the muscles used are the same and you’ll see a cross training effect. But to get the best results for your golf game, we need to focus on your golf swing - break down those movements, improve them and put it all back together.

  4. Repetition Matters - how many times does an baby fall before they master the art of walking? Almost 14,000 times! (Thanks, Dr. Lara Boyd, for that nugget - I’ve been keeping that number in my head for 10 years!) Keep this is mind if you’re getting frustrated - “brains are stubborn, but so am I”.

  5. Intensity Matters - when you’re working out or practicing a new skill, work hard and make it count. Sweat! Fail! Make it hard! The more you push it - either physically or mentally - the faster you’ll see change.

  6. Time Matters - we know we get faster neuroplastic change if we start rehabilitation shortly after an injury. The sooner we start, the better.

  7. Salience Matters - you need to care about what you’re doing to get change! You know that adage, “You can’t make a person change”? It’s true for the brain, too! If the person doesn’t care, they will not see neuroplastic change. This is why we ask you what you love to do - we need to make sure the exercises we are prescribing relate to something that matters to you and helps you get to your end goal. Otherwise, what’s the point?

  8. Age Matters - younger brains are better at neuroplastic change. We used to think younger brains were the ONLY brains that could change, but research has blown that out of the water. Older brains change, too - here is no age limit to neuroplasticity!

  9. Transference - this is the cross training effect. Let’s go back to the golf/tennis example. Both games demand good shoulder control, a strong core and good hand/eye coordination. If we focus only on your golf game, your tennis game will improve a bit as well.

  10. Interference - I’ll use a personal example with this one. I have spent so much time playing ultimate frisbee that I cannot play tennis without flicking the tennis racket. I can’t do it! My wrist just flicks every time I hit the ball. The neuroplastic change I have developed to throw a frisbee has interfered with my ability to hit a tennis ball properly. I could put in the effort to induce enough neuroplastic change and separate these circuits if I wanted to, but it’s not salient for me (see what I did there?).

Want to have more neuroplasticity in your life? There are two things you can do to make your brain more efficient at neuroplasticity: aerobic and mental exercise. Both have shown to increase the brain’s ability to adapt and change. All the more reason to get out for that bike ride and rock that crossword puzzle!

As always, if you’d like to see one of our physiotherapists, give us a call at (778) 630-8800, email us at clinic@ladnervillagephysio.com or book online.

Happy learning!

Have An Empty Wine Bottle Lying Around?

So I know we’re all in the same boat here. We’ve been staying home for over a month, which has probably included a lot of vegging out, binge-watching old movies, and baking more cookies than we could ever eat. We think about working out but gyms are closed, and it’s just so hard to get motivated for a home workout. Then you check your phone and see Nicole’s blog telling you it’s time to start strength training. What to do??

Don’t worry, I am here to help! All you need is one wine bottle (and don’t tell me you haven’t consumed at least ONE bottle of wine!). Fun fact: an average empty wine bottle weighs about 2.5lbs – personally my preferred dumbbell! Got your wine bottle? Let’s get started!

Here are 5 exercises that YOU can do AT HOME with just one empty WINE BOTTLE! This is a full body workout and has both easier and harder variations so no matter where you’re at in your fitness journey, this workout is for you!

Exercise #1: Triceps Curls in a Bridge

DSC04938.JPG

Lie on your back with your knees bent. Lift your hips up into a bridge position. Bring your arms up so that they are directly over your shoulders with the wine bottle held horizontally between both hands. Bend your elbows so that the wine bottle goes towards your head – but don’t let it hit your head!

Easier variation: Take out the bridge and just do the triceps curls!

Harder variation: Make it a single leg bridge!

Exercise #2: Biceps Curls in a Wall Sit

DSC04965.JPG

Position yourself with your back to the wall like you are sitting in a chair, knees bent to around 90 degrees. Grab the wine bottle with both hands and bend and straighten your arms while keeping the elbows tucked at your side.

Easier variation: Take out the wall sit and just do the biceps curls! Or drop that wine bottle! (gently)

Harder variation: Extend out one leg at a time!

Exercise #3: Side Plank Star

DSC04941.JPG

Get into a side plank, on your forearms or on your hands, you pick…just make sure you’re engaging all of those lovely shoulder muscles so your shoulder is not collapsing down! Grab that wine bottle and hold it up in the air.

DSC04943.JPG

Easier variation: Plank on your knees, drop that wine bottle and put your hand on your waist!

Harder variation: Wrap the wine bottle under your body and back up into the air (just like the picture on the right)!

Exercise #4: Wine Weighted Lunges

DSC04948.JPG

Grab that wine bottle with both hands and lunge one foot forward, dropping the back leg down so that your knee is bent to around 90 degrees. Step back and do the other side.

DSC04950.JPG

Easier variation: Drop the wine bottle. You can even use your free hands to now hold on to a chair for support!

Harder variation: Add a rotation with the wine bottle towards the side of the lunging foot with each lunge. Pulse it out at the bottom of the lunge. Do some walking lunges. So many options!

Exercise #5: Wine Weighted Side Stepping Squats

DSC04966.JPG

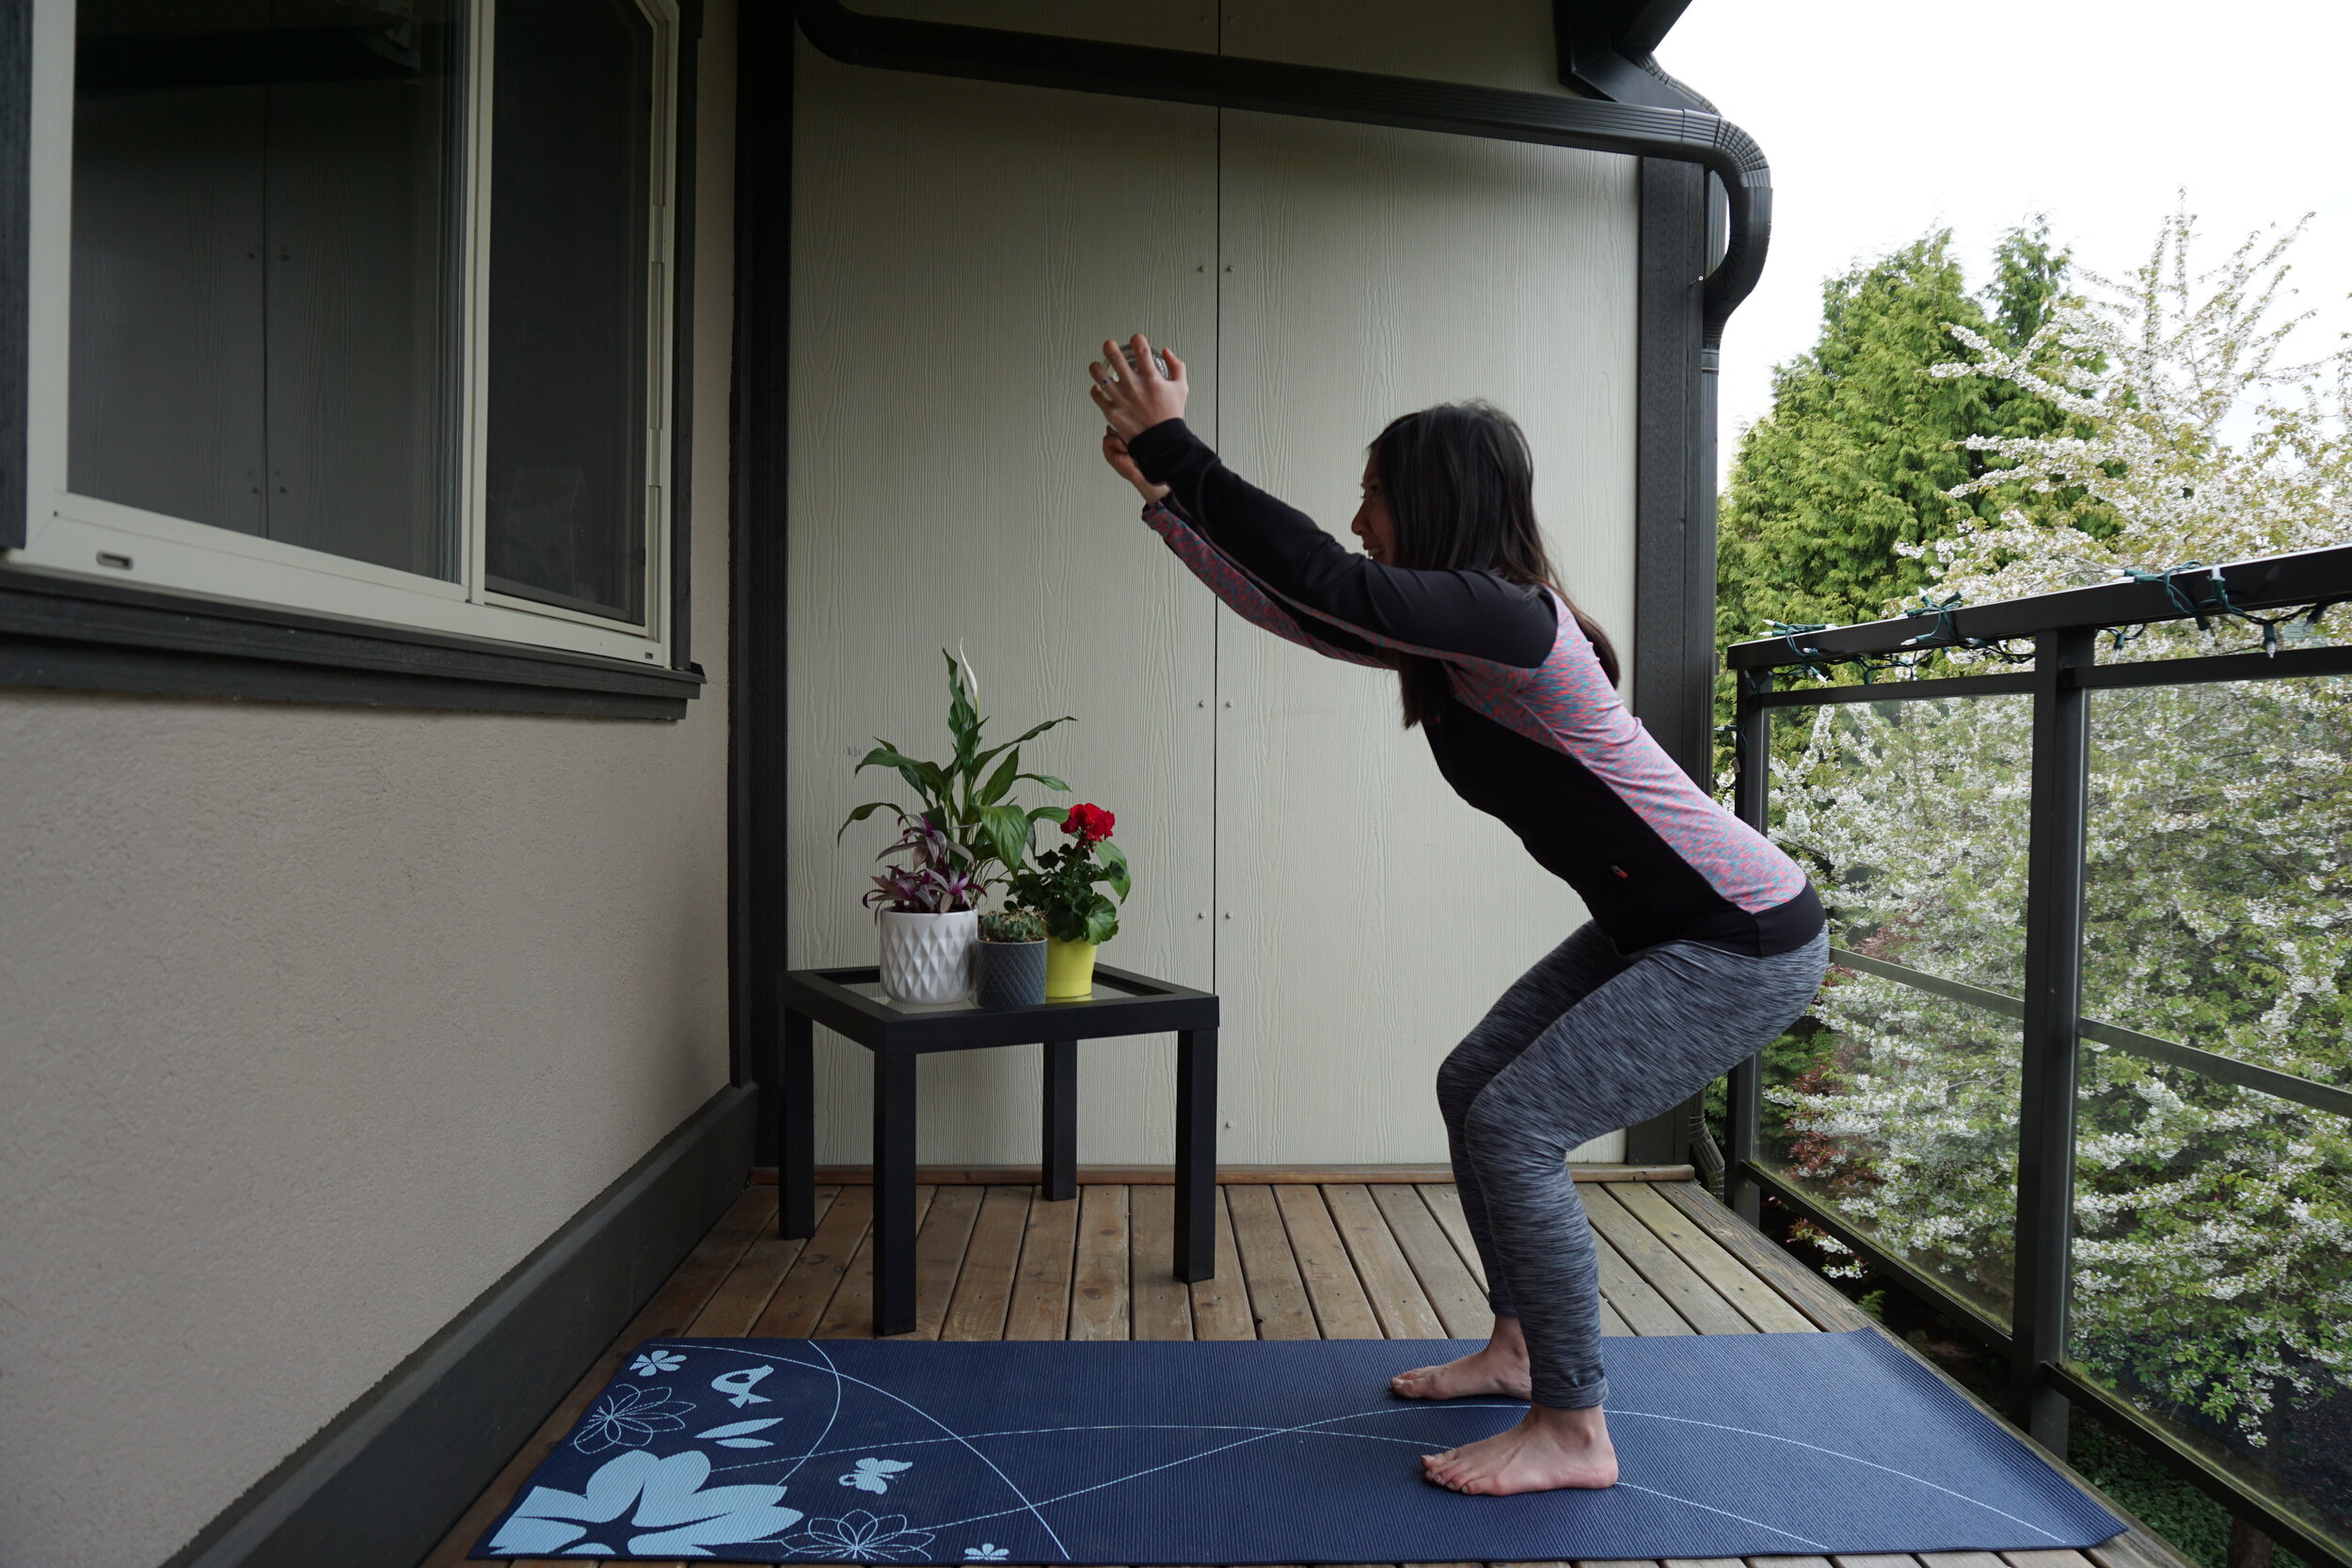
Grab the wine bottle and get into your best squat – you got it, able to see and wiggle your toes! Now step to the side while staying in your squat. Don’t forget to change directions!

DSC04968.JPG

Easier variation: Just squat, forget about the side steps. Do mini squats if you don’t want to get down low.

Harder variation: Add in some overhead presses with the wine bottle as you side step!


Want to make this a full blown, 30-minute total body workout? Just do each of the above exercises for 1 minute and take a 1 minute break after exercise #5…Then repeat 5 times!

For those of you looking for a bonus challenge…Do this workout with a FULL wine bottle, and then pour some out to celebrate when your 30 minutes is over.

As always, to book an (online!) appointment, give us a call at (778) 630-8800, email us or visit us at ladnervillagephysio.com.

I don’t know what you’re waiting for – happy workout! 

Injury Prevention in Running - Part 3: Strength Training

Nicole.jpg

Nicole Coffey, one of the owners of Ladner Village Physiotherapy, is a life long runner with several half marathons under her belt. This blog is the final instalment in a three part series on common running injuries and how to prevent them. Enjoy!

The sun is shining, the grass is green, and it’s a great day for a run!

The gyms are closed and options for exercise are more limited these days. As a result, more and more people have been lacing up and pounding the pavement, which is awesome if you ask me. But (and there is always a but) the cold hard truth is that running comes with a 50% injury rate. My last few blogs (Part 1 and Part 2) have covered some common misconceptions people have about preventing running injuries as well as some of the most common training errors I see in my clients who are injured (see below for a quick review). Let’s now focus on what you CAN do to prevent running injuries.

Do you remember being in high school and the teacher would say “this will be on the test- if you only remember one thing, remember this.” Well, dear reader, this is the take home message. There IS something you can do. It’s not a nutritional supplement that magically makes you bigger/faster/stronger (but if you ever find one of those let me know okay?). It’s not stretching for 20 minutes per day (even though you’ll be extra flexible), and it’s not buying a fancy new treadmill or a new running outfit (although those do sound snazzy).

The answer is strength training!

Canva - Woman Doing Exercises.jpg

Many runners I know avoid the gym at all costs. They worry they’ll get too bulky and heavy and it will slow them down, or they think if they go into the gym they will hurt themselves and it will negatively impact their running. But this is not what the research shows. The research shows that strength training is one of the best things you can do to increase running performance and decrease running injuries. For maximum benefit and impact on running strength training should account for 20% of your training.  

Strength training has several benefits for runners:

  1. Increased running economy

  2. Increased running power output

  3. Prolonged point of exhaustion

  4. Reduced risk of overuse injuries

What kind of strengthening should you be doing?

  • Lift heavy weights. That means doing exercises such as squats, calf raises, farmer’s carry and deadlifts at 60-80% of your maximum effort will give you more benefit than doing more reps at lower weights.

  • Plyometrics and other explosive exercises such as lunges, jumping and hopping.

How often should you strength train?

One or twice per week is good. Because the strength training is done at such high load and intensity you only need to do it twice per week during your “off season” or “training season.” When in “race season” strength can be well maintained with only one session per week as long as the intensity is correct (in addition to your running of course).

What else do I need to know?

  • Don’t go nuts. Technique here is still critically important. If you have never done weighted resistance exercise before you need to learn proper technique before you start loading up the barbells. If you don’t know how to do these exercises get someone who is qualified to teach you. Youtube is not your friend here.

  • Be ready. This is also assuming you don’t already have a pre-existing injury. If you do, get help with it and rehab correctly before implementing new aspects to your training program.

Lifting heavy loads and doing explosive exercises can help increase muscular strength, making you a stronger and more efficient runner with less chance of overuse injury.


“Uhhhhh You’re forgetting something Nicole, I can’t go to the gym right now because of a little thing called COVID-19.”

AdobeStock_116318475.jpeg

I know that right now you don’t have access to a full gym and weight rack right now, BUT exercises like:

  • single leg jumping

  • hopping

  • lunges

require no extra equipment and can definitely be incorporated into your routine at home right now. Once restrictions have been lifted we can all get back to the gym.


Looking for the other instalments? Check out Part 1 - Running Volume and Part 2 - Footstrike! Here’s what we have learned so far:

Common Mistakes:

  1. Increasing volume too quickly, resulting in overuse injury

  2. Putting too much emphasis on stretching, which does not reduce overuse injury rates

  3. Trying to make yourself a “mid-foot striker” when you are naturally a “heel-striker”

What Can You Do To Decrease Injury:

  1. Increase volume by no more than 10% per week (includes distance AND intensity)

  2. Increase cadence by no more than 10% (aim for 160-180 steps per minute)

  3. Re-allocate some of the time you spend stretching and focus on strengthening instead.

Happy running everybody - enjoy the sunshine! 

As always, if you have an injury that you would like assessed or if you need assistance with technique please call our clinic at (778) 630-8800 and we will be happy to help! 


References:

  1. Beattie, K., Kenny, I. C., Lyons, M., & Carson, B. P. (2014). The effect of strength training on performance in endurance athletes. Sports Medicine, 44(6), 845-865

  2. Berryman, N., Mujika, I. Strength Training for Middle – and Long-distance Performance: A Meta-Analysis in International Journal of Sports Physiologiy and Performance. 2017:13: 57-64

  3. Blagrove RC, Howatson G, Hayes PR Effects of Strength Training on the Physiological Determinants of Middle- and Long-Distance Running Performance: A Systematic Review. Sports Med. 2018 May;48(5):1117-1149. doi: 10.1007/s40279-017-0835-7.

  4. Lauersen J, Bertelsen DM, Andersen LB (2014) The effectiveness of exercise interventions to prevent sports injuries: a systematic review and meta-analysis of randomised controlled trials British Journal of Sports Medicine 2014;48:871-877

  5. Mikkola J, Vesterinen V, Taipale R, Capostagno B, Häkkinen K, Nummela A (2011) Effect of resistance training regimens on treadmill running and neuromuscular performance in recreational endurance runners, Journal of Sports Sciences, 29:13, 1359-1371

Ergonomics: The At Home Edition

Canva - Mother and Kid Typing on a Laptop.jpg

So you’ve found yourself working from home all of a sudden. Kids are underfoot, you don’t have a proper office or even a desk to claim for yourself and the online video meetings seem to be endless. Chances are, you’ve had to improvise. Maybe you’ve been waking up, staying in your PJs, and curling up in bed with your laptop. Or maybe you find yourself sitting cross legged on the couch, laptop down on the coffee table.

I saw an article recently compiling “unglamourous” photos of people’s at home workstations. There were photos of people balancing their laptops on recycling bins, using ironing boards in their bathrooms – there are definitely some very creative people out there. This may have all been fine for the first couple of days, but now that it’s been a few weeks, I’m guessing you’ve probably started noticing some new aches and pains that only seem to appear after a day working from home. Is your neck starting to throb? Low back feeling angry?

Canva - Woman Sitting On the Floor Using Laptop.jpg

The good news is, that doesn’t have to be your new reality! And no, you don’t need to order the fanciest ergonomic chair, or that automatic sit-stand desk! The great news is that even if you don’t have access to a desk at all, there are simple ways that you can make your own ergonomic work station at home, using things you probably already own!

Why Is An Ergonomic Set Up So Important?

Let’s start by quickly reviewing why an ergonomic set up is important at all. You’ve probably already noticed that your body doesn’t react well to sitting cross legged with your body hunched over, neck curled down while you work on your laptop for 5 hours. But why is that?

First of all, our bodies were not designed to be in any one static posture for hours on end, so even if you are in a so-called “perfect ergonomic set up” it is still very important that you change your position and take moving breaks regularly. But when we are in a prolonged poor posture, the effects are worsened as some muscles remain in a shortened position while others are overly stretched. Therefore, we want to remain in a relatively neutral position. (For more information, check out our previous blog on the physics behind ergonomics.)

How do you do that? Focus on these three things:

  1. Screen Height: The top line of your screen should be just around eye level or slightly below and within arm’s reach so that your neck can remain in a neutral position rather than constantly looking down or craning forward. If you don’t have an external monitor you can adjust, you can stack books under your laptop or monitor until you attain the correct height. Don’t have a ton of books? You could use an upside down laundry hamper, tupperware, shoe boxes, old boardgames - the options are endless!

  2. Keyboard and Mouse: If you are using a laptop, the keyboard height may now be too high for your wrists/arms. This is where getting an external keyboard and mouse can be so pivotal. While external monitors are often quite pricey, an affordable keyboard and mouse are much easier to find. You can now set up the keyboard and mouse in a way that your wrists are not curled up or down, with your elbow bent at around 90-100 degrees by your side, and arms supported. The position of your keyboard/mouse should also be close enough to you that you are not having to reach to use them.

  3. Chair Set Up: If you’re going to be sitting, you want your hips and knees to be bent to around 100-120 degrees, with your feet supported – no dangling feet! Find a box, books, anything that can support your feet while maintaining a height that will allow the above set up to happen. You can also use a rolled up towel or small cushion to support your lower back, and maintain your natural lumbar curve.

Change Your Position Frequently

So now that you know the basics of how to set up your work station ergonomically, you can change it up, while maintaining the essentials. This is important as the best posture is a changing posture. This means you can stand or walk on the spot while working, while maintaining all of the above elements. And if you don’t want to have to keep adjusting your work station, take short but frequent stretch breaks (every 30 minutes or so). Get up and do a quick lap of your room, move your neck, do a few lunges.

Some Big No-Nos

  • Clutter: If there’s a lot of clutter under your work area, there won’t be any space for your legs and feet to sit comfortably. If there’s a lot of clutter around your work area, you’ll be constantly reaching over things to get to what you need, resulting in unnecessary repetitive strain. Place what you need close by, and remove what you don’t need.

  • Poor Lighting: Glare, or light reflected off of your work surfaces into your eyes, can be not only irritating, but can also result in more aches and pains if you end up in a poor posture trying to avoid the glare, or leaning to see your work better. To avoid this, position yourself so that you are either sitting beside or parallel to the window, and between lights in your room. If you have overhead lighting, make sure your screen is at a right angle to the work surface.

Canva - Flat Lay Photography of Laptop Beside Yellow Flower Arrangement.jpg

And there you have it - easy and simple ways you can make working from home way easier on your body. And most importantly...don’t forget to keep moving! Check out our blog on fun ways you can keep moving while in quarantine.

Looking for some individualized tips to tweak your own at home workstation? We are here for you! Book online, email us at clinic@ladnervillagephysio.com or call us at (778) 630-8800.


RESOURCE LINKS:

1. WorkSafeBC [Internet]. Worksafebc.com. 2018 [cited 7 April 2020]. Available from: https://www.worksafebc.com/en/resources/health-safety/books-guides/how-to-make-your-computer-workstation-fit-you?lang=en&origin=s&returnurl=https%3A%2F%2Fwww.worksafebc.com%2Fen%2Fforms-resources%23q%3Dcomputer%2520workstation%26sort%3Drelevancy

2. Office Ergonomics: Practical solutions for a safer workplace [Internet]. Lni.wa.gov. 1995 [cited 7 April 2020]. Available from: https://www.lni.wa.gov/IPUB/417-133-000.pdf

Stretching!

Untitled design (10).png

Ahhhhhh stretching. I’m not going to lie, it’s not my favourite thing. I used to brush off my lack of flexibility with a light-hearted “sorry, I don’t bend that way” until one day a client totally called me on it! We were talking about yoga and I was saying that I preferred running and the gym because “I don’t bend that way.” And she said “saying you’re too inflexible for yoga is like saying you are too dirty for a bath. The worse you are the more you need it!” And…. I think she was absolutely right. I actually might have given her a high five.

Touché dear client, touché.

Since then I have definitely incorporated more stretching into my fitness routine. But here is the thing, it’s important to know why you are stretching. What is the goal? Are you aiming for more range? Trying to avoid injury? Trying to warm up or cool down?

A lot of people view stretching as the magical answer to preventing and healing all injuries but this simply isn’t true.

There are a lot of different categories of stretching including static, dynamic, and pre-contraction stretching (more commonly known as PNF). What I have written below applies to good old-fashioned active static stretching (meaning you are doing the stretching to yourself, not someone doing it for you).

Stretching increases blood flow to muscles, can be psychologically relaxing and increases flexibility.  That new-found flexibility has it’s own set of benefits including improved performance in physical activities and decreased risk of injury for certain activities.

Should everyone just start stretching everything right now???? Not necessarily. Again, you have to remember the goal. Below I have given a few examples to outline situations when stretching is great vs some times when it is not-so-great. These obviously are not extensive lists but I just wanted to give you an idea about some things that we as physiotherapists are thinking about before we give you a stretch.

When Is Stretching Is Not Helpful?

  • If someone is hypermobile (eg. they have too much “wiggle room” in their joints) then stretching can be detrimental because they are adding even more range of motion to a joint that already moves too much! This will increase risk of injury. (A super quick screening test to tell if someone is hypermobile is to look at the Beighton Score.)

  • Stretching won’t prevent an overuse injury. This is a common misconception and not supported in the research.

When Is Stretching Great?

Untitled design (11).png
  • People who sit at a desk all day often experience muscle shortening (hamstrings, hip flexors and pectorals are major culprits). Then when these people try to be active, they have increased risk of injury because their muscles are too tight to allow full range of motion. In this instance stretching muscles can help maintain their natural length, avoid shortening, and possibly avoid an injury.

  • For jumpers. Volleyball, basketball, soccer and ultimate players - we’re looking to you! During a jump the tendon and muscle are stretched as they land to absorb energy. That energy is then needed as they recoil to rebound and jump back into the air (think of a giant elastic being stretched then snapping back). If their tendon is lacking length that jumper is at higher risk of hurting themselves as they land and take off repeatedly.

  • In general, most stretching is safe as long as it is done with proper form and technique.

If you are going to stretch, here are some things to consider:

  • Don’t stretch cold muscles. Doing an intense stretch on cold muscles can increase your risk of injury. A brisk 5-10 minute walk could be your warm up, or something similar to the dynamic warm up (see below). Or you can do your stretches after your workout when your muscles are already nice and warm!

  • Hold it, don’t bounce. You should focus on a gentle, slow, sustained stretch of at least 30 seconds. Bouncing can harm your muscles.

  • Be gentle. I used to think that a stretch was only effective is my muscles felt like they were about to snap in half. But you catch more flies with honey and muscles are no exception. You should keep the intensity of your stretch at a 3/10, which is enough to feel some tension it but not enough for it to hurt. On this note, remember to breathe!

  • Use caution. If you have a pre-existing injury or a chronic ongoing issue, stretching might not be the answer. Maybe you need strength instead. Maybe you need to adjust your technique with the situation that is causing the injury. We can help you figure this part out!

  • Be consistent. Stretching is also similar to other types of exercise in the fact that consistency is key. Stretching two days per month will not affect your flexibility in the same way that running two days per month won’t help you with your cardio.

  • Stretching does not count as a warm up. A sustained static stretch (where you hold a certain position for >20 seconds) completed before a high-power activity such as sprinting decreases power output and increases injury risk. 

Instead of starting your workout with stretching, you should be doing a dynamic warm-up: swing your legs, do some squats, jog on the spot… move the limbs and joints you are about to move gently through their range of motion before beginning the more intense part of your exercise. Spending 5-10 minutes at the beginning of your workout warming up will help lower your risk of injury.

Looking for some guidance on your stretching routine with your aches and pains? We are here for you!

Book on online appointment - call us at (778) 630-8800, email us at clinic@ladnervillagephysio.com or book online.

Happy stretching!

Quarantined? Keep Moving!

If you’re anything like me, the world is an anxiety-producing place right now. Every company I have ever given my email to is sending me their COVID-19 updates. I understand why but it’s not helping my mind calm down.

There is a huge body of research showing how exercise helps with a whole assortment of mental health conditions. As gyms, pools and public spaces shut down, several companies are stepping up and offering their services online, often for free.

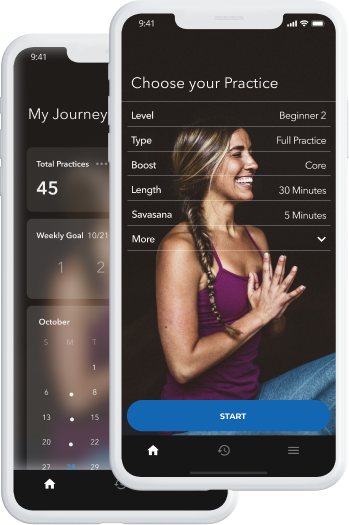
Down Dog owns a series of online apps, all of which they are providing for free during the COVID-19 outbreak, helping people to stay as healthy as they can in their own homes. You can find their apps on iOS or Android. Here’s what they do:

original-screenshot.png
  • Down Dog Yoga - yoga from home! You can chose your practice type (restorative, flow, hatha, gentle, etc), your level (Beginner 1 on up) and how long you want your practice to be.

  • Yoga For Beginners - completely useless at yoga? Try this one!

  • HIIT Workouts - for something more intense, try this one. Again, you can choose your level of difficulty, your focus (total body? arm workout or glutes?) and how long you want to go for. The best part? NO EQUIPMENT REQUIRED. Just turn it on and GO.

  • 7 Minute Workout - same idea as HIIT with a little bit less intensity. And hey, who can’t give 7 minutes a day for a little sweat?

  • Barre Workouts - are you caught up in the barre obsession? This is a great way to get at home! I’ll probably break this one out with my kids too - they’ll love practicing their ballerina moves. Once again, it’s the same idea - pick your focus and your time, then go for it!

The Washingtonian, an online publication out of the states, published a list of fitness studios offering their classes (some for free!) by online stream. Take a look and see what strikes your fancy. They’ll also be updating their list as the days go on.

One of my favourite meditation apps is Headspace, available on iOS and Android. In response to the outbreak, they have created a “Weathering the Storm” category with free meditations, sleep stories and more! If meditation is something you’ve been meaning to get into, now is definitely the time and Headspace is a great way to get started.

Finally, one of my favourite home exercises is an oldie but a goodie: Twister with my kids. The pretzels I twist myself into are certainly a good workout!

As of March 16, 2020, the biggest rule is social distancing. That leaves all kinds of things available for us - a lovely bike ride on the dyke! Walking among the tidal flats at Centennial Beach! Going for a jog in the gorgeous sunshine! Get outside for now and stay moving for the long haul.

Do you have a favourite website, app or idea for this outbreak? Let us know and we will add it to the list!


As always, if you’d like to book in with a physiotherapist, give us a shout at (778) 630-8800 or clinic@ladnervillagephysio.com. We are also now offering Telehealth services for those unable to come in person.

Injury Prevention in Running - Part 2: Foot Strike

Nicole Coffey, one of the owners of Ladner Village Physiotherapy, is a life long runner with several half marathons under her belt. This blog is the second instalment in a three part series on common running injuries and how to prevent them. Enjoy!

Light Blue and Grey Foods Plain Collage Instagram Post (1).png

In a continuation from my last blog, here are a few more commonly misunderstood running topics. Hopefully they save you some time and some pain. As always, if you have any questions about your specific running style or gait please feel free to contact the clinic for an assessment with one of our physiotherapists!

Heel Strike vs Midfoot or Forefoot Strike

This debate came to the forefront quite some time ago when the minimalist shoe fad hit town. And yes, it’s true that people with a heel strike have a higher chance of knee pain (1). BUT: those who have a mid-foot strike have an equal and proportionate risk of Achilles and calf injuries (2), so it’s one or the other, one is not superior.

The “evil heel-strike theory” was based on the concept that landing on your heel meant you were increasing your “braking force” as the ground reaction force pushed back at you (in the opposite direction that you were travelling) and therefore you would have to work harder to overcome that. Turns out that isn’t true!

There is no difference in the efficiency of running for a heel strike vs. a midfoot strike.

Also worth noting, if you happen to be a rear-foot striker and you try to change yourself to a mid-foot striker you increase your chance of injury to your calf and Achilles pain (3) So, run the way you run. The majority of people prefer a heel strike. A heel strike is not the devil it was once made out to be, and if you try to change your gait pattern you are probably doing yourself more of a disservice. Time to focus your energy on more helpful techniques.

Cadence 

This is one topic people don’t often think to ask me, but I feel like it’s worth noting. Should you pay attention to your cadence? My answer to this one is “yes, it couldn’t hurt.”

Cadence is the number of steps you take in one minute. An elite runner will run about 180 steps per minute, efficient recreational runners should aim for 160-170 steps per minute. Increasing cadence can indeed decrease some risk of knee pain.  This is because a slower cadence means you are taking longer steps, which means you are spending more time in the air and actually travel a little higher, which means you are landing harder and from a higher height.  This heavier landing puts extra strain and impact on your joints.  “Subtle increases in step rate can substantially reduce the loading to the hip and knee joints during running and may prove beneficial in the prevention and treatment of common running-related injuries.” (3).  

Also note that taking faster steps does not mean you have to run faster. You can still run a 6 minute mile or a 10 minute mile, the difference is if you are taking big huge long slow strides vs tiny quick little steps.

Calm brain fast feet” - I’m not sure where that saying is from but I really like it.

Once again, remember that any change must be implemented gradually. If you increase your cadence by more than 10% you decrease running efficiency, which means you are going to work harder and get tired more quickly, which is not the point.

Happy running everybody! Next up we will talk about the role of stretching and foam rolling for runners!


Looking for the other instalments? Check out Part 1 - Running Volume and Part 3 - Strength Training!


Injury Prevention in Running - Part 1: Running Volume

Nicole Coffey, one of the owners of Ladner Village Physiotherapy, is a life long runner with several half marathons under her belt. This blog is the first instalment in a three part series on common running injuries and how to prevent them. Enjoy!

I’m really glad I am finally writing about this as I’m sure all of you know, the injury rate when running is extremely high. As a matter of fact, 54% of people training for a marathon will report a lower extremity injury during their training or their race (1).  Another source says the reported injury rate can be up to 79.3% (2). And, if you’re curious, about half of those injuries will be knee injuries.

To me those statistics are very scary, but also completely accurate. I cannot think of a single runner that I know personally who has never suffered from a running related injury (myself included). Because of this, runners take prevention of future injuries quite seriously.  So today I would like to begin to go over some errors in training that can increase your risk of injury. In future blogs I am also going to discuss misconceptions that people have about reducing injury and shed some light on some beliefs that runners hold that are actually not true at all. If you’re spending the time training and trying to prevent injury the last thing I want is you unintentionally wasting your time, especially if that effort could be redirected to something else that actually might help you stay injury-free. So without further ado, let’s jump right in shall we?

The most important factor in avoiding injury is to avoid overloading yourself.  You must increase your volume slowly.

When used in terms of running, volume refers to the total amount of work you are doing (including the distance you are running and the intensity of that run). The first and most common mistake that I see is people increasing their volume too quickly.

Maybe they were on vacation and missed a few weeks of training so they decide to “cram” in a couple of extra runs to get back onto their training schedule, or maybe they want to run with a friend who runs 12km every weekend even though they haven’t done more than 5km in months but decide to go for it anyways. This time of year is so common for running injuries because people have renewed enthusiasm for fitness in the new year and suddenly decide they are going to run five times per week in order to shed a few pounds or get back into shape even though they have never run a day in their life.

Don’t get me wrong, I love that people love running. I love running too, but unfortunately all of the situations I listed above seem to end the same way. And that usually involves a client in my office feeling defeated and discouraged because of a running injury.

download.jpg

So here is the take home message for week 1: Slow and steady wins the race.

Running volume should not increase by more than 10% per week.

If you increase your volume too quickly (considered more than 15% per week), YOU CAN QUADRUPLE YOUR LIKELIHOOD OF INJURY (3). So I repeat, slow and steady wins the race. Give yourself enough time in your training that you won’t feel rushed and still be able to achieve your goal.

If you’re looking for some guidance for how to increase your volume without overdoing it, check out these resources:

  • For a straight forward list of what to do week by week, take a look at the SportMedBC InTraining program.

  • Interested in joining a local group? The Run Inn in Tsawwassen runs several fabulous groups aimed at all running abilities!

  • There are tonnes of apps for both iOS and Android. Two great ones are Couch to 5k and Couch to 10k, depending on your goal distance.

So there you go. Tip #1 is to avoid overloading. Gradual increases in speed and intensity will get you where you need to go. Be patient and trust the process. Happy running everybody!


Looking for the other instalments? Find Part 2 - Running Cadence and Foot Strike and Part 3 - Strength Training here!


Snow!

Untitled design (6).png

Snow!!! Maybe I’m alone in this but I really like snow - IF it is on a mountain and IF (and this is a big “if”) I have nowhere to go. Otherwise it’s a fairly large pain. And down here in South Delta I generally am pretty happy! We have plenty of snow up in the mountains that we can access any time we like for fun things like skiing or snowshoeing or what have you, but generally do not have to deal with the white stuff on a day to day basis down here the way the rest of Canada does (which involves shovelling and driving in the snow and is decidedly less fun). That being said, once in a while winter decides that even sunny South Delta gets some snow, and if the weather network is correct (another big “if”) then we have some snow coming our way in the next week.

But here is the thing - snow is not only a figurative pain, it can literally cause you pain or injury. Did you know that every year the average number of emergency room visits due to snow shovelling related injuries in the US is around 11,500!? Shovelling snow can cause back pain, shoulder pain, neck pain or even a heart attack. Not to mention a slip on the ice can result in anything from a bruised tailbone to a broken hip.  As a physiotherapist I would like to take it upon myself to hopefully prevent a few snow related injuries this week.

So without further ado I present to you:

Nicole’s Tips and Tricks for Dealing with Snow-Mageddon 2020 (South Delta Edition)

Shovelling Snow:

  • Pace yourself! It is significantly easier to shovel 2 inches of fluffy snow than 8 inches of hard packed snow. If it is going to be snowing all day do yourself a favour and get out there a few times. Not only does it spread the work out over time with rest breaks, but each session will involve less load and strain.

  • Push the snow!!! Don’t twist and lift, don’t throw it over your shoulder, just put your shovel on the ground, and walk forwards. When you get to the end of the line squat and use your legs instead of your back to lift the snow and place it in the pile. Your back will thank you for it.

  • Use a good shovel. If it is too short you will have to bend more. If it’s too heavy you’re increasing your workload. A shovel that is mid-chest height is a good bet.

  • Treat it like a workout. You’re going to be working hard in cold weather. A good warm up and cool down can help decrease chance of injury and post-workout muscle soreness. It doesn’t have to be fancy, a few arm swings, some marching on the spot, and off you go!

  • Ask for help if you need it. If you experience any pain or shortness of breath discontinue and seek medical help if needed. If you have concerns about your cardiac health consult with your doctor before shovelling or get someone else to do it for you. We live in a lovely neighbourhood and the guy next door is not going to mind helping you out.

 Walking on Snow and Ice:

I have already made a short post on this elsewhere but it is worth repeating. A normal upright walking pattern can put you at higher risk of your feet shooting out from underneath you when you are walking on a slippery surface. To decrease the chances of a nasty fall all you have to do is walk like a penguin! That means:

  • Lean slightly forward

  • Angle your feet slightly outwards

  • Take small almost shuffling steps

  • Keep your arms out at your sides (not in pockets)

  • Wear proper footwear (okay, penguins don’t wear shoes but you should)

So good luck everyone and stay safe out there! If you do happen to end up with an injury or two and would like a physiotherapy assessment please feel free to contact the clinic at (778) 630-8800 or through our website at https://ladnervillagephysio.com/

IMS - What's the Point?

IMG_2129.jpg

For those who follow us on Instagram and Facebook, you probably saw Nicole and I gleefully inflicting pain on each with needles. We were furthering our education with Level 2 of Kinetacore’s Functional Dry Needling (and using each other as pin cushions in the process). While we have been needling for awhile now, this course opened us up to new muscles we can treat. These include muscles in the jaw, thoracic spine, shoulder girdle, deep hip, back of the knee and foot. Overall, it was a great course and we are excited to integrate these new treatment options into our practice.

Why would we do this to ourselves? Why would we do this to you? These are great questions!

Intramuscular Stimulation, also known as IMS, uses acupuncture needles to get into those deep muscles that are hard to reach with our hands. Both Nicole and I practice Functional Dry Needling - our needles are solid (not hollow - we cannot inject anything!) and we are going after areas of the muscle that are impeding normal movement and function. (How do IMS and acupuncture differ? Check out this earlier blog post for that answer!)

IMG_2125.jpg

So what exactly does IMS do? The research behind IMS has been picking up steam in the last 20 years. Here are the main effects borne out in the research:

  1. Increases Blood Flow - several studies have shown increased blood flow in both the muscles directly treated and the other muscles with the same innervation.

  2. Restores Normal Muscle Length - one of the things that can happen with dysfunctional muscles is the become tight and short; we often refer to this as “increased tone”. IMS helps decrease the tone of these muscles back to normal levels.

  3. Decreases Spontaneous Electrical Activity - both nerves and muscles rely on electrical impulses to work properly. Sometimes the muscles and nerves fire off impulses spontaneously and inappropriately; this leads to impaired movement and function. IMS has been shown to reduce the number of spontaneous events in the muscle.

  4. Decreases Pain Chemicals in the Tissue - Substance P and CGRP, two nociceptive (aka pain) neuropeptides found in muscles, are reduced with IMS.

  5. Increases Capillaries in the Muscle - with repeated needling, we see an increase in the capillary density improving the circulation to the muscle.

  6. Changes in the Central Nervous System - the brain changes with repeated needling! Pain thresholds decrease, substance P reduces in the nerves and endorphin levels increase.

To sum it up: IMS works. It helps muscles work and move better. It reduces pain at the tissue level and in the brain. It improves circulation in both the short and long term.

Have we convinced you yet? If it’s something you’d like to try, give us a call at (778) 630-8800.


For more information on the science behind these claims, check out these research articles:

  • Ballyns JJ, Shah JP, Hammond J, Gebreab T, Gerber LH, Sikdar S. Objective sonographic measures for characterizing myofascial trigger points associated with cervical pain. J Ultrasound Med. 2011;30:1331-1340.

  • Bron C, et. al. Interrater reliability of palpation of myofascial trigger points in three shoulder muscles. J Manual an Manip Ther 2007;15(4):203-215.

  • Cagnie B, Barbe T, DeRidder E, Van Oosterwijck J, Cools A, Danneels L. The influence of dry needling of the trapezius muscle on muscle blood flow and oxygenation. J Manip Physiol Ther 2012;35(9)685-691.

  • Cagnie B, Dewitte V, Barbe T, Timmermans F, Delrue N, Meeus M. Physiologic effects of dry needling. Curr Pain Headache Rep 2013;17:348.

  • Chen JT, Chung KC, Hou CR, Kuan CR, Chen SM, Hong CZ: Inhibitory effect of dry needling on the spontaneous electrical activity recorded from myofascial trigger spots of rabbit skeletal muscle. Am J Phys Med Rehabil 2000;80:729 –735.

  • Chen QB, Basford JR, Thompson JM. Identification and quantification of myofascial taut bands with magnetic resonance elastograpy. Arch Phys Med Rehabil 2007; Dec(88):1658-1661.

  • Chou LW, Kao MJ, Lin JG. Probable mechanisms of needling therapies for myofascial pain control. Evid Based Complement Alternat Med. 2012;2012:705327

  • Cummings TM, White AR. Needling therapies in the management of myofascial trigger point pain: A systematic review. Arch Phys Med 2001;July(82): 986-992.

  • Federation of State Boards of Physical Therapy. Intramuscular manual therapy (dry needling)-Resource paper. March 2010.

  • Gerwin R: Myofascial pain syndrome: here we are, where must we go? Journal of Musculoskeletal Pain 2010;18(4):329-347.

  • Gunn C.C. (1996) The Gunn approach to the treatment of chronic pain: Intramuscular myofascial pain of radiculopathic origin. Churchill Livingstone.

  • Hsieh YL, Kao MJ, Kuan TS, Chen SM, Shen JT, Hong CZ. Dry needling to a key myofascial trigger point may reduce the irritability of satellite myofascial trigger points. Am J Phys Med Rehabil 2007;86:397-403.

  • Jimbo S, Atsuta Y, Kobayashi T, Matsuno T. Effects of dry needling at tender points for neck pain (Japanese katakori): near infrared spectroscopy for monitoring muscular oxygenation of the trapezius. J Orthop Sci 2008;13:101-106.

  • Mense S: How do muscle lesions such as latent and active trigger points influence central nociceptive neurons? Journal of Musculoskeletal Pain 2010;18(4):348-353.

  • Niddam DM: Brain Manifestation and modulation of pain from myofascial trigger points. Current Pain & Headache Reports 2009, 13:370–375.

  • Sikdar S, Shah JP, Gebreab T, et al. Novel applications of ultrasound technology to visualize and characterize myofascial trigger points and surrounding soft tissue. Arch Phys Med Rehabil 2009;90:1829-38.

  • Srbely JZ, Dickey JP, Lee D, Lowerison M: Dry needle stimulation of myofascial trigger points evokes segmental anti-nociceptive effects. J Rehabil Med 2010; 42: 463–468.

  • Tsai CT, Hseih LF, Kuan TS, Kao MJ, Chou LW, Hong CZ. Remote evvects of dry needling on the irritability of the myofascial trigger point in the upper trapezius muscle. Am J Phys Med Rehabil 2010;89:133- 140

Chronic Pain

Want to know what truly fascinates me? Chronic pain. There are lots of definitions for chronic pain, but most sources agree on this one:

Pain that is persistent and lasts longer than 12 weeks can be classified as chronic pain. 

With most injuries (let’s say a sprained ankle) you injure yourself (tissue damage). There is an inflammatory reaction (your foot becomes swollen and looks like a balloon with toes sticking out) and you probably feel some pain with certain movements (if you try to run or jump). But body is on the ball and starts working to heal the tissue injury (building scar tissue). You find that slowly but surely your range of motion and activity tolerance improve, the pain and swelling dissipate and you’re back to playing soccer in 6-8 weeks. Yay!

Pain.png

But what if the pain doesn’t go away? What if the tissue is healed but you still feel pain? What if the pain you feel is way out of proportion to the severity of the injury? What if the pain is still there six months later? What if you still can’t put weight on that foot, it hurts to touch it gently and you can’t stand putting a shoe on because it feels like too much pressure?

This is the realm of chronic pain and it can have major implications on physical and mental well being. People start to get told “it’s in your head” and “suck it up” and “it should be better by now”. The reality is that we are only just starting to understand the complexity of chronic pain.

There is no “set” pain response.

A certain injury does not cause a pre-calculated level of pain. Everyone’s experience of pain, even with similar injuries, vary greatly.

How we act and react can depend on many factors such as stress and the “threat level” of the injury.

We have lots of receptors throughout our body (in our skin, joints, etc) that recognize lots of different things such as sharp vs dull, hot vs cold, light vs firm pressure, etc. When that input is noxious (irritating or damaging) those signals are sent by nociceptors. When enough of these signals get sent to the brain all at once the brain interprets them and decides how to act.

Some different scenarios for you: maybe your brain feels like something tickles and so it sends a signal to you that you should squirm, maybe you are getting a massage and it “hurts so good” but you decide to keep still even though it’s not comfortable, or maybe you stepped on a a nail and your brain decides that the situation is dangerous and immediately moves your foot away from the nail. In each instance, your brain got a nociceptive input but decided to react in different ways depending on the situation. That interpretation of danger and threat level is important and helps determine how you feel about the input you are experiencing.

How you perceive your injury and how it impacts your life has a huge role in how you feel pain.

A classic example is a paper cut. It is small, it is mighty, and it is a total pain (pun intended) for everyone. But who do you think will feel more threatened from that paper cut - a violinist who has a concert tonight or to a soccer player who has a game next weekend? If I was a betting woman (I’m not but let’s pretend) I would guess the violinist will panic - “oh my gosh can I play? Will I have to miss the concert? Is everything ruined?” - and that paper cut will probably throb all day long. Switch to the soccer player who probably thinks “Yup, that sucks, but as long as I’m careful reaching into my soccer bag I’ll probably be fine” and then goes on with his day and forgets about the paper cut. Those two people had very different reactions to the same injury.

The amount of tissue damage cannot predict the amount of pain experienced.

I know this seems strange. If you have pain you assume it’s because something is injured right this very moment, but in chronic pain this is not always the case.

Let’s start with amputees who have phantom limb pain. If someone’s foot is gone it’s impractical to think that they can have an itch on their big toe or an ache in their ankle because there is literally no remaining tissue, so how could it be damaged and send signals to the brain if there is nothing there to be damaged? And yet there are many reports of amputees feeling pain in their lost limb.  On the other extreme, some people have severe life threatening injuries and feel no pain at all. Soldiers with gunshot wounds will sometimes report not realizing they were hit until after the situation calmed down. Their body was so busy in survival mode that it didn’t have time to stop and worry about a major wound.

This also happens with knee arthritis. Some people have “brutal” X-rays that show severe knee degeneration but report only minor stiffness in the morning and no impact on their daily function. These folks can still walk, garden, etc. Other people report debilitating pain that stops them from doing simple daily tasks such as standing and walking for more than a few minutes at a time but their x-rays show only mild degeneration. We cannot rely on X-rays or MRI’s as a way to determine how much pain someone is in. The longer you have pain the weaker the correlation between pain and tissue integrity.

The longer you have pain, the more efficient your body’s pain warning system becomes.

It’s like it has practiced and practiced and practiced sending those signals up your spinal cord to your brain and it becomes really good at it. This starts to get more complicated but to oversimplify we start to call this system “sensitized.” It’s like your body has turned up the volume button on the radio - a simple input on one end (light touch) is over-represented and feels overwhelming and loud at the other (which gets interpreted as extreme pain). The brain is being told there is more danger at the tissue than there actually is. This often leads to pain avoidance behaviours (it hurts when I move so I’m going to move less) even though the joint and muscle are completely physically capable of moving. 

Chronic pain is not “all in your head”.

There are legitimate physiological processes that lead to chronic pain. The good news? Your body did this as part of a protective response for you. There was a real or perceived threat and your body said “Not on my watch! I’ve got your back.” Your body is not silly - it wants to keep you safe.

The other good news? If your body wound up this much in response to a need it can also down-regulate when that need is no longer present. That means going back down to pre-pain levels! It means feeling like you are in control of your pain instead of it controlling you.

You just need the tools so it can get the message “thank you for your help but your services are no longer required. Chill out.”

Walking dog.png

If you would like to do some more learning here are some awesome resources:

  • TedTalk by Lorimer Moseley, who is absolutely brilliant and it really explains a lot of how interpretation of stimulus can influence pain. Honestly it’s one of my favourite videos.

  • Here is another good intro that I like - “Tame the Beast

  • If you prefer to do some reading anything by David Butler or Lorimer Moseley is great. They have a book called “Explain Pain” which is a great read.

  • Neil Pearson is a local (B.C.) man who has done a ton of work with chronic pain. His resources are also quite good.

Okay friends, I’m outta here for now. Happy reading!

I Need More Sleep!

I don’t get enough sleep. Quite frankly, I don’t know anyone that does. That bake sale for the PAC? No worries, I’ll just stay up until 3am to get those cupcakes done. A huge presentation at work? I’ll have extra coffee tomorrow - it’ll be fiiiiine. Everyone I know is guilty of sacrificing sleep to get all those little things done.

Sleep.jpg

Chronic fatigue is also a huge component of chronic injury. Simply put: you need sleep to heal. Without sleep, it is nearly impossible to recover from anything - it’s when we sleep that our bodies are able to dedicate the resources needed to repair the tissues. Sleep is one of the most underrated aspects of rehabilitation from any injury.

If you need a shake up in your sleep hygiene routine, here are some tips to help get you started:

  • Keep a regular sleep schedule. It is vital to healthy sleep hygiene that you prioritize getting to bed at roughly the same time every night and waking up at roughly the same time. Your brain thrives on routine and getting into these circadian rhythms help your brain heal. Aim for 7-9 hours of scheduled sleep every night, preferably more than less.

  • Expose yourself to natural light during the day. This helps your brain set those circadian rhythms and regulates the melatonin (the sleep hormone) circulating in your brain.

  • Promote a sleep friendly environment. Keep your room dark when you are sleeping, using backout curtains if necessary. Block ambient noise by either using a sound machine, fan or ear plugs. Keep your room cool but comfortable.

  • Make a bedtime routine. With babies and kids, we usually have a bedtime routine to help them get ready for sleep. Why not do the same for us? Get in some kind of bedtime habit – a shower, a book, meditation, etc. Do what works for you.

  • No naps. Napping disrupts these rhythms you are working so hard to build. Instead, take a brain break during the day – do some yoga, meditation or listen to a podcast.

  • Avoid alcohol, caffeine, nicotine, heavy meals and lots of liquids in the evenings. Aim for none of these things in the last 4-6 hours of your day.

  • Avoid exercise before bed. If you can, get your exercise in the morning – it will help wake you up and keep you going through the day.

  • Avoid screen time in the two hours before bed. When you look at bright lights, your melatonin levels decrease and your brain wakes up more. If you need to look at screens, add the night filter to your phone – it helps decrease the blue light and reduces the effect on your circadian rhythms.

  • Use your bedroom for sleep and sex – that’s it. Don’t turn your bedroom into your gym, your office space, your afternoon lounging area. You want your brain to associate your bed with those two things; everything else is a distraction and will hinder your sleep.

  • Can’t sleep? Get up. We all have those nights where we just can’t sleep. When that happens, give yourself 15-20 minutes to try and get to sleep. If that fails, get out of bed and go into another room. Read a book, do some meditation, have a light snack. When you are sleepy again, go back into your bed and try again. Do not turn on the TV or try to use that time to get some work done – keep those hours you have reserved for sleep as quiet, non-stimulating time.

Sometimes, these strategies are not enough. If these strategies are not working for you, talk to your doctor about medications or supplements that may help you find the sleep you need.

“I’m Tired But I’m Okay” - An Approach To Home Exercise Programs

It happens a lot, people come in for their follow up visit with a sheepish look on their face because they did not do their home exercise program. Sometimes life happens, and I get that, the kids are sick, someone dropped in for dinner, or maybe you totally forgot. But on the other hand you have to realize “if you change nothing then nothing will change.”

What we do as your physiotherapists in 30 minutes with you is great but what you do in the other 23.5 hours of the day is also extremely important.

This is why during sessions we point you in the right direction with “do’s” and “try to avoid’s” and then give you exercises or stretches to help you progress until your next visit so we can help you reach the next step.

Some of the more common reasons for not doing exercises and some possible solutions:

1ba4b2e3deba46ae38dbe86ece28042b.jpg
  • “It hurts when I do it.” Fair enough. This is a good reason to be hesitant. It’s important to have a good conversation with your physio about what they are trying to help you accomplish with each exercise and which level of discomfort that is acceptable. For some injuries we need them to be completely pain free. In other circumstances you will get better results by pushing into that discomfort. It’s also important to distinguish pain and discomfort. A stretch, a pull, stiffness, and feeling stuck or feeling fatigued are common sensations but they aren’t pain. Remember, for muscles to adapt and get stronger they need to be pushed slightly past their comfort zone. That is how they get the signal that they need to get stronger. You can tell yourself “I’m tired but I’m okay.” and get those last few reps in.

  • “I totally forgot.” Okay, how can we help you remember? Maybe you need to incorporate that exercise into something that you already do every single day. Can you balance on one leg while you brush your teeth? Can you do your kegels after you’re done stretching at the gym? Can you do squats each time you have something in the microwave and you’re waiting for it to be ready? Something is better than nothing, so if you are consistently forgetting to do your exercises see if you can link it to something else that you already do each day. If that fails set yourself reminders. An alarm on your phone or computer can pop up or sometimes it’s really effective to just put stickers up around your life. Maybe one on the bathroom mirror, one on the volume button of your car, one on your computer screen. Every time you see a sticker you can stop and do your exercise or fix your posture, or whatever else you might have to do.

Some tips for reaching your goals and staying accountable:

  • Remember why you are doing this (you are tired of having pain while sleeping at night, not being able to go for a run, etc.) So you are taking control of your own health and working towards something that is important to you so you can get back to what you want to do.

  • Have a workout buddy or a support system. You are more likely to go to the gym if you’re meeting someone there, or if someone is going to ask you how it went

  • Make SMART goals (specific, measurable, achievable, relevant, timely) “I’m going to lose weight and workout” is too vague. “I will do 30 minutes of walking 4 nights per week after dinner instead of eating chips. My goal is to lose 3 pounds in one month” is a goal that is much more likely to be met because you have a battle plan.

As always, you can find us at ladnervillagephysio.com or give us a call at (778) 630-8800.

In An Exercise Rut? Try Something New!

Before I had kids, I was obsessed with ultimate frisbee. WAY before kids, I played 4 nights of double headers per week and spent at least one weekend a month in the summers playing in tournaments. More than anything else, it was soul filling. Sure, the exercise was great. But there was something about the people and the sport that gave me a sense of belonging, of self.

I haven’t been able to play in years. I get twinges of going back but I think that ship has sailed. This leaves me with a dilemma: what do I do now? I’ve been searching for something to inspire and excite me again. If you’re like me, you might be looking for that something too - something that fits your new life with its new needs and constraints. Here are some ideas:

The green route is my current nemesis!

The green route is my current nemesis!

  1. Rock Climbing - Bouldering at the Hive has excited me in a way I haven’t felt in years. With walls about 18 feet high, you climb a specific route without any ropes, landing on thick crash pads below you if you fall. Not only is the upper body workout phenomenal, the social aspect of analysing and figuring out a route with friends is great. I don’t have to commit hours to it or plan much - I can just fit it in somewhere in my week. My family has even gotten into it - it’s turning into one of our favourite things to do on a lazy Sunday. And as my best friend says, it’s like solving a puzzle with your body - what’s not to like about that?

  2. Swimming - There’s something blissful about the water. Whether you’re swimming laps, joining an aquacize class or water running, the water just feels good on your body. I can get into an almost meditative-like zone when swimming laps, rhythmically counting my breaths as I zone out. The local pools, including the Ladner Leisure Centre and Winskill, have lots of options in their schedules that can work around families and obligations. If you’re more adventurous. slip on a wetsuit and hit the ocean - nothing like a brisk swim in the bay to make you feel alive!

  3. Rowing and Dragon Boating - I recently ran across the Abreast in a Boat group at the Ladner Village Market. Back in my undergrad days, I was an ardent participant in Day of the Longboat, a dragon boating intermural competition held every September at UBC. Seeing this dragon boating group reminded me how much fun it is. Abreast in a Boat is dragon boating specifically for survivors of breast cancer - if that’s you, it’s definitely worth checking out this incredible group of supportive and inspiring women, especially considering they now have a group that paddles out of Deas Island. Otherwise, check out The Dragon Zone for dragon boating in Vancouver or the Delta Deas Rowing Club for some local paddling.

  4. Pickleball - A cross between badminton and tennis, pickleball is one of the fastest growing sports in Canada. It’s gotten so popular that Delta has even built dedicated outdoor courts at Memorial Park in Ladner. The Delta Pickleball Association is a fantastic resource for those thinking of trying this sport out - they also provide lessons free to members!

  5. Lawn Bowling - If you’re looking for something that is social and challenging without being too energy draining, lawn bowling is a fabulous option. With clubs in both Ladner and Tsawwassen, lawn bowling combines a high degree of hand-eye coordination, depth perception and balance, all while having a great laugh with your competition.

  6. Yoga - If you haven’t tried yoga, you’re doing yourself a disservice. There is a type of yoga for everyone: super bendy people who need more control through their joints; super inflexible people that can only wave at their toes from a great distance; people who chronically injured and need to work on their balance and other deficits (hey, that’s me!)…. In my experience, finding the type and style of yoga for you is all about trial and error. If yoga is something you’re interested in, try a bunch of different styles and instructors until you find the one for you. To find a yoga studio, walk 100 feet in any direction and you’ll probably be close.

Have you found something new that excites and inspires you? Let us know by commenting below!

If your new sport has given you some new injuries, give us a shout at (778) 630-8800 or ladnervillagephysio.com.

Who Doesn’t Love A Good Walk?

Walking.jpg

When I ask people how they stay active, almost everyone includes the same answer: walking. It is one of the most studied forms of physical activity and counts some big names as its cheerleader: Harvard Medical School, The Heart and Stroke Foundation and The Arthritis Foundation, just to name a few.

The benefits of walking are seemingly endless. It’s low impact enough to be gentle on arthritic joints, yet with enough resistance to help people with osteoarthritis maintain their bone density. It’s free and accessible, and requires little more than a decent pair of shoes. It works your heart, your lungs and your muscles.  It can be a great solo adventure or an excuse to hang out with your friends. Here’s a few more benefits you may not know:

  • Improved brain function – a 2017 study found the impact of the foot hitting the ground while walking produced pressure waves throughout your circulatory system, significantly increasing blood to your brain. They even found that your heart rate and stride rate were synced by your body to help improve blood flow to your brain!

  • Improved mood – A large meta-analysis published in 2016 showed walking to be a treatment option (either by itself or as an adjunct to other treatment options) to those who suffer from depression. The American Office of Disease Prevention and Health Promotion’s 2018 Report on Physical Activity Guidelines also list walking as a treatment option for anxiety.

  • Improved memory and cognitive function – given the last two bullets, this makes sense! It’s even further supported by a 2015 study on older adults in Japan. Better memory, improved focus and concentration – what’s not to love?

DSC_0903.JPG

Have we convinced you to add walking into your weekly routine? Here’s a list of our favourite walks around South Delta:

  1. Ladner Spirit Trail - Technically located in the South Arm Marshes Wildlife Management Area, this trail is a fan favourite among my kids. Filled with carvings and painted rocks, the Spirit Trail access can be found off Ferry road close to Admiral Road.

  2. Swenson Walk at Ladner Harbour Park – Access to this park is from River Road, with a bridge going over the slough just west of Ferry Road. Tall trees with views of the water make it a great escape without having to go far.

  3. Deas Island Regional Park – Another tall tree and water view combination makes this park a lovely destination. Find the access to Deas Island off River Road a few minutes north of the Tunnel.

  4. Reifel Migratory Bird Sanctuary – If you’re into feeding black birds and chickadees from your hands, this is the place for you. Located at the far end of Westham Island, the best part of this walk is the berries and farm fresh produce you can get on your way home!

  5. Fred Gingell Park – Less of a walk and more of a grind, this “walk” involves a lot of stairs. The view on the way down is stunning and there’s a counter for you at the top (assuming you plan on subjecting yourself to it multiple times….) Find this park on English Bluff Road at around 3rd Avenue.

  6. Brunswick Point – Wander on the dike while you take in the birds and the ferries on this lovely walk. Its two main points of access are Wellington Point Park and at 30B Street and River Road.

  7. Boundary Bay Regional Park at Centennial Beach – Located at the north end of Centennial Beach, this lovely walk has great views of the beach with Mt. Baker in the distance.

  8. Lily Point Marine Park – Located in Point Roberts, this lovely walk has a bit of everything – panoramic views, beaches, a bit of hiking and some birdwatching. Head straight down Tyee Road from the border to the end, turning left onto APA Road.

What are your favourites? Let us know by leaving a comment below!

DSC_0548.JPG

IMS, Dry Needling, Acupuncture... Aren't They All The Same?

As physios, we get asked this question a lot - aren’t they the same thing? Both acupuncture and IMS use very thin (less than half a millimeter!), solid (in other words, not hollow) needles, but that’s where the similarities end.

Acupuncture is based in Traditional Chinese Medicine. It is believed the Life Force, or Qi, flows through the body in paths termed meridians. When the path of Qi is blocked, an acupuncture needle can be used at specific points along the meridians to re-establish the flow of Qi. Acupuncture can be used for a whole host of things outside of a physiotherapist’s scope, including labour induction, pain control, and mental health. Often, acupuncturists will place several needles into the body at various locations and leave them there for a period of time.

DN-1.jpg

Intramuscular Stimulation (IMS), also known as Dry Needling, is a completely different approach using the same tool. It has taken off in the last several years mainly because of how fast and effective it has shown to be with certain musculoskeletal problems. With IMS, we are looking for trigger points - tight bands of muscle fibres that are sources of pain and dysfunction within the muscle. After identifying the trigger points, needles are inserted into the points with the goal of disrupting the trigger point and forcing it to relax. Needles aren’t typically left in for any length of time.

Let’s pretend your tennis elbow has been acting up for awhile and no amount of stretching, massage or rest is making a lick of difference. If we decided to give IMS a go, we would first use our hands to find the trigger points in the offending muscles in the forearm. Our goal is to use a needle to get into these trigger points and make the muscle contract around the needle. When we hit The Spot (you’ll know when we do!), the muscle contracts a few times before it gives up and relaxes. We are usually in and out with our needles in under 10 seconds.

There are several key benefits to IMS:

  • Pain reduction - several studies have pointed to the ability of IMS to reduce pain almost immediately, both at the tissue level and reducing the perception of pain in the brain

  • Increased range of motion - once that muscle lets go, you can move a lot more!

  • Increased blood flow to the area, helping to clear out the build up of waste products produced by a tight muscle

  • Improved function of a body segment

For the 24 hours after IMS, the best thing you can do is to move, but not too much! If you’re used to hitting a spin class, go for a leisurely bike ride instead - low intensity, low impact movement is best.

Of course, IMS is not for everyone and cannot treat everything. If needles aren’t your thing, we always have other things we can do. If simply reading this article made you feel yucky, we never have to do it!

That being said, if it is something you’re interested in learning more about, chat with one of our physiotherapists or feel free to give us a call!