Orthopaedic Physio

Soft Tissue Injuries Just Need Some PEACE & LOVE

AdobeStock_438490019.jpeg

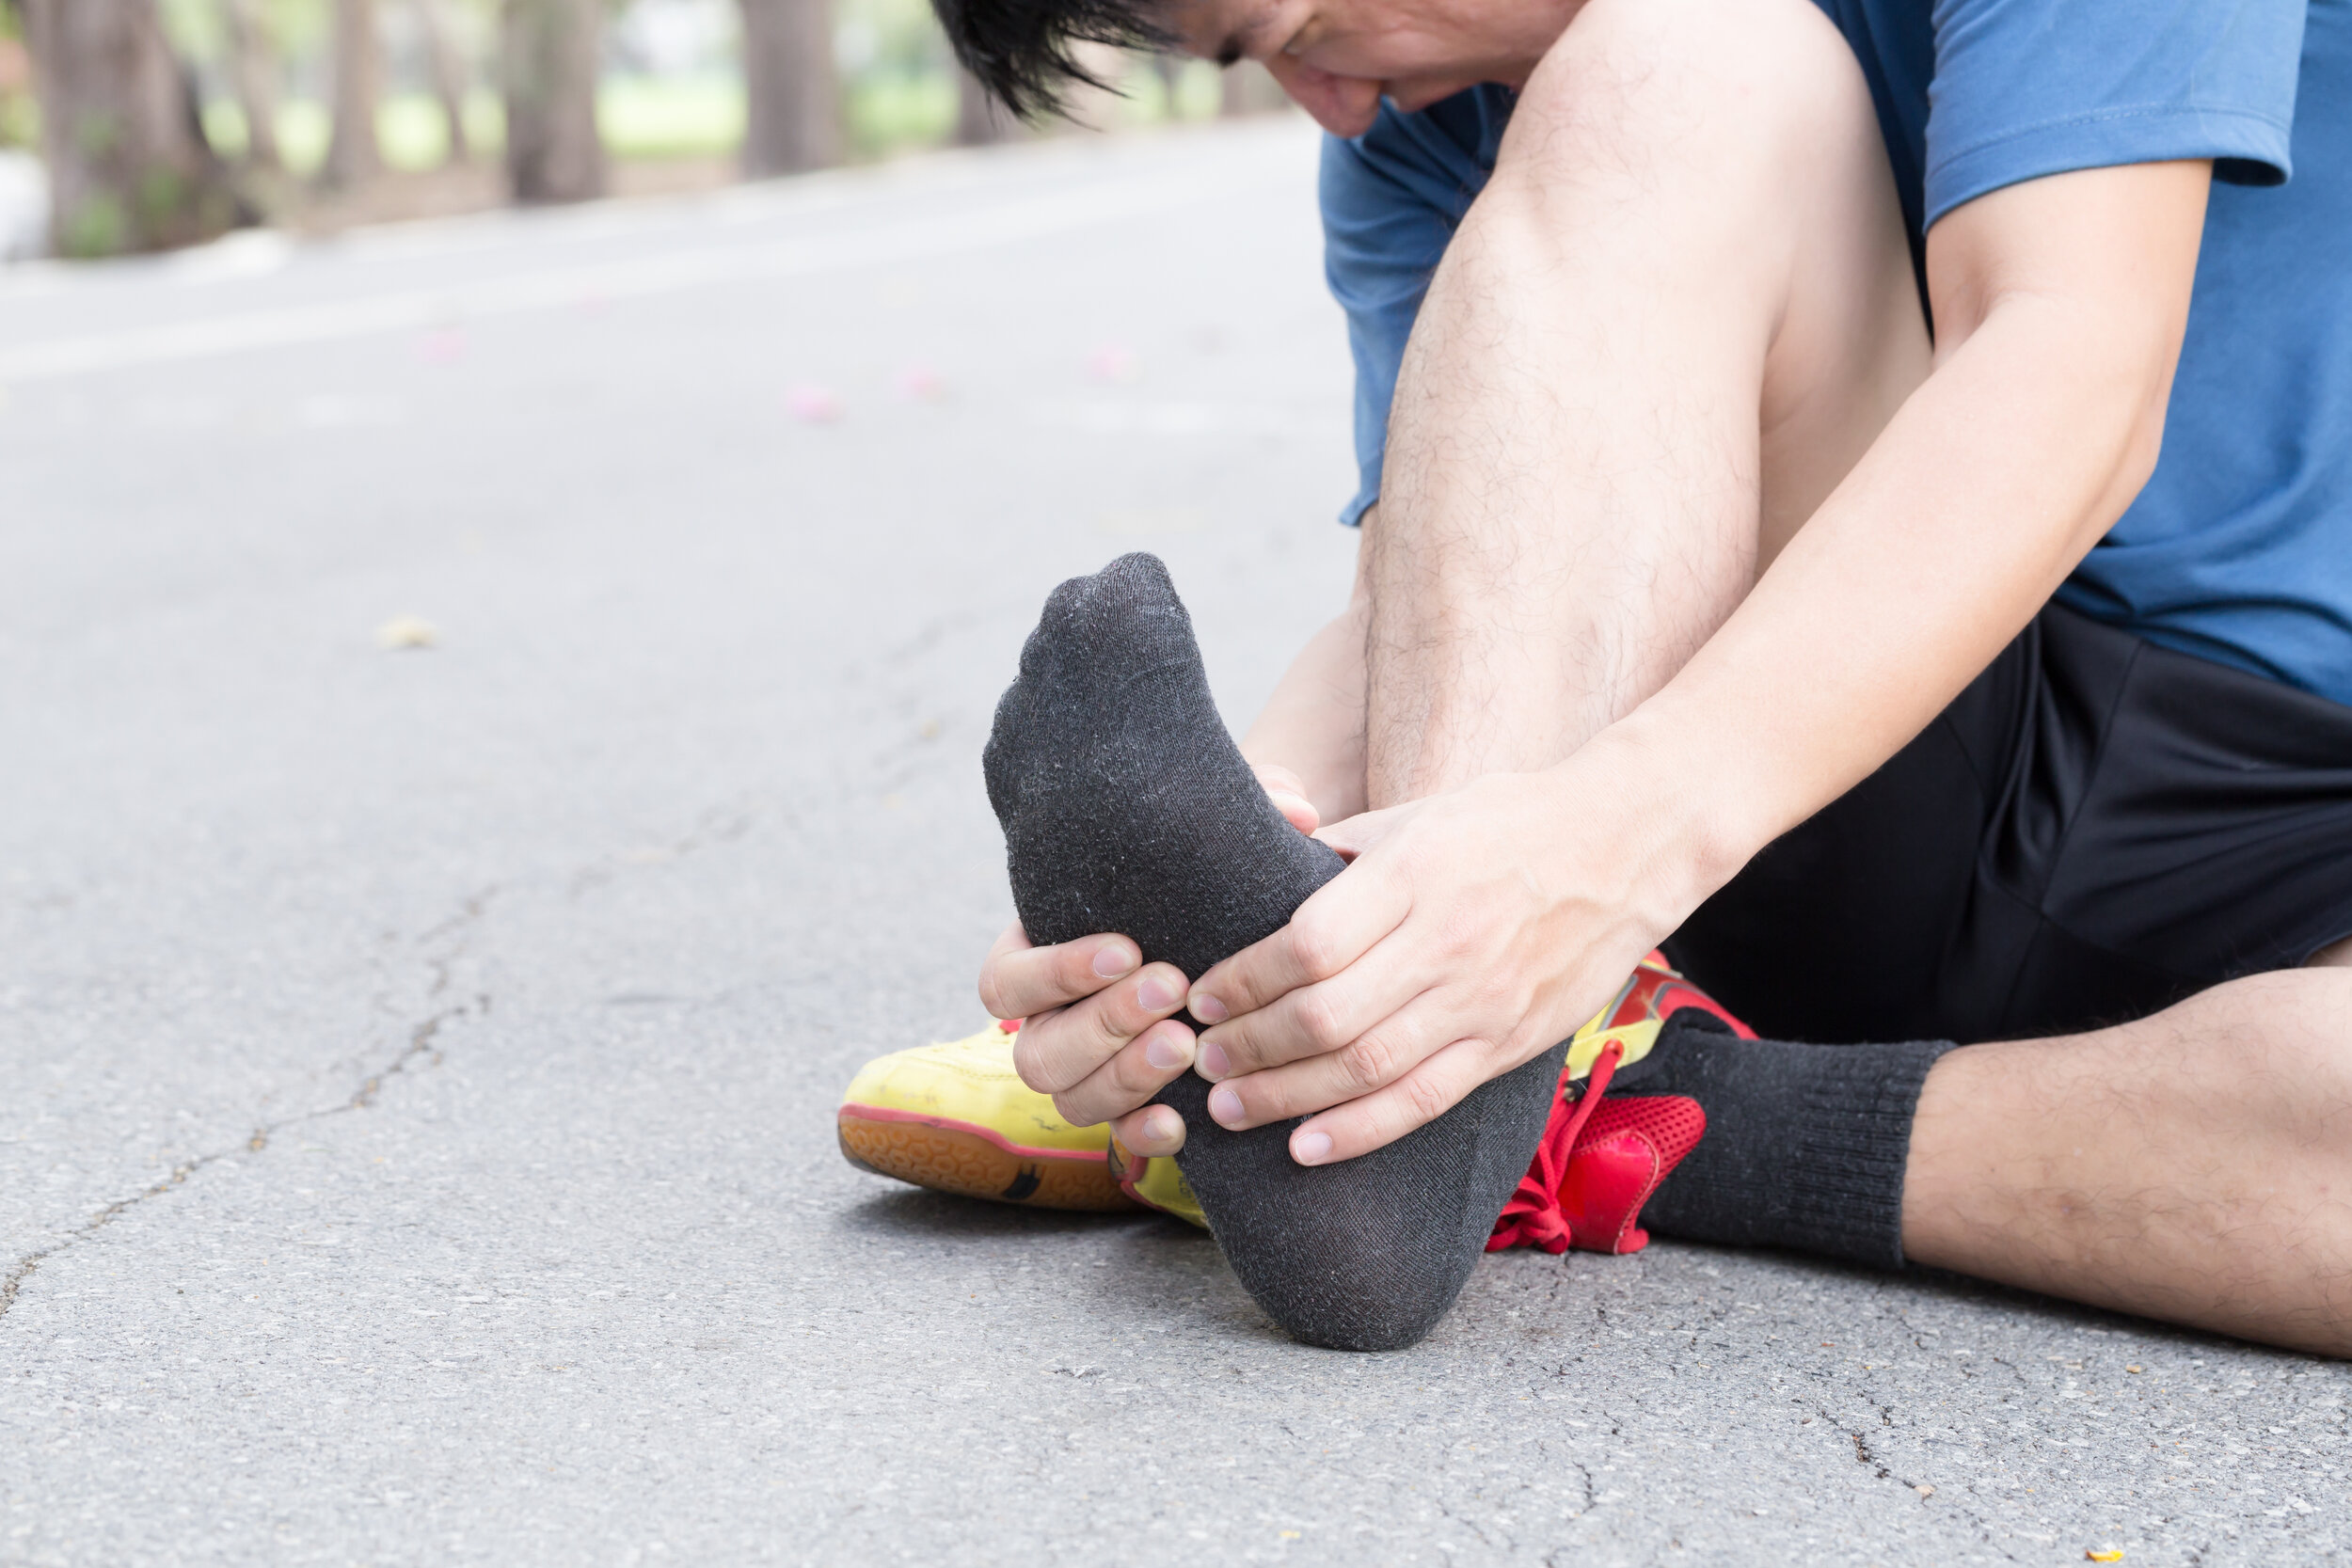
You may have heard the acronym RICE before (rest, ice, compression, elevation). This protocol was developed by Dr. Gabe Mirkin in 1978 and remained the primary recommendation for management of acute soft tissue injures (like ankle sprains).

In 1998, it was adjusted to PRICE (protection, rest, ice, compression, elevation). PRICE was en vogue from 1998 until 2012 when the research evolved yet again and we were given the newly named POLICE protocol (protection, optimal load, ice, compression, elevation).

POLICE had some positive changes, especially as it included active participation and appropriate loading rather than just several passive treatments.

But now there is a new kid on the block:

PEACE and LOVE 

The researchers behind PEACE and LOVE are Blaise Dubois and Jean-Francois Esculier. They identified how the previous RICE/PRICE/POLICE strategies ignored the subacute and ongoing stages of healing*. Because the subacute and ongoing stages compose the majority of the post-injury timeline, we welcome suggestions for this phase with open arms.

*We classify injuries as acute in days 0-4 after the injury, subacute from days 4-14, post-acute is after 14 days.

Without further ado, I present to you a protocol that emphasizes the PEACE-ful stages of immediate care, which emphasizes doing no harm, and the subsequent management that gives the soft tissues some LOVE.  

  • P is for PROTECTION: Avoid activities that increase pain during the first few days after an injury.

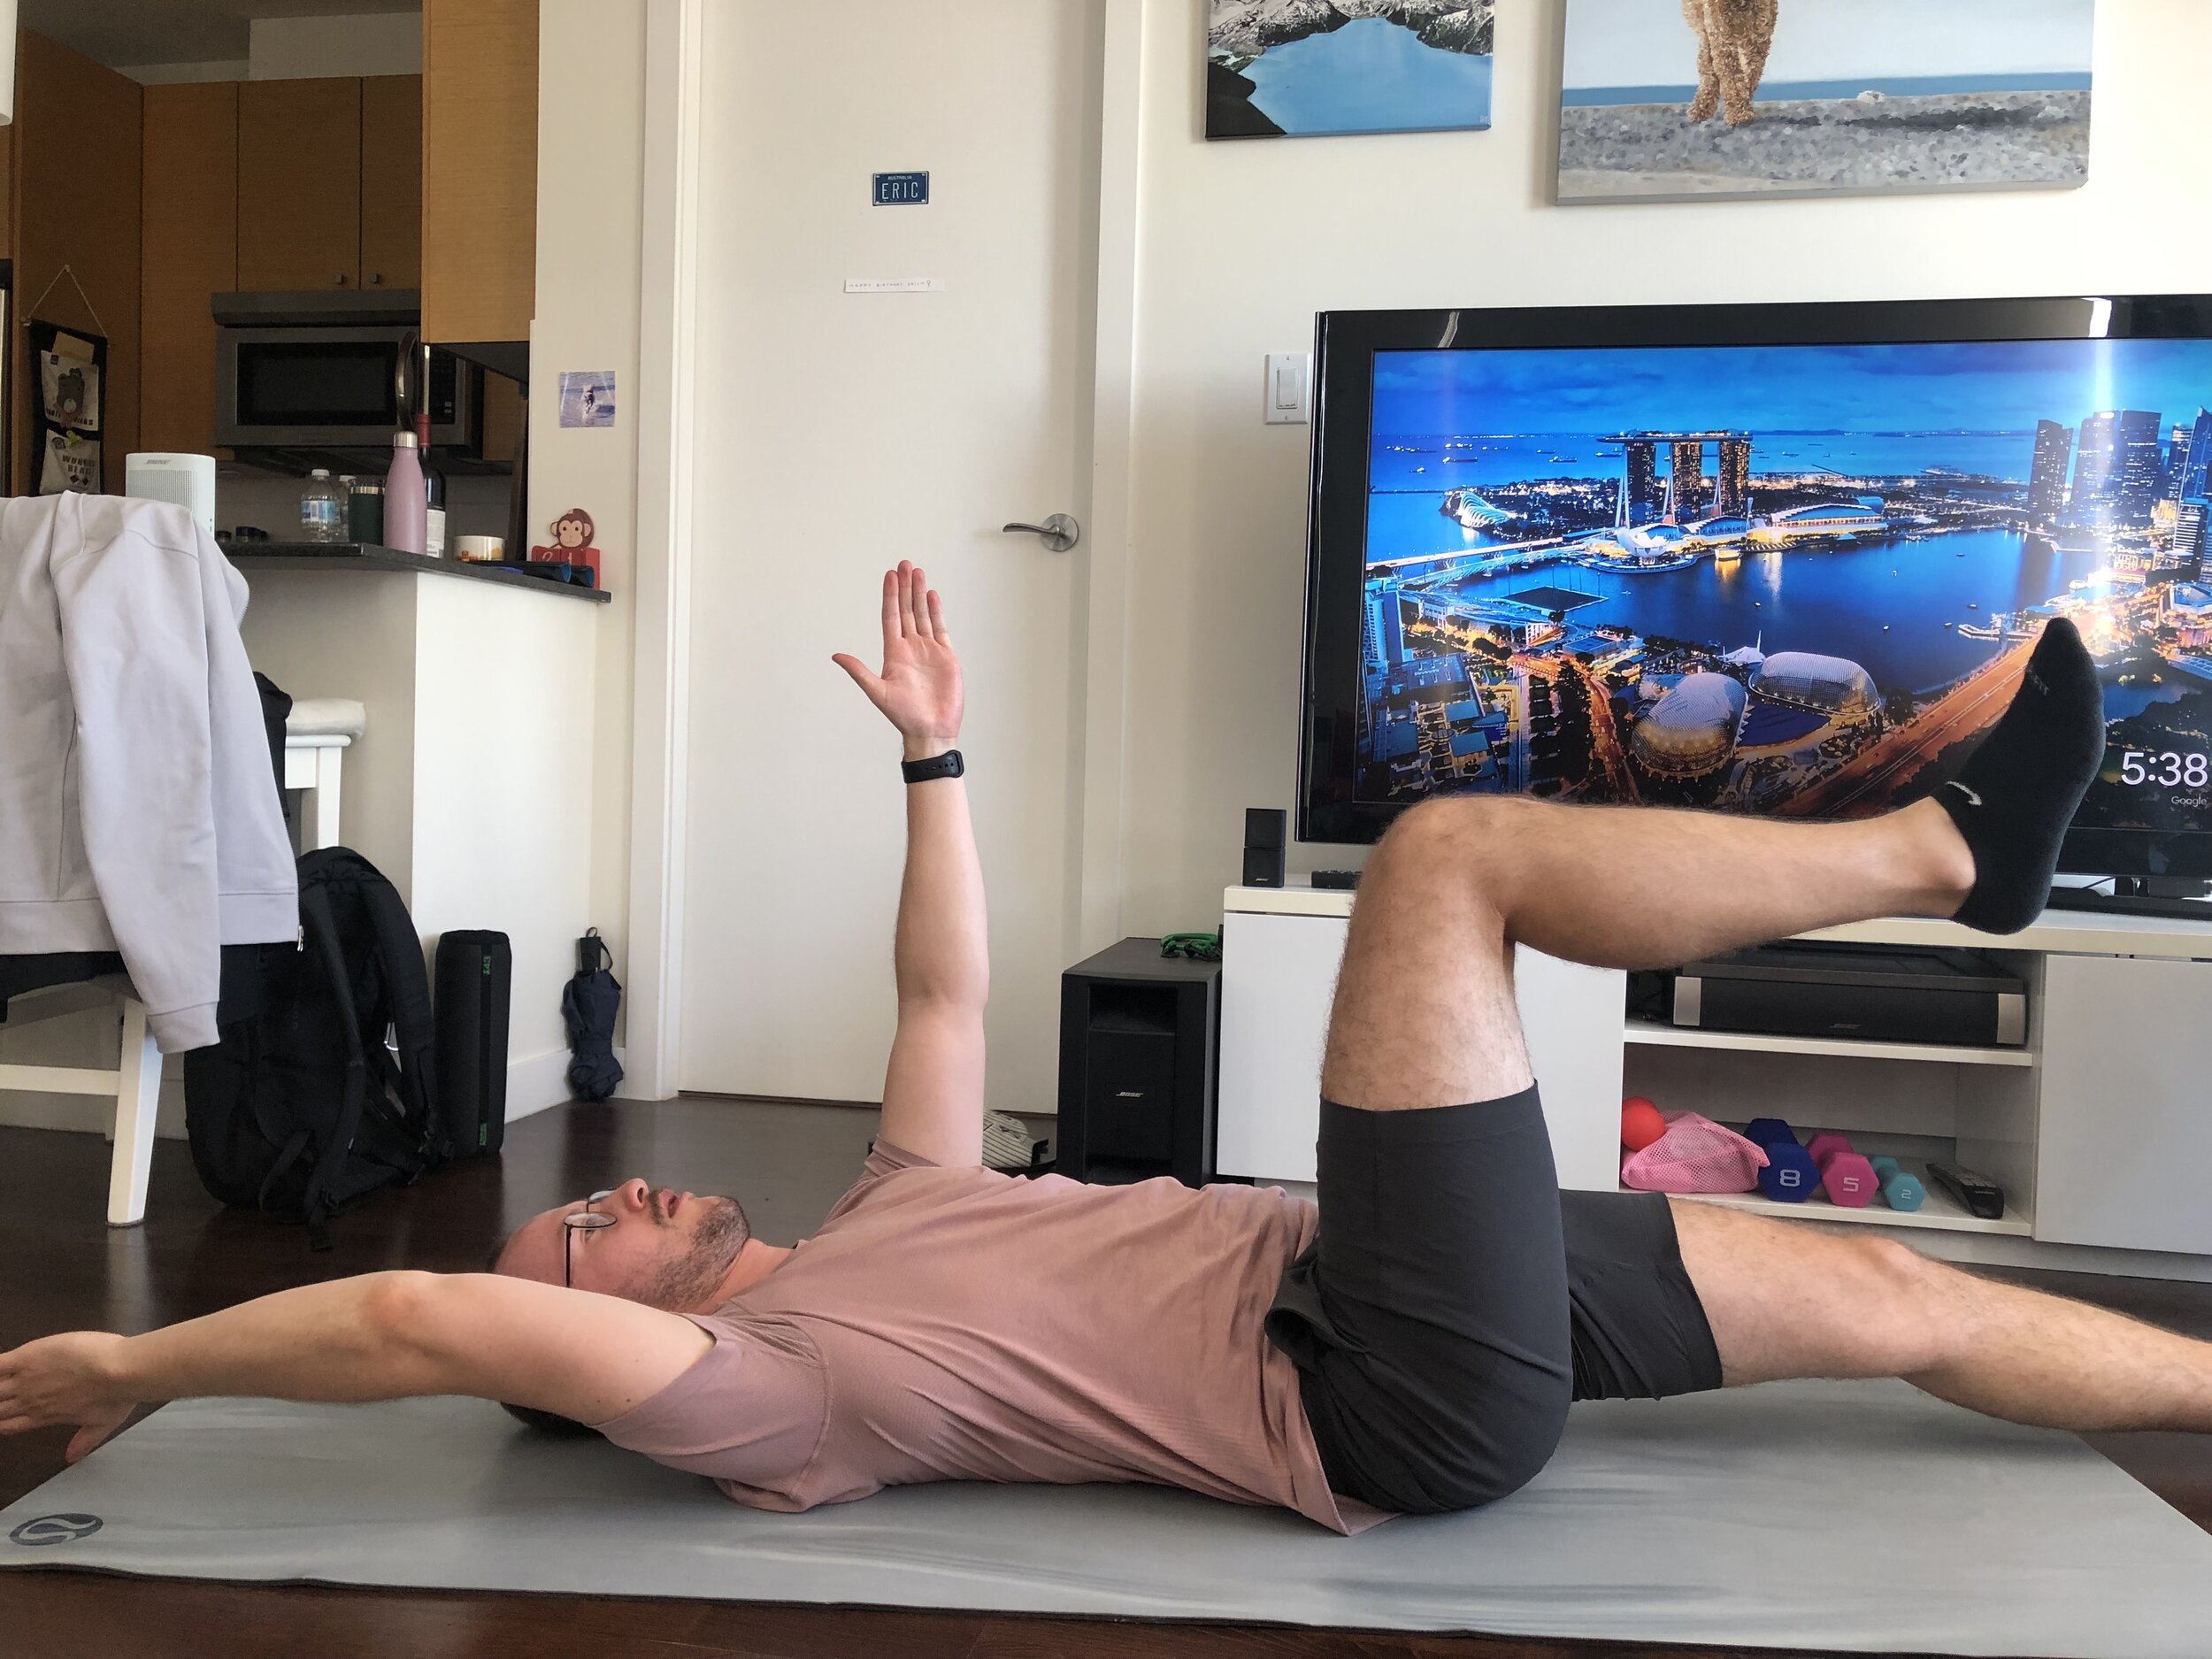
  • E is for ELEVATION: Elevate the injured limb higher than the heart as often as possible. 

  • A is for AVOID ANTI-INFLAMMATORIES: These medications can reduce tissue healing. Avoid icing. 

  • C is for COMPRESSION: Use elastic bandage or taping to reduce swelling. 

  • E is for EDUCATION: Your body knows best. Avoid unnecessary passive treatments and medical investigations and let nature play its role. 

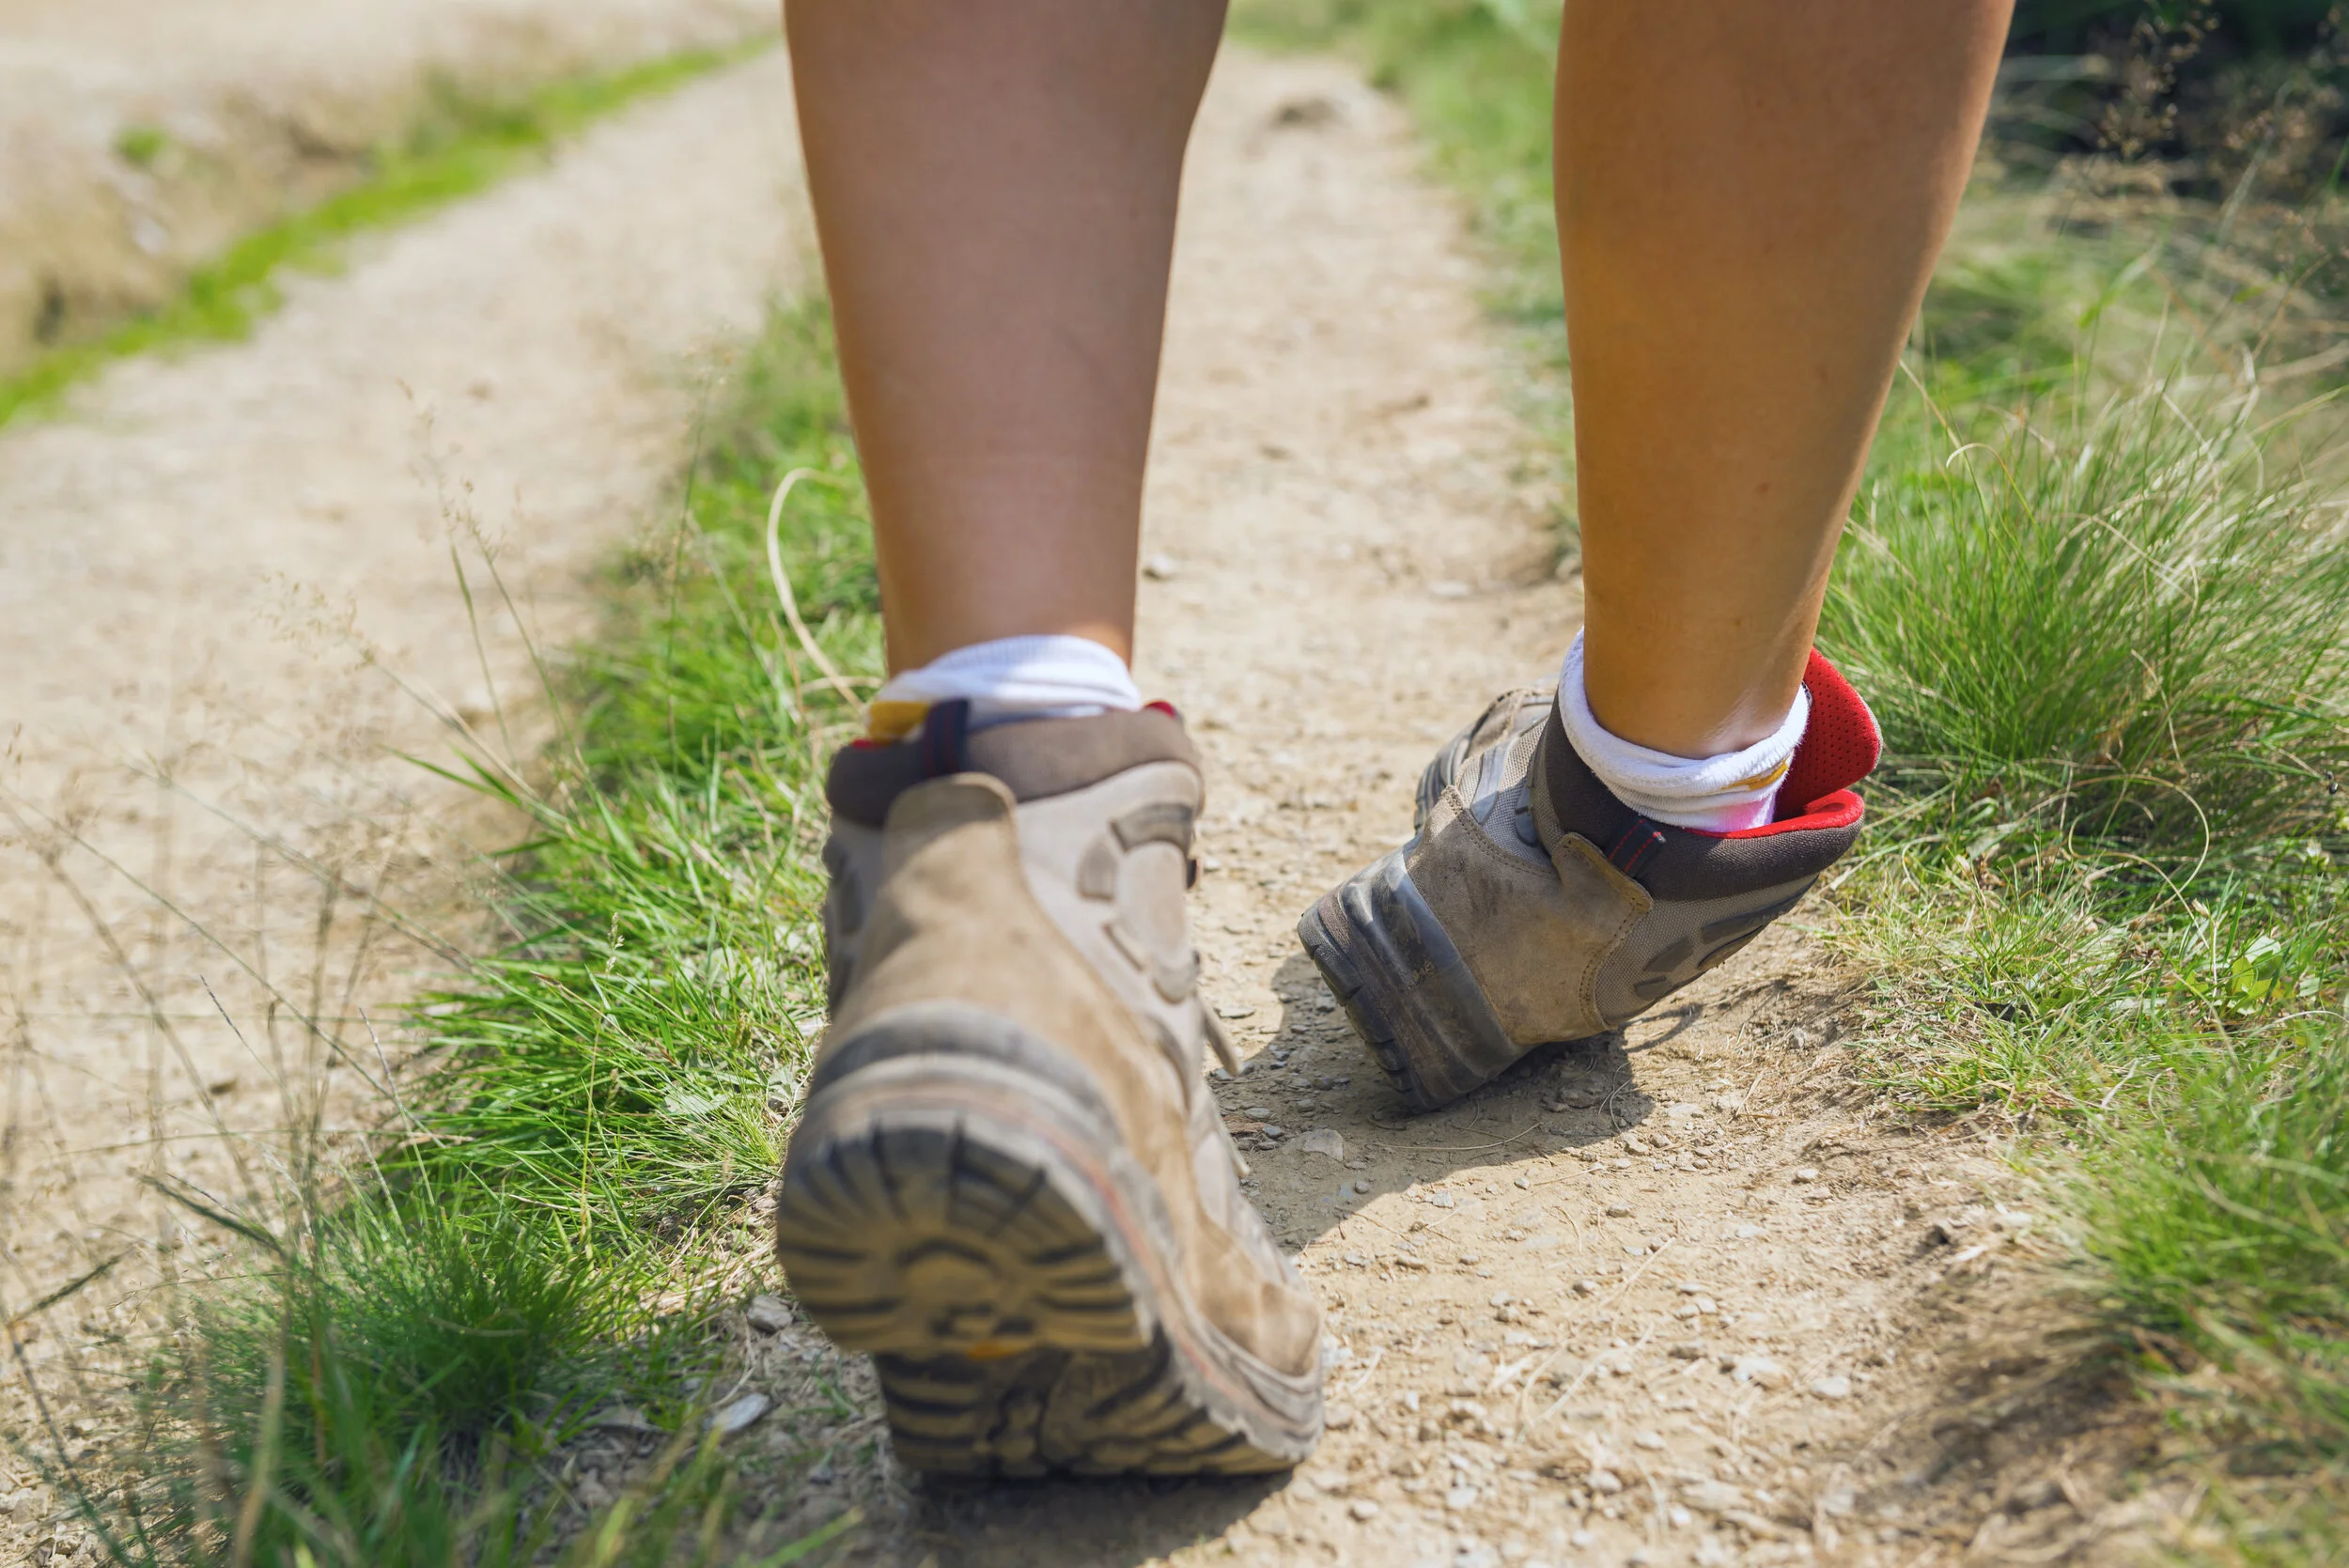
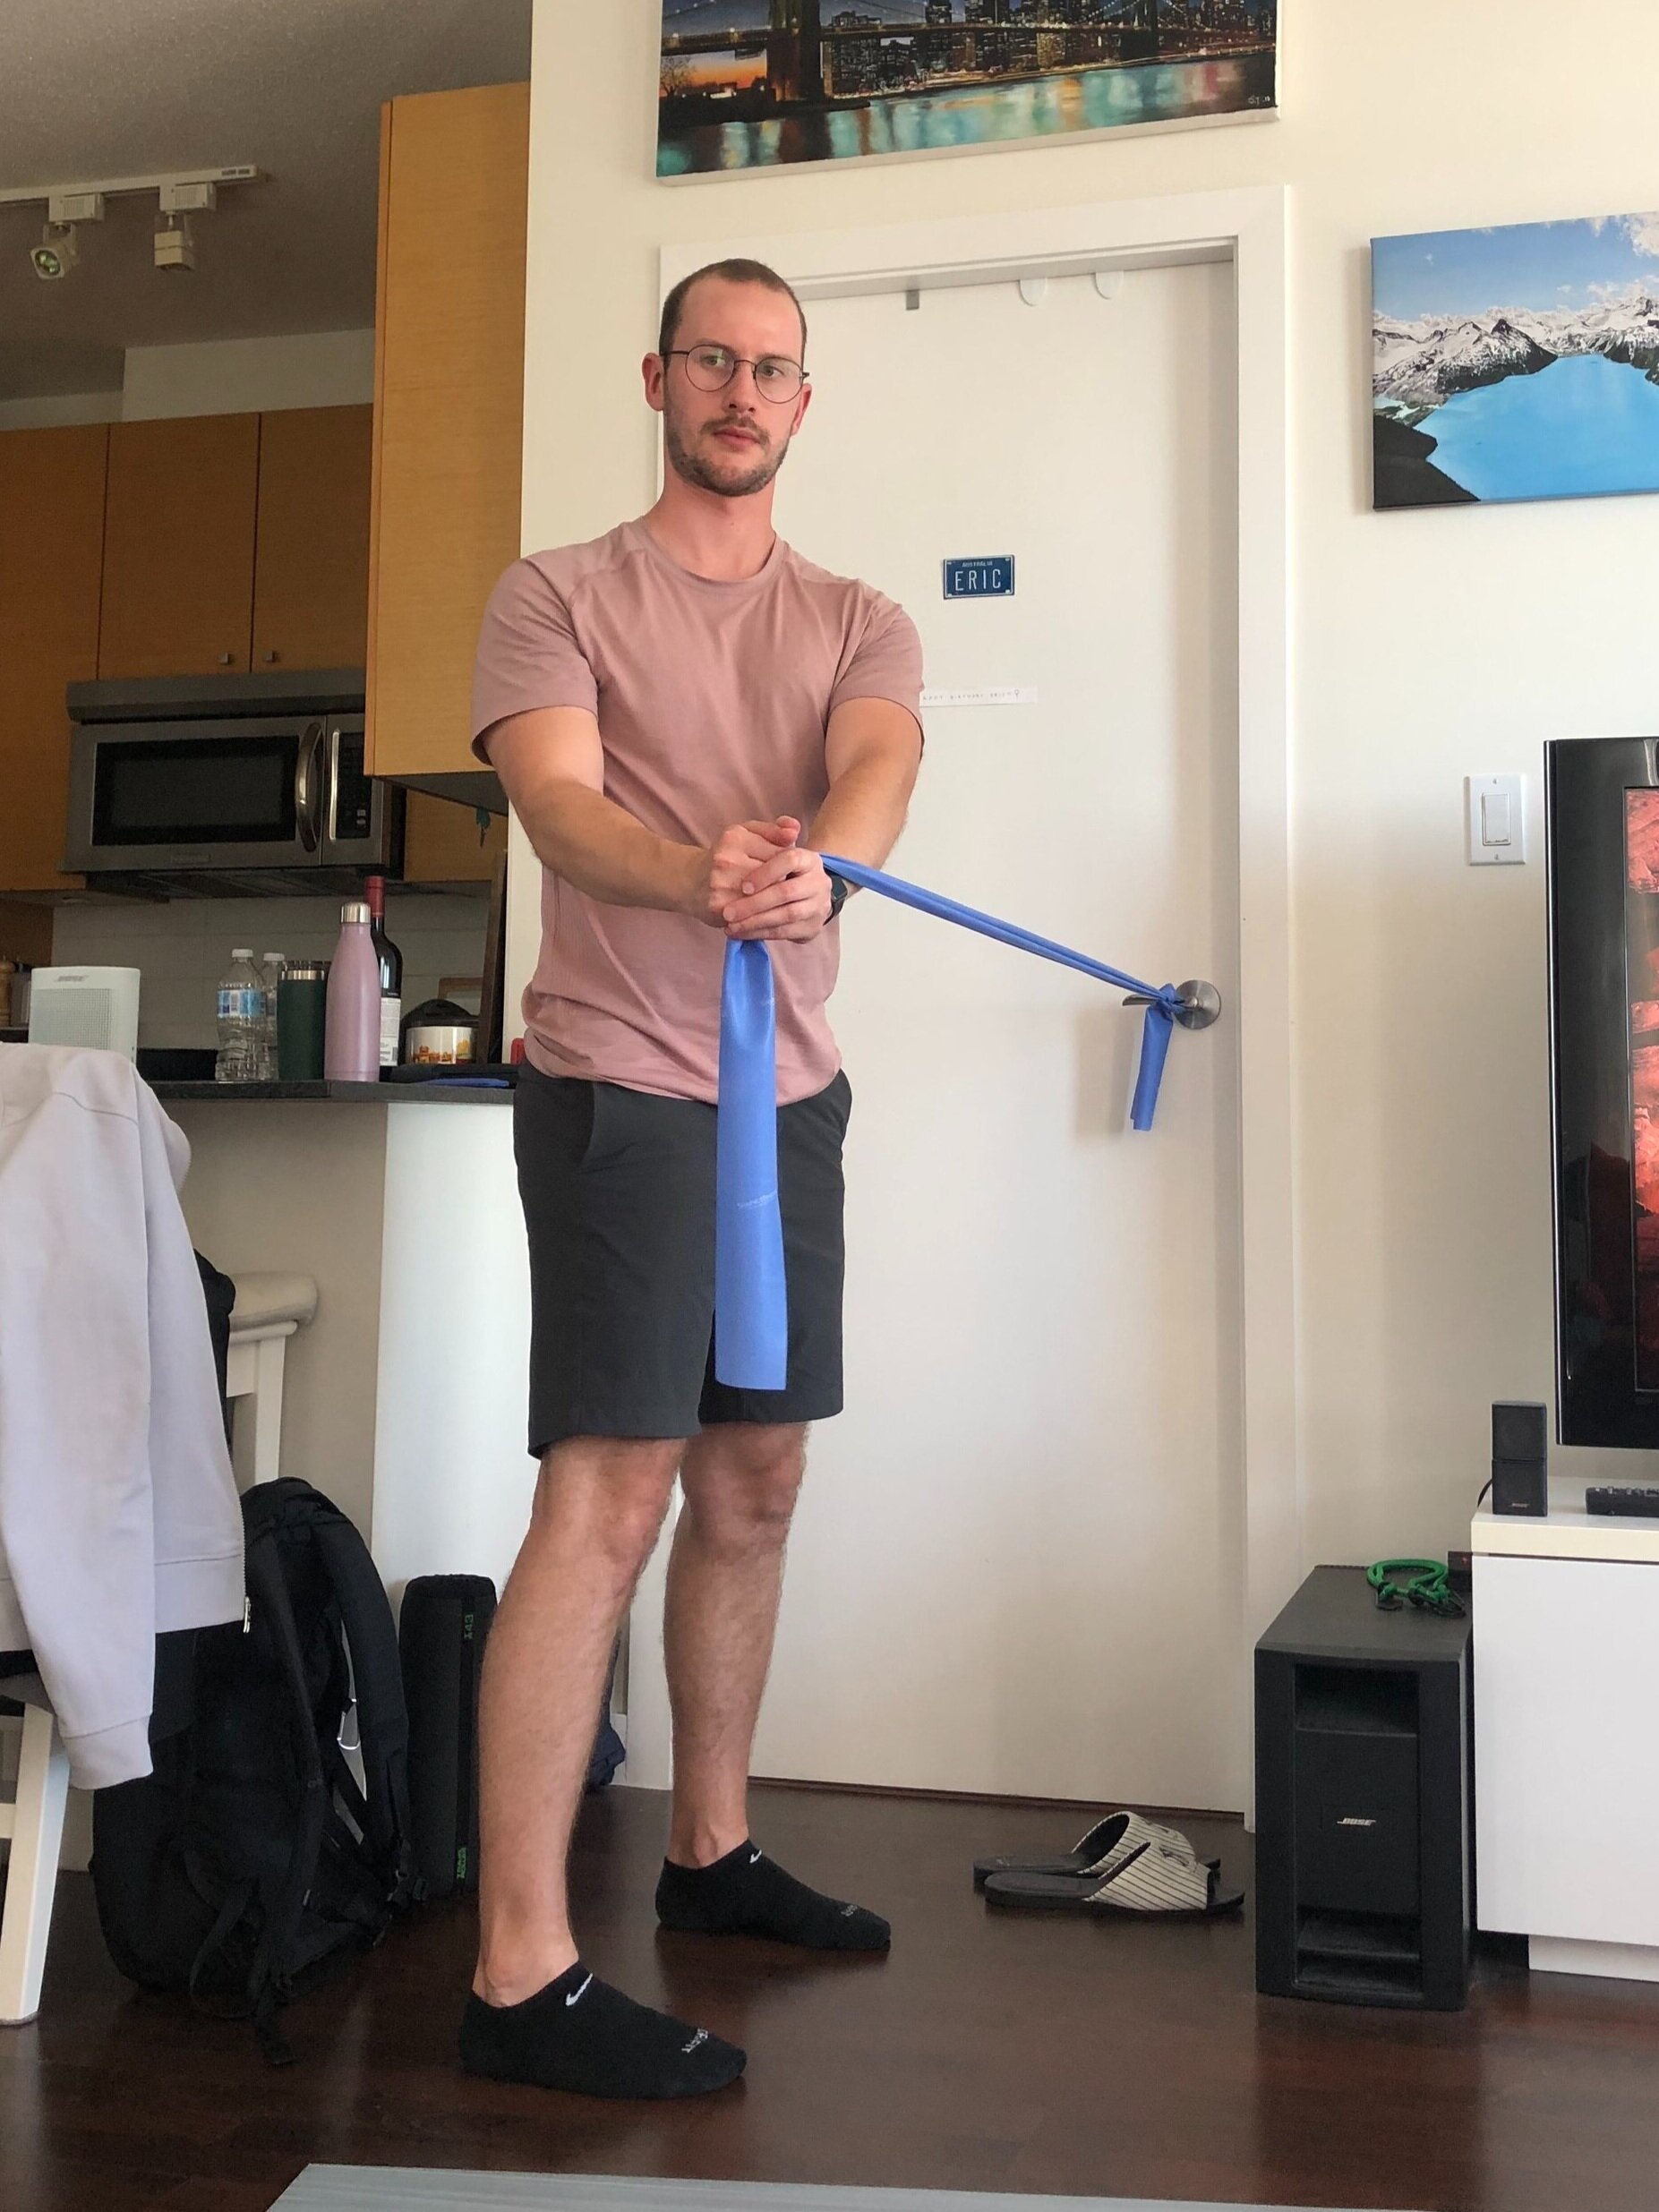
  • L is for LOAD: Let pain guide your gradual return to normal activities. Your body will tell you when it’s safe to increase load. 

  • O is for OPTIMISM: Condition your brain for optimal recovery by being confident and positive. 

  • V is for VASCULARIZATION: Choose pain-free cardiovascular activities to increase blood flow to repairing tissue.

  • E is for EXERCISE: Restore mobility, strength and proprioception by adopting an active approach to recovery. 


Most of the above is self explanatory but there are a few points which are new or warrant some further explanation. Below are some key points for each factor. 

A for Avoid Anti-Inflammatories

  • Inflammation is a natural and beneficial process to repair damaged soft tissues. 

  • Using anti-inflammatory medications may negatively affect long-term tissue healing.

  • Ice is analgesic but can interrupt regeneration and can lead to impaired tissue repair via disrupting angiogenesis, delaying macrophage and neutrophil infiltration and increasing immature myofibrils. 

E for Educate

  • An active approach to recovery is better than a passive approach. 

  • We want to avoid people feeling therapy-dependent or “needing to get fixed.” 

  • Better education and correct load management can decrease the need for unnecessary injections or surgery.

  • There is no “magic cure” and expectations should be realistic. 

O for Optimism

  • Optimistic clients have better outcomes and prognosis. Beliefs and emotions are thought to explain more of the variation in symptoms following and ankle sprain than the degree of pathophysiology.  

  • Catastrophisation, depression and fear can represent barriers to recovery.

V for Vascularisation

  • Cardiovascular activity is important for the management of musculoskeletal injuries and should be completed in a pain-free way to boost motivation and increase blood flow to the affected area. 

  • Early aerobic exercise and mobilisation improve physical function which can aid with successful return to work and decrease the need for pain medication. 

  • Further research needs to be done for recommendations on dosage. 

E for Exercise

  • Exercise can help restore mobility, strength and proprioception. It can also reduce prevalence of recurrent injuries such as ankle sprains. 

  • Avoiding pain to ensure optimal repair during the subacute phase. Progress exercise as tolerated. 

For the full paper, download it here!

Top Ten: Backpack Tips

AdobeStock_70665822.jpeg

If you’ve seen me around town, I’m usually carrying my bright blue backpack on my shoulders and either zipping around on my bougie cruiser bike (and my new wicker basket!) or walking while zoning out to a podcast. Backpacks are my favourite way to carry my essentials while keeping the weight happily distributed and my hands free.

Like most people I know, I have fallen victim to poor backpack habits in the past. I have definitely been that person in class treating my pack like a clown car, pulling out item after item and desperately trying to find the thing I need. At the end of those days, it was all I could do to pop an Advil and get in the bath - not exactly the smartest thing to do.

So, dear reader, it’s a great time to learn from my mistakes! Let’s go over the essentials of backpack wearing - how much weight is appropriate, how to pack your backpack and what red flags you should pay attention to.

Top Ten Backpack Wearing Tips for Back To School:

AdobeStock_82597624.jpeg
  1. Ensure your pack weighs no more than 10% of your body weight. We commonly hear that 15% is the upper limit, but current research questions this number. Another journal article identifies “significant biomechanical, physiological and discomfort impacts on the wearer, especially with loads above 10% of the student’s body weight”. The take home? Keep it under 10%.

  2. Buying a new pack? Go for wide straps and a padded backing. The cushion will help distribute the weight and make it much more comfortable especially on long days.

  3. While you’re at it, make sure the pack actually fits your back. Try it on (preferably with some weight) - the bottom of the back should be right around hip height and not hitting your bum.

  4. Use both straps. Please, for the love of everything holy, distribute that load across both your shoulders.

  5. If your pack is particularly heavy one day, use the waist strap. It will help keep the load closer to your centre of gravity and distribute some of the weight from your shoulders to your pelvis.

  6. Place heavy things close to your body at the back of the pack. There’s a reason the laptop pouch is at the back of the bag (beyond the whole projecting the valuable thing part) - it keeps the weight close to your body’s centre of gravity and places less stress on your muscles and joints.

  7. Use those multiple compartments. They keep your load spread out and in place, reducing the chance of injury from load shifting.

  8. Putting your backpack on and off should be easy. If you’re struggling, it means your pack is too heavy.

  9. If you’re leaning forward to carry your pack, it’s too heavy. Your backpack shouldn’t be pulling you backwards. If it is, back pain won’t be far behind.

  10. Other signs of too much weight in your pack: neck pain, tingling and/or numbness in your shoulders, arms or hands, and visible strap marks show up on your shoulders. If you start experiencing any of these signs, it’s time to re-evaluate your pack situation ASAP.

We see a lot of poor backpack practices lead to postural changes and pain. Develop good habits early and avoid the problems down the road - you’ll be happy you did!

If you’re suffering with backpack-related pain, give us a shout at (778) 630-8800, email us or book online.

Are Your Nerves Limiting Your Mobility?

Our dance physiotherapist Anh is back! Here, she discusses neural mobility and tension - what it is, why it occurs and why dancers especially should know about its wide-ranging effects.

Hey dancers! Are you or do you know someone who stretches for hours a day, every day of the week and still can’t get into their splits? As dancers we often think about stretching our muscles to improve mobility. But what if it isn’t your muscles that are preventing you from touching your toes or achieving the splits? What if the problem is your nerves?

Your nerves are meant to move freely throughout your body. They connect our brains to our big toes and everything in between.

Neural tension occurs when a nerve’s ability to move has been impeded.

AdobeStock_355420182.jpeg

You can think of your nervous system as a tangle of ropes, extending from your brain to all areas of your body. Imagine one of these thick ropes starting at the top of your head, running down your spine, behind your glutes, down the back of your leg and all the way into the bottom of your foot and toes (this would be your sciatic nerve). If there is a restriction anywhere along the line of this rope, you won’t be able to move your leg the way you should.

Like rope, nerves do not like to be stretched or squeezed - both affect the ability of the nerve to do its job. In order to achieve full range of motion, nerves need to glide back and forth in the body. If a restriction is present and not removed, further stretching can cause irritation of the nerve over time.

So how do I know if it's neural tension that's preventing my mobility and not muscle?

  1. If you are experiencing burning, tingling, numbness, or shooting pain that radiates past the muscle that is being stretched

  2. If the sensation of stretching changes with different head and neck positioning

  3. If the sensation of stretching changes with a change in position of a joint unrelated to the muscle being stretched (ie. stretching your hamstring feels better when your feet are pointed vs when your feet are flexed)

How do I get rid of neural tension?

AdobeStock_332498788.jpeg

First things first - if there’s neural tension, there’s a reason for it. As physiotherapists, we assess and identify the source of the tension. Is there something squeezing the nerve in the back? What about in the glutes or behind the knee? Finding the source of the problem is always the first step.

We then use a combination of techniques including manual therapy, soft tissue massage and specific exercises designed to help settle the tissue down and not reaggravate it.

Without a doubt, nerve flossing comes into play. Nerve flossing is a dynamic stretching technique that mobilizes the nerve. Think of a piece of dental floss: when you are flossing your teeth, you pull on one side of the floss and allow the other side to slacken, then reverse directions. Nerve flossing is the exact same idea - it is performed by tensioning one end of the nerve while slacking the other end.

Nerves control your muscles. If a nerve feels unsafe (like when going from sedentary to being over stretched) it will send signals to the muscle to contract and stiffen. This puts the dancer at risk of muscle strain. It is important to incorporate nerve flossing techniques and movements into your warm and stretch routine. 

For more information on neural tension and its effect on mobility, book online or give us a call at (778) 630-8800.

Ask A Physio: When Can I Go Back To Sport After An Ankle Sprain?

AdobeStock_89378251.jpeg

Ankle injuries are one of the most common acute injuries we see, especially amongst athletes. Pretty much everybody who has played a sport has sprained an ankle before, leading to a lot of people minimizing the injury and not taking it seriously.

There is often pressure from coaches (and ourselves!) to make a quick return to sport because “it’s just an ankle sprain.” Just because ankle sprains are common does not make them insignificant. We know that only about half of people who experience an ankle sprain seek help. We also know that up to ONE THIRD of individuals experience chronic ankle instability after an ankle sprain.

It is in your best interest to handle ankle sprains correctly. Otherwise, they come back to bite you again and again.

Below is a list of factors that physiotherapists consider while gradually returning you to your activity of choice. It’s not just about going back to practice and taking it easy for a day or two then going to play a game next week. In the clinic we test and re-test all of these aspects and gradually help people progress up to their top level of functioning.

If you want to manage your sprain yourself you absolutely can, especially it’s not your first time and you know what to expect. But please know that going back too soon is a really good way to get re-injured and everything that is listed below is relevant no matter who is doing your rehab.

(Looking for what to do immediately after an ankle sprain? Read our Top Ten Tips for Acutely Sprained Ankles in our blog!)

Factors to Consider in Ankle Sprain Rehab:

Pain:

  • Do you have any pain?

  • Does it hurt while exercising or afterwards?

  • How intense is the pain and where is the location?

  • How long after the pain starts will it subside and return to baseline?

AdobeStock_139924818.jpeg

Swelling:

  • Is there swelling?

  • Is it old or new swelling?

  • How does the swelling fluctuate with activity?

Physical Aspects:  

  • Does your ankle move in all directions as well as the other foot?

  • Is the strength equal in all directions?

  • How is the endurance?

  • What about the power?

  • How about your sensorimotor control - do you have complete proprioception back (a fancy word for knowing where your body is in space)?

  • Is your balance as good on that side?

  • How about your dynamic control - can you maintain stability and balance while moving and doing other things?

  • Do you need a brace? Which kind of brace? When should you wear the brace? Can you wean off of the brace?

Mindset:

  • How do you feel about your ankle?

  • Are you confident that it will be fine?

  • Do you feel that your ankle is stable?

  • Are you psychologically ready to go back?

  • In contact sports, does the thought of someone checking you from behind make you nervous?

Functional and sport performance:

AdobeStock_293619619.jpeg
  • Can you hop? Jump? Change directions?

  • Can you jog? Run? Sprint? Run a gentle curve? Cut to the side? Slam to a stop?

  • What about things specific to your sport? For example if you are a soccer player can you pass? Receive a pass? Shoot? Tackle?

  • Are you fast enough to react to another player?

  • Can you do all the drills in practice? What about a scrimmage?

We want you to be able to do all of these things and do them well before you fully return to your sport. It’s a long list to consider and not always easy to answer every question, but it’s important to run through this list and make sure you are really ready to return to sport.

If you suffer with ankle sprains, get it checked out by a physiotherapist - we are the experts at this! We are always happy to see you and will do our best to get you back out there as soon and as safely as possible.

Need to book an appointment? Book online, send us an email or call us at (778) 630-8800. Happy healing!

Ask A Physio: If My Knee Hurts, Why Are You Looking At My Hip?

AdobeStock_200432432.jpeg

As physios, we see bodies differently than most people. This is a good thing - you want your body specialist to see beyond the obvious! But what is often obvious to us is a mystery to others.

You may have heard one of us talking about the kinetic chain, a concept borrowed from the engineering world and repackaged for health care. The basic idea is the movement in one joint will create and affect the movement of the next joint, and so on. If your pain is in your elbow, we would be doing you a disservice if we didn’t also look at your wrist, shoulder, neck and upper back as well.

The kinetic chain is a big reason why one-size-fits-all approaches don’t work.

We don’t tell you to simply Google your symptoms and treat yourself. One person’s treatment approach for sciatica will be completely different than the next. My grandma’s elbow pain often has a completely different cause than my daughter’s elbow pain, even if they are in the same spot. Looking at the body as a whole is imperative to proper treatment.

A Case Study in Kinetic Chains: Runner’s Knee

A great example of this is someone with runner’s knee, also known as patellofemoral syndrome (PFPS). To understand how PFPS develops, an understanding of knee biomechanics is crucial.

The patella (aka the kneecap) rides in a groove on the femur at the front of the knee and is critical for proper knee movement. The patella acts as the attachment point for ALL your quads - think of how much muscle that is! To stretch out your leg, your quads first contract and pull on the patella. The force is transmitted through the patellar tendon (or ligament, depending on who you read) and pulls on the tibia, the main bone of your lower leg. Without the patella, the amount of force required for the quads to unbend the knee is simply too great. The patella acts as a fulcrum, giving the quads a mechanical advantage.

Need a visual? Check out this fantastic video:

Muscle imbalance is one of the main causes of PFPS. The patella is held in its position by a fine balance of muscle and connective tissue. Muscles that attach to the patella directly - we’re talking about the quads here - are obviously a main focus. But there’s many more muscles to consider. Consider these two examples:

AdobeStock_348335712.jpeg
  1. One cause of PFPS is tight calf muscles. The gastrocnemius, one of the calf muscles, attaches at the back of the leg above the knee and can have a great effect on knee function. When these muscles are too tight, people tend to walk more in a pronated foot position (see photo on the right), increasing the forces at the back of the knee and adding to the compression and irritation of tissues around the patella.

  2. The IT band runs the length of the thigh on the outside of the leg and attaches to the outside of the patella. The gluteus maximus, the large muscle in your buttock that controls hip extension, attaches into the top of the IT band. If the glutes aren’t doing their job, you can experience knee pain even if it isn’t the source of the problem.

We don’t expect you to know the ins and outs of this - that’s our job! When you come in for a little rehab, don’t be surprised when we start checking out your other joints - you may be surprised by what we find.

If you need to see a physiotherapist, give us a call at (778) 630-8800, email us or book online. We would love to work with you!

Improving Your Golf Game

LVP-Final-3.jpg

Trevor Reid, one of our physiotherapists at Ladner Village Physiotherapy, is a former athletic therapist with some of Fraser Valley University’s varsity teams. An avid golfer, Trevor has given his tips on how to improve your golf game.

Want to know more about Trevor? Read all about him here!

Golf is a fun sport played by many in our community. We are lucky to have an abundance of courses including Beach Grove, Tsawwassen Springs, The Links at Hampton Cove, Kings Links and Delta Golf Course. I’m still working my way through all of them!

The Golf Swing

As you could imagine there are many different forces and mechanical components involved in a golf swing. As complex as a golf swing may be, Newton’s Third Law of Physics still applies:

When two objects interact, they apply forces to each other of equal magnitude and opposite direction.

In other words, when a club hits the golf ball it causes the ball to go flying in the opposite direction. We can use this simple concept to our advantage in two main ways: generating more force and moving through a bigger range of motion:

  1. Producing more force - Any exercise that strengthens an individual’s muscles involved with a golf swing will allow them to produce more force which can then be applied to the golf ball.

  2. Increasing available range of motion - Any mobility exercise that can gain range of motion related to a golf swing can allow for force to be generated over a longer period of time.

When performing a specific strength and mobility regime you will be able to hit the ball further and improve your game!

A good golf swing involves your entire body. Your feet need to be planted and well engaged. The power behind your swing is driven from your legs and core and transferred to your arms in one seamless motion. Making the most of your swing requires strong muscles and mobile joints from head to toe.

AdobeStock_345242654.jpeg

The Exercises

Looking for some starters? Here are some of my favourite golf strengthening and mobility exercises you can do at home 2-3 times per week. The first four exercises can be performed for 10 repetitions (both sides) for 2-3 sets, then finish off with the stretch at the end.

1. Dead bug: A good exercise to strengthen the core muscles.

yqDYm+D+QHy4PE8ALDGw1g.jpg
urUHYigRTOuM8q8x8+rQrA.jpg
 

Lay flat on the ground, raise your arms and legs in the air and keep the knees bent at 90 degrees. You will then straighten/lower one arm and the opposite leg at a time while the opposite limbs stay in the starting position. You will then return to the starting position and repeat the same movement on the opposite side. Be mindful to keep your core engaged - no back arching!


2. Resistance band trunk rotation: Helpful on strengthening the rotational muscles.

QlXItzjLQTunzZniX0YjTA.jpg
U5ysyuB7RkqLjyvpSV1IjA.jpg
 

Tie a band around a stationary structure (like a door knob) then stand 3 to 4 feet away from the band. Straighten both arms fully and hold the band between your interlocked hands. From this position, you will rotate away from the band and then return to the starting position, perform this movement on both sides.


3. Knee swings: Effective at keeping the hip muscles and lumbar spine mobile.

eAEFUCmzS1imaKrkFpch2w.jpg
8pcp8tYFTcCzC0G9LSV1Jw.jpg
 

Lay on your back, bend both knees and then swing them side-to-side.

4. Seated thoracic spine rotation: Good for improving the mobility of your thoracic spine.

P%35pjvWQNOyIDYA3c9a3w.jpg
MLtC4cAWTlyWlZU+bW88mg.jpg
 

Sit in a normal chair, cross your arms across your chest and then slowly rotate left and then the right.


5. Quadratus lumborum stretch: A muscle commonly tight in golfers.

xFchnp4wTCuXVsB0YVQm6g.jpg
 

Start on your hands and knees and place your hands slightly off to the side. Lean back while keeping your hands in the same place, go until you feel a stretch on the opposite side of your lower back. Hold for 30 seconds on both sides.


Does your golf swing need a bit more oompf? Book with us online, by email or phoning (778) 630-8800. Until then, see you on the course!

Summertime in Delta

That big shiny thing in the sky… I’m told that’s the sun. According to the weather man “June-uary” is over and the heat has finally arrived. How exciting!

Before we all just rush outdoors to soak it all in I wanted to point out that we Vancouverites are not so great at dealing with warm days (kind of in the same way we aren’t great with snow. How can you be expected to be good at something if you never get to experience it am I right?). Let’s take this opportunity to remind ourselves of some important factors to consider before heading out into the sun to exercise.

Nicole’s Top Tips for Summer Exercise

AdobeStock_109278442.jpeg
  1. Stay hydrated! Your body will sweat extra when it is hot out. Keep yourself cool and help prevent heat injury (such as heat stoke) by keeping the H2O handy!

  2. Be aware of your fitness level. Unless you are acclimated to the heat your exercise tolerance will go down when it is hot out. Take it easy and listen to your body. Go at an intensity that feels good for you. You probably won’t be able to run as far or as fast when it’s 28 degrees out as you did a few weeks go when it was 10 degrees and cloudy. And that’s okay.

  3. Timing is everything. Take advantage of the long days! Early mornings and late evenings are significantly cooler and more pleasant for exercise (or just to exist in generally speaking, just ask my golden retriever).  

  4. Wear sunscreen. Just do it.

  5. Wear appropriate clothes. Loose fitting thin clothes in a light colour will help you stay cool.

  6. Location location location! Is there a shady spot that you could go for your run instead of the track? Could you bike along the water where there is a breeze? It’s worth checking out!

Some of our favourite outdoor summer exercise opportunities in Delta include:

AdobeStock_279951273.jpeg
  • Hiking or nature walks - If climbing mountains isn’t your thing than A) you chose the right place to live because Ladner is as flat as a pancake, and B) Delta has some lovely little forest walks including Deas Island, Watershed Park and Burns Bog. If mountains are your thing then that’s great too. Be safe and take pictures for us!  

  • Walking - Walking as exercise is underrated. It gives you cardiovascular benefits and is well tolerated when it’s hot out (need more details? Check out our earlier blog on the health benefits of walking as well as our favourite walks in our neighborhood). You can make a walk more challenging by changing the terrain (walking on sand is more difficult that concrete) or by increasing distance. Remember that walking doesn’t have to be fancy - I love my evening neighbourhood walks with my dog.

  • Water sports - Paddle boarding and kayaking are great options in South Delta. They work your core and upper body while you get to stay cool out on the water. Just remember your hat and sunscreen!

Remember to go indoors if needed - not everyone likes the heat and that’s okay too. You could do yoga inside your own home, or workout at the gym (woo hoo for air conditioning).

Whatever you decide, I hope you have a great time and stay safe. It’s been a doozy of a year and I’m glad that we can all take an opportunity to enjoy some of this lovely weather. 

Ask A Physio - Why Is My Joint Making That Noise?

Joints can make peculiar noises. They can snap, pop, crack, grind, grate, click and clunk. The proper name for these noises is crepitus. Many people become understandably nervous about this, especially if it is a “new noise.” Although crepitus is generally unwelcome, it is not as scary as you think.

When people come to physiotherapy for joint noises they generally have similar concerns. They want to know what is causing the noise and how to stop it.

The general perception people have is their joint must now be degenerated and “bone on bone.” People take this as a sign of aging and extreme arthritis and become scared for their joints. They do not want to unnecessarily wear the joints down.

So what do they do? They avoid the noise! They stop climbing stairs and getting down on the ground to play with their kids and grandkids. They tell me they have stopped doing the movement that initiates the noise in order to “preserve” the joint or avoid “making it worse.”

It seems logical right? If I rotate my neck to the right and it snaps or clicks I may feel unsettled by that and want to avoid that feeling. I hear constantly from my clients that they don’t swim anymore because their shoulder clicks when they bring their arm over their head, or they no longer squat because their knees click on the way down.

My response to these clients is always the same - I ask:

“Does it hurt when it clicks?” 

Because here is the thing. There are many causes for crepitus. And yes, some of them require treatment, but many do not! Before anything else, we need to figure out what is causing the clicking and decide if we have to be concerned about it or not.

Most snaps, crackles and pops are pain free and totally harmless.

If you do not experience pain when your joint makes a noise you don’t have to worry about it and can continue with business as usual. 

AdobeStock_124729956.jpeg

Common Causes of Crepitus

  • The most common culprit is gas bubbles popping within the joint (think cracking knuckles). When the joint is stretched and released a gas bubble is formed and then pops, causing the noise.

  • The crepitus could also be a tendon or ligament snapping over a bony structure. In this case there might be pain, but it has nothing to do with the joint and a whole lot more with the muscle. This would require an assessment, range of motion and strength exercises from a physiotherapist.  

  • Arthritis. Yes, sometimes crepitus is because of arthritis.  But please know that the clicking or grinding does not mean you are doing “extra damage” to the joint. If you have arthritis a primary goal is to maintain range of motion. Working through your available range should be a priority rather than being avoided. If your knees are a little extra talkative but you have no pain and no decrease in function I would encourage you to continue with your activities. There are so many benefits to exercise (cardiovascular, mental, general strength, etc.) and it would be a shame to throw all of those away because of a misconception that you had about your click-y knee. 

AdobeStock_310179278.jpeg

Speaking of Knees…

Most noisy joints I see people for happen to be knees. If you’re wondering what that noise is and what’s causing it, here’s our top three noises people complain of and what they could mean (please be aware that this is a gross generalization but is meant to give you a decent idea):

  1. Snapping, cracking or clicking “outside” of your knee: This is often due to the patellofemoral joint. The patella (aka kneecap) lives in a little groove that it is supposed to glide up and down in when your knee bends and straightens. If the patella is not properly aligned (maybe from an injury or muscle imbalance) it can make noise as you crouch, use the stairs, or just with bending and straightening your knee. If these noises are inconsistent, occasional, and pain-free I would not worry. If they are constant and painful then seeing a physiotherapist can be very helpful.

  2. Snapping, cracking, or clicking “inside of your knee”: This is often your meniscus, which is the cartilage shock absorber within the joint. With injury or degeneration over time this structure can tear, rip or peel back. In some cases a flap of cartilage can get caught out of place and this will often cause the joint to “lock.” If you have a click within your knee that causes a sharp pain and sometimes causes the joint to lock it is likely a meniscus problem and you should visit a physiotherapist. 

  3. Creaking or grinding: This is most often associated with arthritis. If it is early stages and you are noticing some pain it is definitely worth a trip to your neighbourhood physiotherapist as an arthritis management plan can significantly impact the maintenance of range of motion, strength and function in the joint. (Side note - since exercise is one of the best ways to manage osteoarthritis, we offer the GLA:D Program!)

AdobeStock_339417439.jpeg

Again, if you experience these noises and there is no pain then I would not be too worried about it. But if you have these noises and they are painful it is probably worth coming in to see a physiotherapist. We will assess your joint range of motion, muscle strength and balance, and see if we can identify the cause for the click so we can come up with a treatment plan that will work for you. 

If the noise bothers you enough that you cannot stop worrying about, come on in. If nothing else we can confirm to you that it is harmless and you can have peace of mind moving forward with your activities. We are always happy to help! 


If you have any questions or would like to schedule an assessment please call Ladner Village Physiotherapy at 778-630-8800, email us or book online at ladnervillagephysio.com 

Stephanie's Top Tips For Managing Your Sore Shoulder

IMG_8112.jpg

Stephanie Yip is one of our physiotherapists here at Ladner Village Physiotherapy with a passion for treating shoulder injuries. In her latest blog post, Stephanie shares her top tips for acute shoulder management.

The shoulder joint is the most mobile joint in our body, but that also makes it the most unstable joint and prone to injury. Chances are you’ve experienced an achy shoulder at some point in your life. With rock climbing and paddle boarding being my two favourite activities, I have definitely had my share of annoying shoulder pain. I get it - you can’t sleep, easy tasks feel impossible, and you just want to get back to life.

To learn more about shoulder anatomy and the muscle of the rotator cuff, check out this blog post. Today, I am here to share some practical, easy-to-implement, everyday tips for managing your sore shoulder in the early days of your rehab journey.

EVERYDAY LIFE

If your shoulder is in pain, you will automatically want to hold your arm to your side and not use it as much. This will only increase the stiffness and tension in the surrounding muscles, and add to your discomfort.

AdobeStock_178583612.jpeg

Instead, follow these tips:

  • Continue to use your arm in pain-free ways throughout the day - The best way is to use it for easy tasks like turning a page in your book, picking up your keys, or taking out your credit card.

  • Keep tasks within an easy arm’s reach - Avoid long levers. Carry loads close to your body. Avoid reaching far away for items by moving your body closer to what you need.

  • Avoid repetitive overhead motions - The most unstable and (muscle-speaking) demanding position for your shoulder is overhead. When your shoulder is healing, avoid being up here as much as you can.

PAIN MANAGEMENT

So your shoulder is sore and bugs you all the time – now what?

  • Avoid compensating movements - The most common one is hiking your shoulder up to reach items overhead. This will create more tension and discomfort in the muscles around your shoulder.

  • Try heat or cold to ease the pain - This is 100% your choice; pick the one that feels better for you.

POSTURE

Your posture plays a huge role in where your shoulder is positioned and as a result, how much pain you experience while at rest.

  • Don’t let your shoulder poke forward - This means no slouching!

  • Support your arm when resting - If you’re chilling on the couch or at your desk for a while, support your arm with a cushion/pillow/armrest so that it’s in a neutral, stable position

  • Use the “fish hook” rule - Imagine there’s a fish hook pulling you up by your sternum. This will help set your back in a better position.

SLEEP

AdobeStock_78207150.jpg

It is normal to feel more pain or discomfort at night while trying to fall asleep. When sleeping, you aren’t aware of where your arm is in space and are much more likely to put it in a position that can get quite painful.

  • If you’re a back sleeper - Place a rolled up tea towel under your elbow. This will help keep your shoulder in a more neutral position.

  • If you’re a side sleeper - Sleep on your unaffected side and hug a pillow with your injured arm so that it is comfortably supported.

  • DO NOT TUCK the injured arm under your pillow

EXERCISE

You get some shoulder rehab exercises, and you’re super excited to get started. Remember these key points:

  • Do your exercises in small, but frequent bouts - Your shoulder is like a young puppy: it wants to get exercised regularly but gets tired quickly.This means it’s better to do your exercises 3 times per day for 5-10 minutes, rather than doing just one session for 30 minutes.

  • Use pain as a general guide - It’s okay to feel mild discomfort while performing your exercises (think 3-4/10 on an imaginary pain scale) but it shouldn’t feel excruciating. It’s normal to feel a bit of soreness afterwards for a couple of hours but it shouldn’t leave you in agony for days.

If you need this as a printable tip sheet, download it here - Shoulder Management 101


Are you experiencing shoulder pain? Book an appointment online, through email or by calling (778) 630-8800 - we will help get you started on your own rehab journey to getting back to what you love to do most!

Getting Rid of Plantar Fasciitis

AdobeStock_148003092.jpeg

It’s coming up to that season - heel pain season! When we all go from wearing our supportive boots and shoes throughout fall and winter to popping on those flip flops as soon as it hits 15 degrees. Every summer we see an uptick in people complaining of heel pain: a stabbing pain smack in the heel first thing in the morning that sometimes lessens with walking, sometimes not. And when we touch that point on your foot that hurts? You go through the roof.

Read all about plantar fasciitis - the hallmarks of the condition, how we treat it and our top five tips on how to prevent it from coming back.


Plantar fasciitis is the most common cause of heel or “rearfoot” pain. It is most commonly the result of overuse of the plantar fascia (aka plantar aponeurosis), a thick band of connective tissue that runs from the heel to the toes on the bottom of the foot. The plantar fascia has a lot of important jobs in the foot:

AdobeStock_164854183.jpeg
  1. Protection of blood vessels and nerves - like any part of your body, the network of vessels and nerves is dense and required to keep your tissues healthy. The plantar fascia lines of the bottom of the foot and acts as a suit of armour for anything you may step on.

  2. Site of muscle attachment - a bunch of the little muscles that control the toes attach directly onto the plantar fascia.

  3. Helps to maintain your arch - take off your shoe and admire the curves of your foot. Some of those curves are brought to you by the plantar fascia!

  4. Shock absorption and distribution of forces when standing and walking - arguably the most important role of the plantar fascia, it is integral to a healthy foot when walking and running.

AdobeStock_355114152.jpeg

Think of the plantar fascia as the string on a bow - the tension on that string maintains the integrity of the whole bow and provides explosive force for the arrow.

With every step you take, that downward force is absorbed by your plantar fascia. When you roll over your foot and propel off your big toe, your plantar fascia recoils and transfers some of that absorbed energy into forward momentum. Your foot is then returned to its curvy shape, ready to absorb the next step.

But if your bow is only as good as your bowstring, what happens when it starts to fray?

Hallmarks of Plantar Fasciitis

The person with plantar fasciitis will generally complain of the following:

  • A gradual onset of pain

  • Pain in a specific spot on the heel that is tender when palpated

  • Worse in the morning, especially when getting out of bed for the first few steps

  • Pain typically decreases with activity unless it’s been going on for awhile, in which case it just hurts all the time


There have been several risk factors associated with developing plantar fasciitis. These include:

  • Increased training volume and/or number of practice days per week - this is the big one. Overuse injuries happen when the tissue is stressed too much and isn’t allowed to rest and regenerate.

  • Anatomical variations - Varus knees (aka bow-legged) and high-arched feet both lead to a higher incidence of plantar fasciitis.

  • Use of spiked athletic shoes or cleats

  • Standing work - those who stand at work all day are a bit more likely to develop plantar fasciitis.

  • Lack of flexibility and strength in the lower extremities - Tight calves? Weak toe muscles? What about your hamstrings and glutes? All these contribute to how to walk and how those forces go through and are absorbed by your feet.

One area of debate in the risk factor world is the link between BMI and plantar fasciitis. While it has been suggested in several studies that those with a higher BMI are more likely to develop plantar fasciitis, additional studies of athletes with a range of BMIs have not found a significant difference in likelihood of developing plantar fasciitis. A sedentary lifestyle is associated with a higher BMI and therefore weaker muscles so it may be that instead of weight being a risk factor for plantar fasciitis, it’s the lack of strength and flexibility that’s the issue at play.

Getting Back to Function

Plantar fasciitis is something we see in the clinic every day. Typically, rehab goes a little something like this:

AdobeStock_130931215.jpeg
  1. Settle the tissue down - like every overuse injury, we have to settle it down before we build it back up. This may mean LASER or ultrasound. This may mean massaging the tissue, either with a frozen golf ball or with our hands. This may mean supporting the foot with a gel heel pad or heel lift to temporarily provide some of that cushioning. There are lots of options to settle it down, we just have to figure out the combination that works for you.

  2. Tape it - supporting the foot through tape, especially when its aggravated, can be really helpful. There are a variety of tape jobs that are used depending on your specific issues.

  3. Ice it - I’m a fan of frozen golf balls. You can pop them on the ground and roll the bottom of your foot out on them, giving yourself a soothing ice massage.

  4. Stretch the tight things - without a doubt, this means calves. If you come in for physiotherapy for a plantar fasciitis, expect this from day one. The plantar fascia can be thought of as a continuation of the Achilles tendon, which connects the bulky calf muscles (the soleus and gastrocnemius) to the heel. Stretching and maintaining the length of the calf muscles helps cut down on the stress through the plantar fascia - loosening the bowstring, in a way. There may be more things tight as well, from your quads and hamstrings to other muscles up the chain.

  5. Strengthen the weak things - again, we need to look at the whole chain. How are your quads? What about your glutes? Is your core working the way it should? We also need to look at those little muscles in your foot that support your arch and attach into the plantar fascia as they likely need some attention of their own.

What About Footwear and Orthotics?

Proper footwear is incredibly important in the prevention and management of plantar fasciitis. With summer coming, we reached out to our friends at the Run Inn for their recommendations on plantar fascia-friendly sandals for the summer:

 
  • Hoka Slides - another great option for warmer weather, Hokas are nicely cushioned with great support for those with plantar fasciitis.


Once the pain settles down, getting appropriate footwear for your feet will help keep plantar fasciitis and other foot problems at bay. There are several factors that go into finding the right shoe for you - the last, the toe box, the rise… I could go on.

As with anything shoe-related, do not buy them online without being fitted first! Go to a local store that knows their stuff - for us, that’s definitely the Run Inn - and get fitted properly. Different bodies and different feet demand different support! They also have a range of over the counter orthotics that may help as well.

For some, custom orthotics is the way to go. Finding a local pedorthist - someone who is an expert in the foot and all things foot orthotics - is key. We are lucky enough to have a great group in Ladner, West Coast Pedorthics. They are fantastic, informative and thorough - we highly recommend them!

It’s Gone! How Do I Stop It From Coming Back?

Plantar fasciitis can take months to finally go along its merry way. Once it’s gone, these habits will help keep it that way:

Top Five Tips For Preventing Plantar Fasciitis

  1. Wear good shoes all year round - make sure the sandals you choose to wear in the summer are just as supportive as the shoes you wear the rest of the year. Cheap flip flops are not your friend! Remember that all feet are different and demand different supports - get your feet fitted properly by shoe experts.

  2. Keep your calves long and supple - a tight calf is plantar fasciitis’s best friend. Download this PDF for instructions on how to stretch both your gastrocs and soleus.

  3. Untuck your bed sheets at night - when the sheets of your bed are tucked at the bottom, it forces your feet to be more pointed and shortens your calves. Sleeping with loose bed sheets allow your ankles and feet more freedom of movement.

  4. Plan and pace your running and walking - Nicole did a great three part series on injury prevention in running, all of which can equally be applied to walking. Follow her tips on adjusting your running and walking volume, foot strike and strength training.

  5. Maintain a healthy weight and exercise routine - it is clear that a healthy BMI combined with a regular exercise program helps keep the plantar fascia healthy.


Are you experiencing foot pain? Book an appointment online, through email or by calling (778) 630-8800 - we will help you figure out what’s going on and how to get it under control.

Diastasis Rectus Abdominis 101: All About The "Mummy Tummy"

Abdominal diastasis, diastasis rectus abdominis, diastasis recti, abdominal separation, ab gap, “mummy tummy” ….. it has a lot of names. But whatever you call it, I want you to know a little bit more about it so you can be better equipped to manage it.

 
DRA.png
 

What is it an abdominal diastasis?

Diastasis Rectus Abdominis (also known as DRA) is a common occurrence where the linea alba (the line of connective tissue between your six-pack muscles) gets stretched. Note that I said stretched, not torn. Think of pizza dough - stretching the pizza dough is a diastasis, but there are no holes or tears in the pizza dough (which would be a hernia).

DRA most commonly occurs during pregnancy but can also occur in people who have never been pregnant, such as people who lift really heavy weights with poor abdominal engagement and technique.

DRA is considered a normal change in pregnancy!

Your body stretches to accommodate the growing baby and honestly, stretching is kind of the name of the game when it comes to pregnancy. Did you know that uterine capacity increases from 4ml to 4000ml at term and abdominal length increases by an average of 115% at 38 weeks gestation? Can you imagine how uncomfortable pregnancy would be if your stomach didn’t stretch? I can only imagine the heartburn.

So I hope we can all agree that the stretch is a good thing and we are on team stretch - yay for stretch! But unfortunately, as with other body parts faced with a sudden increase and then decrease in size (RIP pre-baby boobs), it is also quite common for that stretch to remain after pregnancy.

How common is DRA?

Way more common than you think! Here’s the research from Mota et al and Sperstad et al showing how common DRA is in pregnancy:

  • 33.1% of women at 21 weeks pregnant

  • 100% of women at 35 weeks pregnant

  • 60% of women at 6 weeks post-partum

  • 32% of women at 12 months post-partum

How do I know if I have a diastasis?

DRA Doming

There are a few ways to tell! The most obvious sign that people notice is the presence of an abdominal “dome”, “cone” or “triangling” of their stomach when they exercise or during daily activities (like getting up from the couch or straining on the toilet). This is a protrusion or bulge down the center line of your stomach when you attempt to use your muscles without correctly preparing or stabilizing first.

Some common movements which can cause doming are crunches, “V” sits, Russian twists, pull ups and getting up from bed or a reclined position.  This picture is someone with a diastasis doing a double leg lift without any preparation for the movement. Can you see the peak down the middle of her tummy? This is what we are talking about when we say “the dome.”

Avoiding the dome is one of the biggest considerations for proper DRA management.

If you haven’t noticed a dome you may also be able to feel the increased space between your abdominals.

To test yourself for DRA:

  • Lie flat on your back and press your fingers into your midline right underneath your sternum.

  • Press again a few inches down and keep going all the way down to your pubic bone.

  • When you press you might feel that some places feel firm and springy while in other places your fingers might sink in deeper. This could indicate an area that has stretched.

  • You can confirm this with a head lift test: with your fingers in the soft spot do a mini crunch and lift your head and shoulders off the ground, does the soft spot narrow? If it does that is another indication that you likely have a diastasis (the narrowing is a good thing, don’t let it freak you out!).


Need a visual? Check out this youtube video for a guide to assessing your own DRA.

Still not sure if you have a DRA? A pelvic floor physio, midwife or OB could also tell you right away if you have a diastasis and give you further direction.

Is it my fault?

This is a question I hear a lot and the answer is usually a resounding NO. Women often say to me “maybe if I didn’t gain so much weight” or “maybe if I was younger then my gap wouldn’t be so big” but according to the research this simply isn’t true.

According to a wide body of research, here is a list of things that are NOT risk factors for DRA:

AdobeStock_404215893.jpg
  • Age 

  • Ethnicity

  • Height 

  • Pre-pregnancy weight

  • Duration of labour  

  • Method of delivery

  • Weight gain during pregnancy 

  • Baby weight at birth

  • Gestational age 

  • Exercise training before, during and after pregnancy

  • BMI before pregnancy or at 6 months postpartum

Some things that we think might contribute to a diastasis are:

  • Having multiple pregnancies close together

  • Being pregnant with multiples

  • Heavy lifting using a Valsalva technique

  • Genetics

Will it go away?

While some natural recovery can occur in the first 8 weeks postpartum a large number of women will still have a DRA and need to learn how to properly manage it going forwards.

How do I manage my DRA?

DRA dome.png

Management will include learning proper movement and abdominal techniques so you can exercise without worsening your diastasis. You will need to avoid the dome. I know I mentioned that earlier but it needs to be repeated.

Exercises and movements which cause a dome will need to be modified until you are strong enough to maintain control throughout the entire movement.

DRA no dome.png

Take a look at the pictures on the right hand side. You can see the doming in the DRA in the top picture. Through proper technique, this doming can be controlled - this is demonstrated in the bottom picture. This person has properly activated the rest of her abdomen and is in control of the movement. Can you see how her stomach remains flat even when she lifts her legs?

(For what its worth, this lady deserves a lot of credit because that move is really hard to do properly and I’m sure it took some time and practice to get to this level!)  

The most important thing to remember:

AVOID THE DOME. Say no to the dome. You are now a dome-free zone.

A pelvic floor physiotherapist will be able to assess your abdominal diastasis, teach you correct abdominal control techniques, give you exercises to increase your abdominal strength and endurance, and help you transition back to your preferred type of exercise.


If you suspect you have an abdominal diastasis and want to investigate further, please feel free to book with Nicole at Ladner Village Physiotherapy by booking online or calling us at (778) 630-8800. She will be happy to help!

Ask A Physio: How Can I Get Rid Of My Sciatica?

AdobeStock_270090264.jpeg

We’ve all heard of sciatica - that awful, weird pain that runs down the back of your leg. It’s often fairly vague pain and hard to pinpoint but there’s no mistaking its presence.

Lately, we have seen a serious uptick in clients complaining of sciatica and its good friend, low back pain. So, what is sciatica and what exactly can we do about it?

What Is Sciatica?

Sciatica refers to in irritation of the sciatic nerve which runs down the back side of your leg and innervates the hamstrings and all the muscles below the knee. The sciatic nerve is HUGE - about the width of your thumb! It passes through, around and beside some major structures including the spine as well as the glutes and piriformis in the buttocks.

The classic profile of someone with sciatic-related pain can include:

AdobeStock_216462525.jpeg
  • Pain in the low back that radiates down the back of the leg, described as anything from dull and achy to sharp, burning or electrical

  • Tingling and/or numbness in the lower spine, buttock, back of thigh, calf and/or foot

  • Increase in pain with certain postures - often sitting with the legs stretched out or driving a car is terrible, but standing, walking or lying down eases pain

  • Electrical and/or shock-like pain down the back of the leg

  • In extreme cases, weakness of the muscles in the lower leg and hamstrings

Usually, the pain is just on one side as it’s only one nerve that’s affected, not both at the same time.

How Do We Treat It?

At the root of it, sciatica is a symptom, not a diagnosis. When the sciatic nerve is pressed on or irritated by other structures, sciatic pain is the result.

Before addressing the sciatica itself, we need to figure out what’s causing the pressure on the sciatic nerve in the first place. The likely candidates include:

AdobeStock_258197710.jpg
AdobeStock_329897389.jpg
  1. Herniated Disc - the nerve roots that exit the spinal cord to form the sciatic nerve can be compressed by a herniated disc, leading to sciatic pain. This is the most common cause of sciatica.

  2. Spinal Stenosis - literally meaning “narrowing”, stenosis occurs when the tunnel of bone that allows the nerve roots to escape shrink, often by bone spurs or a loss of disc height.

  3. Arthritis - When arthritis hits the spine, it usually leads to bone spurs around the exiting nerve roots, similar to stenosis.

  4. Pelvic and/or SI Joint Hypermobilities - most of the muscles that lie over and around the sciatic nerve are attached to some point of the pelvis. When the pelvis is moving more than it should, these muscles often tighten down to try and stabilize the pelvis. When this occurs, an unintended consequence is pressure on the sciatic nerve. Pregnant women with sciatica: this is likely you!

  5. Piriformis tightness - this deep muscle lies right over the sciatic nerve. If it’s too tight, it can squeeze the sciatic nerve.

The treatment approach is defined by the source of the sciatic nerve irritation. Is the problem at the spine? Is it a muscle imbalance or spasm causing the problem?

We see a lot of “one size fits all” fixes for sciatica online. These often don’t work because the root problem isn’t identified and addressed. If your sciatic pain isn’t going away, your best bet is to be assessed by your medical practitioner and figure out what’s driving your sciatica.

My Sciatica Is Gone! How Can I Prevent It From Coming Back?

There are loads of ways to keep sciatica at bay! The top tips:

  • Stay active - Look at all those causes of sciatica listed above. All of them benefit from exercise - strengthening, stretching, MOVING. In fact, one of the biggest risk factors for sciatica is prolonged sitting. So if you don’t want sciatica, move more!

  • Maintain a healthy weight - a normal weight keeps your spine healthier with less disc pressure and a lower chance of degenerative changes, both of which contribute to sciatic pain.

  • Sit properly - I’m talking feet on the floor, bum at the back of your chair with a lumbar support properly. Not sure what that looks like? Check out our blog on proper ergonomics.

  • Strengthen your core - A strong core means a supported spine and pelvis, preventing sciatic nerve compression.

  • Use good body mechanics - Considering a disc injury is the leading cause of sciatica, protect those discs! Lift with your legs and try to not twist as you lift a heavy load. Hold those heavy loads close to your body and find a friend if it’s really heavy.


If you’re dealing with low back or sciatic pain, give us a call at (778) 630-8800 or book online.

Ballerinas & Bunions

Anh Duong grew up in Prince Rupert and was a competitive dancer for years, training in ballet, jazz, tap, contemporary, modern, hip hop and acrobatics. She is a member of the Dance Health Alliance in Canada and she now works with dancers at all levels. Whether it’s dealing with an injury, preparing the feet for pointe or improving performance, Anh has the experience and expertise to help you reach your goal. Read Anh’s latest blog on bunions in dancers.


AdobeStock_171548531.jpeg

Bunions are one of the most common foot injuries in dancers. They can be incredibly painful, making it nearly impossible to go on demi-pointe, land a sauté, or perform a pirouette.

Hallux valgus, more commonly known as bunions, is a deformity of the 1st metatarsophalangeal (aka MTP) joint causing the big toe to deviate towards the other toes. It can often lead to swelling, inflammation and bony growth on the inside of the big toe.

There are certain risk factors for developing bunions that are out of our control. These include being female, older age, genetic predispositions, and having a longer 1st metatarsal bone.

Luckily, there are certain risk factors that we can control:

  • Practicing proper turnout technique: Insufficient turnout at the hip can cause hyper-pronation or ‘rolling in’ at the feet. This places more pressure on the inside of the big toe, pushing the big toe towards the other toes and leading to bunion development.

  • Avoid wearing ill-fitting shoes: Constrictive shoes can contribute to development of bunions. While this goes for all shoes, wearing worn out or ‘dead’ pointe shoes also increases the risk as the shoe may no longer provide adequate support. Dancers should get their shoes properly fitted by their local dance shoe expert to avoid problems with bunions down the road.

  • Strengthen foot arches: Fallen arches are often the result of weak intrinsic foot muscles and can increase the stress to the inside of the foot including the big toe.

  • Avoid leaning on the big toe: Although a winged foot is a desirable look, be careful to avoid bearing weight and putting significant pressure through the big toe, especially in classical position or positions in derriere.

IMG_4294.jpg

How Do We Treat Bunions?

When it comes to treating bunions, research suggests that a multifaceted approach is best. When treating conservatively, this includes:

  1. Correction of improper technique and alignment with the focus on proper turnout technique at the hip and proper weight distribution over the foot

  2. Use of toe spacers can assist with big toe alignment and help reduce pain

  3. Joint mobilization of the foot, ankle, knee and hip, depending on specific joint restrictions

  4. Strengthening of the big toe muscles as well as the little muscles in the foot to help manage symptoms and slow progression of bunion formation

Surgical management is an option but should be the last resort and delayed as close to retirement as possible, generally speaking. The flexibility and mobility of the big toe can be impaired and difficult to regain fully after bunion removal. 

If you are a dancer experiencing bunions or want to learn more about preventing bunions, book with Anh online or give us a call at (778) 630-8800. 

So You've Had A Concussion, Part 2 - Returning to Life

Devon Konrad is a registered physiotherapist and vestibular therapist. She has taken several post-graduate courses in concussion and is a true believer in the multi-disciplinary approach to concussion - in other words, it takes a team and she is but a part of it.

In her second instalment of a three part series on concussion, Devon focuses at return to sport, school and work. Part 1 looks at what a concussion is and how we approach it in the first 2 weeks - if you have recently suffered a concussion, start at Part 1 first! Part 3 discusses persistent concussion symptoms.

AdobeStock_166398965.jpeg

If you’ve had a concussion, you’ve likely heard that you need to return to activities slowly. But has anyone ever defined that for you? What does “slowly” mean? What “activities” are we talking about? Why is everything so vague?!?

It’s a fair point, dear reader - the concussion world is a vague one. Thankfully, there’s been a huge push in the past decade to answer these exact questions and give a solid framework for return to school, work and sports.

Remember: most adult brains heal wonderfully within 2 weeks and kid brains within 4 weeks. We expect most people to progress through their recovery even if things aren’t smooth the whole way.

Regardless of how progress is going, everyone should have a follow up appointment with their medical doctor or nurse practitioner within 2 weeks of their concussion. This allows any potential problems to be identified early and dealt with in a timely fashion.

First, A Word On Symptoms

We used to say you should not increase your activity level until you were symptom-free. Well, we were wrong. If you broke your leg, we would expect some pain and crankiness from your leg as it healed. The same goes for your brain - we do not expect you to progress through your recovery symptom free.

In these first few weeks, what we avoid are worsening symptoms. If you go into a day with your head feeling like a 3/10 (with 0 being completely symptom free and 10 being the worst symptoms imaginable), we want those symptoms to generally stay at a 3 or below. When symptoms start to increase, the activity needs to be changed and symptoms need to be actively managed.

Starting A Return To…

Here are the general points of any return to school/work/play plan:

  1. Before starting a return to anything, a day or two physical and cognitive rest are needed.

  2. Returning to work and school take priority over returning to sport (I know I’m breaking some hearts when I say that - I’m sorry!).

  3. Each plan is broken down into specific stages that must be achieved before moving onto the next stage.

  4. If a person feels ready to move onto the next stage and symptoms spike, they are brought back to the previous stage. This does not mean they fail, it just means they take a bit more time at the previous stage.

  5. Every person will progress differently through the stages. Brains are complex and no two recoveries are the same!

Return To Work

It is important for all groups involved - the client, the employer and the medical team - to collaborate and work together in getting someone back to work safely. We follow the same guidelines for work as we do for other activities:

  • Take a day or two off work. Make sure your brain is able to rest, both physically and cognitively.

  • Work on you first. Keep your normal work day routine. Get dressed, make simple meals, go for walks. Make sleep at night a priority and keep a schedule during the day.

  • Start gradually adding work activities in (for instance, working on the computer or reading). Start in short bursts - no more than 15 minutes in one sitting - and pace yourself!

  • As you heal, gradually add more time, amount and intensity of the activities. Remember: the goal is to keep your symptoms from worsening.

  • If your symptoms worsen, back off. Go back a stage and stay there another day or two. An increase in symptoms is not a sign you are doomed, it just means you went a little faster than your brain was ready for. Listen to your body and try again later.

AdobeStock_298655858.jpg

The decision of when to return to work is very job dependent. The administrative assistant may need to make sure their symptoms are controlled with a lot of computer work while the electrician may need to be comfortable working at the top of a ladder while looking overhead. Each job presents its own hurdles.

As physiotherapists, we are integral to the return to work plan, breaking down tasks into manageable components and gradually increasing these safely. The collaboration between the medical team, the employer and the client is crucial to ensuring a safe and successful return to work.

Return To School

We are very lucky to have the GF Strong Rehabilitation Centre, a leader in the field of traumatic brain injury research and treatment, in Vancouver. One area in which they have invested significant resources is the GF Strong School Program, a collaboration between teachers and medical professionals to get kids back to school after concussions (as well as other injuries and illnesses).

AdobeStock_404515726.jpeg

Their Return to Learn protocol outlines specific stages for return to school after a concussion. Every student needs to have a return to school plan with accommodations depending on symptoms. Teachers, principals and counselors need to be aware of the student’s concussion and the plan that has been set in place.

Here’s a snapshot of the Return To Learn protocol:

  1. Physical and Cognitive rest - just like for everything else, this is max 48 hours or when symptoms start to improve

  2. Light cognitive activity - working up to 30 minutes of reading, drawing or TV without an increase in symptoms

  3. Stage (2) plus school work at home - working up to 60 minutes of school work in 30 minute chunks.

  4. Back to school part time - with the return to school plan and maximum accommodations in place, working up to 120 minutes of cognitive activity in 30-45 minute intervals

  5. Part time school - moderate accommodations, working up to 240 minutes of cognitive activity in 45-60 minute intervals plus up to 30 minutes of homework per day

  6. Full time school - minimum accommodations with no limits on cognitive activity at school and up to 60 minutes of homework per day

  7. Full time school - no accommodations or limits

If you are teaching kids with concussions, GF Strong created a Guide for Classroom Teachers with links to more resources.

The CDC also has a great document for returning to school - it outlines who at the school should be involved in the process and some great strategies when running into specific concussion-related roadblocks. They also have some great information about concussions aimed at school nurses, educators and parents.

Return To Sport

Good news for the athletes! Almost all of the research in concussions has been done in the sports world. As a result, several sports have tailor-made return to sport guidelines. A return to sport strategy can be started after the first 24-48 hours of physical and cognitive rest. Generally, it’s recommended that at least 24 hours pass between stages - no skipping ahead!

AdobeStock_223016084.jpeg

In general, the guidelines follow 6 stages:

  1. Symptom-limiting activity - before the athlete can start back into their sport, they need to get back to school or work without worsening symptoms.

  2. Light aerobic activity - here, the goal is just to get the heart rate going without worsening symptoms. Concussions can have a significant effect on heart rate and it’s important to get this under control before introducing anything else. Resistance training is not allowed in this stage.

  3. Sport-specific exercise - now, movement is added in the form of running or skating drills. Resistance training is still a no go, as are any head impact activities (no tackle practice!).

  4. Non-contact training drills - it’s time to add a bit of thinking to the physical exercise, making it significantly harder on a healing brain. Resistance training is generally allowed to start at this stage.

  5. Full contact practice - after medical clearance from the athlete’s family doctor or nurse practitioner, contact is added into the mix.

  6. Return to sport - goal achieved!

For sport-specific return to sport guidelines, scroll on down to Sport-Specific Return-To-Sport Strategies for everything from rugby and hockey to badminton, canoe and water polo.

Parachute Canada is a fabulous organization with a lot of sport concussion resources, including the Canadian Guideline on Concussion in Sport. It includes the Concussion Recognition Tool, a handy print out aimed at coaches and parents without a medical background to help figure out if an athlete has suffered a concussion.


Once again, I urge you to visit the Concussion Awareness Training Tool website - it has specific information for parents, coaches, athletes, educators and workers. It includes much more information than I am presenting here and is a fabulous road map to concussion recognition and recovery.

Next up is Part 3: persistent concussion symptoms - what they are and what we can do about them.

If you are looking for some help with your concussion (or anything else!), book online, email us or give us a call at (778) 630-8800.

Hip Pain in Dancers

LVP-Final-6.jpg

Anh Duong grew up in Prince Rupert and was a competitive dancer for years, training in ballet, jazz, tap, contemporary, modern, hip hop and acrobatics. She is a member of the Dance Health Alliance in Canada and she now works with dancers at all levels. Whether it’s dealing with an injury, preparing the feet for pointe or improving performance, Anh has the experience and expertise to help you reach your goal. Read Anh’s latest blog on hip pain and overstretched hip flexors.

Dancers, do you really have tight hip flexors?

For years, I suffered from hip pain, especially with movements involving kicks (i.e. grand battement, developé, rond de jambe en l’aire, etc). I always thought it was because I had tight hip flexors. So naturally, I would get down into a deep lunge and stretch and stretch and stretch... but nothing changed.

Little did I know that it wasn’t a hip tightness issue. The opposite, actually - my hip flexors were long and weak likely from years of being overstretched.

AdobeStock_341976408.jpeg

Think of that hair elastic that you have been using for 3 months, the one that has kind of lost its shape, doesn’t really hold your bun up. Similarly, my hip flexor muscle was overstretched and was not strong enough to hold my leg up.

The hip flexors are a group of muscles that are responsible for lifting your hip and leg up in front of you. They also play a role in bringing your trunk towards your legs (i.e. doing a full sit up). When these muscles are long and weak, they often have to work harder and strain to do their job resulting in that pinching or gripping feeling in the front of the hip. When this happens your body will often recruit different muscles to compensate for the weak hip flexors, often causing even more problems.

For many dancers with hip pain, the solution is often not stretching but strengthening the hip flexors through the whole range of the muscle. 

So what do you do?

AdobeStock_106460279.jpeg
  1. Settle it down and avoid painful movements. This may include marking exercises for a period of time. 

  2. Strengthen the hip flexors. Start with small ranges and slowly work towards larger ranges. Do floor exercises and floor barre before progressing to standing. Use weights and therabands to further build strength.

  3. Core core core! Avoiding compensation movements through the pelvis and spine is key to long term success with overstretched hip flexors. A strong core is the best way to achieve this goal.

Should you stop stretching your hip flexors?

No! Flexible hips are required for many dance movements BUT you need to ensure that you are doing the proper stretches and combining stretching with strengthening. The goal is a strong muscle at any range!

Overstretched hip flexors are one of the many causes for hip pain but certainly not the only cause. Make sure you are assessed by a professional before getting back into the studio. Treating any injury correctly the first time saves you a lot of time and pain in the long run.

If you are a dancer experiencing hip pain, book with Anh online or give us a call at (778) 630-8800. You can either visit us at our Ladner location or book a virtual appointment.

Ask A Physio: Anything You Can Do About Tennis Elbow?

AdobeStock_396571043.jpeg

Sometimes, it seems like we see injuries in spurts. I’ll have a day where I haven’t seen a sprained ankle in months and I’ll see 4 new ones that day. Lately, I’ve seen a lot of people with Tennis Elbow all asking the same question: is there anything you can do?

I’m sure you can guess the answer - YES! We have strategies for getting the pain to settle down, treatment techniques to help settle the tissue, and appropriate exercises to build it back up. But first -

What Is Tennis Elbow And Why Does It Happen?

Tennis Elbow (also known by it’s long name, lateral epicondylalgia or lateral epicondylitis) in an overuse injury of the muscles that attach to the outside part of the elbow. These muscles are responsible for pulling the hand backwards at the wrist, creating wrist extension.

AdobeStock_243823577.jpeg

People with Tennis Elbow complain of pain on the outside of their elbow, especially after using their wrists and hands a lot. Often, this pain is in a specific spot and when you hit it, it can be excruciating. People will often complain their grip strength has decreased especially when their arm is stretched out. (If you’ve heard of Golfer’s Elbow, it’s similar to Tennis Elbow but instead of the wrist extensors, it’s the wrist flexors that attach to the inside, or medial, part of the elbow that are the culprit. We can treat this, too!)

Tennis Elbow isn’t just for tennis players either! Anyone who does a lot of gripping or squeezing movements with their hands are at risk of developing Tennis Elbow - gardeners, plumbers, carpenters and painters are all great examples. We’ve also seen an uptick in people developing Tennis Elbow from increased typing and mouse work, both of which demand a lot of wrist action.

When it comes to rehab, physiotherapists are key to conquering this painful and annoying condition. Here are the top 5 most important things to remember in recovering from Tennis Elbow:

Top Five Tips for Tennis Elbow

  1. Do not overuse an overuse injury! This is a common problem - your elbow hurts when you move your wrist, so you try to stretch it and work it out. A lot. This often just leads to more pain - instead of allowing the tissue to rest and heal, it just gets further irritated.

  2. First, settle it down. We have a tonne of options for this - ultrasound, laser, soft tissue techniques, manual therapy, and gentle and appropriate exercises help to settle the tissue down and allow healing to begin.

  3. A brace might help. Using a tennis elbow brace may be the break your muscle needs to start healing. These braces act like a fret on a guitar string - when you use your wrist, it stops the muscles from pulling on the irritated part, allowing it to heal.

  4. Tape might help. Often, Tennis Elbow is accompanied by joints that aren’t working optimally. Tape can be used to adjust how the joints are moving, taking more pressure off the extensor muscles.

  5. When it’s settled, start building it back up. For any overuse injury, the key is to slowly progress exercises appropriately while not letting it flare back up again. This can be tricky! Every body is different and needs to be treated as such - there is no cookie-cutter rehabilitation plan for Tennis Elbow. This is where your physiotherapist is your guide.

As for all overuse injuries, exercise is key to success BUT they need to be appropriate exercises. The goal is to challenge the elbow without aggravating the injury. Success depends on a slow, incremental approach that allows the muscles to gradually gain strength and to get rid of this annoying condition once and for all!

If you’d like to see one of our fabulous physiotherapists for your elbow pain (or any other pain!), book online or give us a call at (778) 630-8800.

Exercise and Arthritis - The GLA:D Way

Devon.jpg

Arthritis can be a life-changing disease. I have arthritis myself - I feel your pain!

As physiotherapists, we treat a lot of arthritis and hear a lot of misconceptions - “I shouldn’t squat down, that’s bad for my knees” or “I’m supposed to rest when my hip hurts”. But what if we told you this way of thinking is wrong? What if we told you that you could gain some control over your pain simply by changing the way you move?

The research has come a long way. Want the up-to-date info? Keep reading!

Top Ten Facts About Osteoarthritis (aka OA)

  1. It is not “something that just happens” as we age! It is a disease that develops slowly over years and years, often not being diagnosed until quite late in the process.

  2. Over 20% of people in Canada have arthritis, most of that being OA. I don’t know about you, but that number blows my mind.

  3. OA affects young people as well. I was diagnosed with arthritis in my mid-thirties after years of chronic ankle sprains (prior joint injury - a big risk factor!) and I’m not alone. 60% of people with OA are younger than 65 when they are diagnosed and that’s usually after several years of going undiagnosed. We exist!

  4. Meniscal tears and muscle weakness are early signs of OA. Research has also shown the faster we treat these with appropriate exercises, the more you can delay the onset of OA symptoms.

  5. You do not need an X-ray for an OA diagnosis. In fact, X-rays are only 30-40% accurate in detecting OA. X-rays usually only pick up OA in the later stages. In other words…

  6. Ignore the X-ray. Did your X-ray come back negative? Or maybe it shows “bone-on-bone”? Great news - it doesn’t matter! X-ray findings do not predict or define your symptoms or how you function. It doesn’t matter if you have the tiniest bit of OA or the worst case ever - what matters is how it feels, how strong you are and what you can do with it.

  7. Physiotherapists can diagnose OA. We do this by listening to your symptoms, testing out your joint and taking a close look at your risk factors.

  8. Losing 5% of your body weight can really help reduce your joint pain for those who are overweight. The force that goes your through your knees with each step is equivalent to four times your body weight. If you take 10 lbs off the scale, 40 lbs of stress are removed from your knees when walking.

  9. Motion is lotion - your body is meant to move, even when OA is an uninvited guest. Physical activity helps lubricate the joint and maintains the health of the cartilage, even if there’s not much left.

  10. Only 2% of people with hip and knee arthritis will go on to get a replacement. The decision to get a joint replacement is often a difficult one and based on many factors. That leaves a whole lot of people in need of management strategies.

The Best Thing We Can Do For OA?
EXERCISE

Research has shown again and again and again that exercise:

  • has better long term pain control than drugs

  • improves the health of cartilage

  • helps delay (or even completely avoid!) surgery and all the possible complications that comes along with it

So what kind of exercises should you be doing? Well we are GLAD (Ha! Get it? No? You’ll get it in a second…) you asked!

Introducing The GLA:D (TM) Program

AdobeStock_176683160.jpeg

The Good Life with Osteoarthritis in Denmark (also known, thankfully, as GLA:D) (TM) program was developed by researchers in, you guessed it, Denmark!

GLA:D (TM) is a group exercise class for those suffering with hip and knee OA. This six week program’s goal is to teach participants about OA and give them the best we have at combating it: appropriate exercises done properly.

The research behind GLA:D (TM) has some incredible findings:

  • 30% reduction in pain levels at both 3 and 12 months after the program

  • More than 50% reduction in use of painkillers

  • Half the anxiety around fear of movement and damaging joints with activity

  • Less than a third of sick time from work

  • Significant improvement in quality of life

AdobeStock_333493835.jpeg

GLA:D (TM) has four components:

  1. Initial assessment - Before you even get started in the program, a physiotherapist will do a one hour 1:1 appointment with you to make sure you’re appropriate for the GLA:D program, test out your hip or knee and go over all the exercises with you.

  2. Education sessions - Over 2 or 3 classes, participants learn about osteoarthritis and its risk factors, symptoms, coping strategies and self help tools. They will also learn about the science behind pain and how they can use this to help control their own pain.

  3. Exercise sessions -12 sessions of physiotherapist-led group classes lasting an hour each. These sessions focus on neuromuscular exercise - strengthening muscles with a huge focus on control throughout the whole movement.

  4. Outcome measures - At the beginning of the program and then again at 3 months and 12 months afterwards, participants will be contacted by researchers about their adherence to the exercise program, their pain levels and how they are functioning. This data is used for public health funding and future research.

Starting in January 2021, Ladner Village Physiotherapy will offer the GLA:D (TM) Program online!

For details on registration, head on over to our GLA:D Program page.

Ready to go? Register at (778) 630-8800 or by email - we are so excited to meet you!

Headaches - The New Guidelines

AdobeStock_273175249.jpeg

When I came across these clinical practice guidelines, I was a little giddy - you may have noticed the excitement in my instagram post. When the Veteran’s Affairs/Department of Defence Clinical Practice Guideline For The Primary Care Management of Headache dropped a few weeks back, I poured myself a glass of wine and settled into my favourite patio chair for a quiet evening of evidence-based practice. Here are some facts I pulled out of the 150 page document:

  1. 66% of people will experience a headache disorder in their lives. Sixty-six. SIXTY-SIX. That number blew my mind. I knew it was a common thing to experience, but I never would have guessed THAT common.

  2. Women are more likely to experience migraines (15-18%) than men (6-10%). These migraines are often triggered by hormone fluctuations and are most prevalent in women of childbearing age.

  3. The three most common types of headaches are:

    1. Tension-type headaches - these can last anywhere between 30 minutes to 7 days and are characterized by pain on both sides of your head and a pressing or tightening feeling. Tension headaches do NOT pulse and are typically not aggravated by life - they just happen.

    2. Migraines - lasting typically from 4-72 hours, migraines usually take over one side of your head with moderate to severe pulsing or throbbing pain, sometimes with a whole host of other symptoms (nausea, vomiting, light and noise sensitivity, visual or auditory auras and more!). Migraines are often triggered by physical activity, such as climbing the stairs, or other triggers in foods or the environment.

    3. Medication-overuse headaches - I’ll be honest, this one surprised me as making the “Top Three” list. These are a result of overmedicating with anything from over-the-counter meds like Tylenol or Advil, or the heavy hitters like opioids and triptans. (If you think this may be you, please speak with your doctor before changing your medication use)

So what kind of headache do you have?

Headache Diary

First things first - you need a headache diary. By tracking the time, medication used, triggers and patterns of your headaches, we can figure out what kind of headaches you’re experiencing and the best method of attack for your headaches. To make an accurate diagnosis, you should track your symptoms for at least a month - this gives us enough data to identify patterns and come to a more accurate diagnosis.

Now, for the big question - what can you do about your headaches? Let’s go through migraines and tension-type headaches separately.

Migraines

The best treatment option for migraines we have right now is the right medication. There are a whole host of them out there with various levels of evidence behind them - in fact, most of them are listed in this clinical practice guideline! If you have a migraine diagnosis or think you should, I urge you to speak with your physician - they can help you decipher your symptoms and figure out the right meds for you.

The other big treatment approach for migraines is trigger modification. Has your headache diary helped you figure out something in your diet is causing your headaches? Or maybe you’ve realized reading in the car can bring one on? Identifying and removing or dealing with these triggers is huge!

Tension-Type Headaches

With tension headaches, medications are also great. We have other non-pharmaceutical options with research behind them, including:

  1. Physiotherapy for your neck - research is supporting more and more the use of manual therapy and exercise for the neck to help reduce headaches. This could mean traction, release of muscles in your neck, strengthening of the deep postural muscles or stretching of the tight muscles in and around your neck - it depends on you!

  2. Aerobic exercise and progressive strength training - it turns out that getting your heart rate up and your body strong is one of the best things you can do for you head. For starters, any exercise that gets your heart rate up also gets your body making new blood vessels including in your brain. Add general body strengthening to that and your head becomes easier to hold up all day, reducing the tension in your neck.

  3. Mindfulness and meditation - we are finally at a place in the medical community where mindfulness is mainstream! We know thought patterns can influence our bodies and the pain we perceive. We also know we can harness this for our own benefit through mindfulness practice. Not sure where to start? Apps like Calm and Headspace are a great place to get your feet wet - I like anything with a body scan!

Wondering about acupuncture and IMS? Right now, the research hasn’t come down on one side or the other, instead saying “more research is needed”. I interpret that as follows: if you’re someone who typically benefits from needling, it’s worth a try. If it doesn’t work for you, we have other options!

If you suffer with undiagnosed headaches, print out the headache diary, fill it out for a month and discuss the results with your family practitioner. If tension-type headaches are the problem, give us a shout - we would love to help you get your headaches under control!

As always, if you’d like to book an appointment you can do so online, via email or by phone at (778) 630-8800.

Knee Arthritis 101: The Basics

Arthritis is a big topic and there is no way I could cover it all so today I am just going to cover some of the basics to help you understand what is going on with your body.

First of all, it’s important to note that there are many types of arthritis. The two most common types are:

  1. Degenerative arthritis, also known as osteoarthritis (OA for short)

  2. Inflammatory arthritis such as rheumatoid arthritis, ankylosing spondylitis, and psoriatic arthritis

Today we will be discussing osteoarthritis of the knee.

AdobeStock_305678564.jpeg

Here are the top five things you absolutely need to know about arthritis:

  1. Arthritis is not a catastrophic diagnosis. You can continue to thrive and lead an active lifestyle with an arthritic knee and it’s not the end of the world. 

  2. Exercise is your best friend. Say this with me, three more times!

  3. X-Ray findings are not proportionate to functionality or pain levels. Someone who describes “occasional stiffness” in their knee might have a “severe” x-ray, while a “mild” x-ray might belong to someone who describes unbearable pain that keeps them awake at night. X-rays do not give the whole picture!

  4. Most knee pain from arthritis is from structures around the joint, and that pain can settle. It’s not the cartilage nor is it the outer compact bone causing the pain in your knee. 

  5. There are things you can do to slow the progression and maximize your function.

Let me say this loud and clear:

Maintaining an active lifestyle is one of the best things you can do if you have arthritis!

AdobeStock_303555159.jpeg

Let’s look at a classic scenario.

Meet Stacy. She’s 62 and tweaks her knee while out for a run. That weekend she goes away for a vacation with her family. They play golf, tennis, and even go kayaking! Now her knee is quite sore and even swollen. Stacy decides to rest for a few weeks figuring she just over-did it while away. But it’s still swollen two weeks later.

She goes to her doctor, who orders an x-ray. The x-ray uses technical terms like “osteophytes” and “joint space narrowing”. She is told she has arthritis in her knee. That night Stacy has company for dinner and a friend, let’s call him Gary, said he has the same thing! Gary says his knee is “bone on bone” (and demonstrates grinding with his knuckles together while making an awful scraping noise) because all his cartilage has “worn away” and that his friend Steve had to have a knee replacement and limped for months.

Now Stacy is devastated. She doesn’t want arthritis and she certainly doesn’t want a knee replacement. She feels doomed. 

What happens next? 

Option A: Stacy is scared and wants to protect her knee. So Stacy stops playing tennis and stops golfing, she hires someone to do her gardening and doesn’t even really walk the dog anymore because if running hurts than walking probably isn’t great either right? (I want you to know it hurts me deep down inside to type that). But when Stacy suddenly stops exercise and spends many hours per day sitting her knee gets stiffer and her muscles get weaker.

In her mind this has confirmed her worst fears that her knee is in awful shape (look how quickly it’s deteriorating!) and tries to protect it further by resting even more. This cycle of inactivity can is bad news bears. 

It also doesn’t have to be this way. 

Option B: Stacy doesn’t worry about Gary or his friend Steve because she knows nothing about their situations and her doctor didn’t mention surgery at all. Stacy’s knee is still a bit stiff and sore so she modifies her activities for a few weeks. Runs on the dyke become walks with the dog and she tries pickleball with a few friends instead of tennis. To her delight the knee pain improves! Her muscles have stayed strong from her modified activities and she still enjoyed her time out and about. Now Stacy is in a position to gradually rebuild and reintroduce activities she enjoys as she is able. (This scenario is a lot better if you ask me). 

I will say it again: exercise is your best friend.

You are not wearing out the joint further by exercising. It is the most effective treatment for early and moderate knee OA (not to mention other health benefits). Exercise helps you maintain range of motion and strength. It is a lot easier to maintain strength and range than build it back up again after it has been lost.

Also, do not underestimate the benefits of exercise for the rest of your body. Many people who get an arthritis diagnosis self-impose activity restrictions and become more sedentary. This can have detrimental health benefits including increased risk of high cholesterol, heart disease and diabetes. Further, muscle weakness and joint stiffness can be contributing risk factors to falls. People with osteoarthritis experience 30% more falls than those without.

There is no use going too hard all day every day and being in extreme pain just for the sake of it but don’t stop all activity completely. You have to find a middle ground between activities that are challenging vs. aggravating (which is easier said than done). A physiotherapist can give you recommendations on which activities can be modified and help you figure out strength and range of motion exercises that are appropriate for you specifically. 

Ok, so I hope you get it by now. If you have arthritis you should exercise. But let’s keep going, shall we? Let’s discuss why this diagnosis doesn’t have to be all doom and gloom.

What causes the pain in knee arthritis?

The cartilage that degenerates has no nerve endings nor does the hard compact bone beneath it. So they cannot be the source of the pain. So which structure is actually responsible? 

The three main causes of knee pain associated with arthritis are:

  1. Periosteum - the thin lining of tissue around the bone, it has nerve endings and supplies blood to the bone. If it tears it will hurt. 

  2. Synovitis - Synovium is the connective tissue lining of the joint itself. It can become inflamed and very painful. Synovitis can feel like joint tenderness or pain, swelling, and nodules (hard lumps). 

  3. Bone edema - This is more common in women who have underlying osteopenia or osteoporosis since the bones are already weaker. When stress on the bone increases, as is the case with arthritis, the deeper central layer of the bone can become swollen, which feels like a deep and intense ache. 

Remember:

  • Not everyone with OA has these issues.

  • If you do experience pain from these structures it will likely settle down over a few weeks or months and your knee pain and function will return back to baseline. It’s not forever.

  • Like I mentioned above, the severity of an x-ray does not correlate with pain or disability.

  • Treatment should not be based off of the x-ray.

  • Do not let a bad x-ray be the reason you stop your favourite activity.

  • Do not let a bad x-ray make you afraid of feel doomed.

  • Please please please do not get surgery just because the x-ray is bad especially if everything else is great! (Disclaimer: obviously I am a physiotherapist and not your surgeon, so I’m not the one making calls on surgery. But if a surgeon is pushing for you to get surgery and you feel completely fine I would be asking why they feel it is necessary. They might have an excellent reason - that’s cool, making calls in grey areas is what they do all day every day so their opinion should be considered - I just don’t want you getting surgery because a friend of a friend had their knee done so you figure you might as well join the club). 

The Arthritis Foundation provides a very general list of things you can do to slow down the arthritis progression and keep you are healthy and active as possible. These include:

  • Maintain a Healthy Weight: Excess weight worsens OA. Combine healthy eating with regular exercise to maintain a healthy weight.

  • Control Blood Sugar: Many people have diabetes and OA. Having high glucose levels can make cartilage stiffer and more likely to break down. Having diabetes causes inflammation, which also weakens cartilage.

  • Maintain Range of Motion: Movement is medicine for joints. Make a habit of putting your joints through their full range of motion, but only up to the point where it doesn’t cause more pain. Gentle stretching, raising and lowering legs from a standing or seated position, daily walks and hobbies such as gardening can help.  Listen to your body and never push too hard.

  • Protect Joints: Make sure to warm up and cool down when doing exercise. If you play sports, protects joints with the right gear. Use your largest, strongest joints for lifting, pushing, pulling and carrying. Watch your step to prevent falls. Balance rest and activity throughout the day.  

  • Relax: Find ways to reduce or avoid stress through meditation, listening to music, connecting with friends and family, doing fun activities, and finding ways to relax and recharge.

  • Choose a healthy lifestyle: Eating healthy food, not smoking, drinking in moderation and getting good sleep will help you to feel your best.

I really hope you feel slightly better about an arthritis diagnosis. This is something that can be managed.

If you have any questions about your arthritis or are looking for some specific suggestions to help your daily life please contact the clinic via email or phone us at ( 778) 630-8800. We look forward to meeting you!

Ask A Physio: Any Tips for Mouse Finger Pain?

AdobeStock_294358654.jpeg

So I don’t know about you, but COVID has certainly pushed me to using my computer a lot more. A. Lot. More. My body is feeling it, too - my neck is stiffer than it was, my hands are tired and my shoulders make a lot of noise after a long session on the computer.

We know that prolonged postures of any kind - standing in one spot, sitting still - aren’t great for anyone. Our bodies are for movement and all too often we get stuck in postures for hours at a time. When that prolonged posture is on the computer, that finger and wrist pain is often directly related to the position of the neck and shoulder as much as it is the wrist and hand.

So what should you do? The best thing you can do is set an alarm for 30 minutes and make a point of moving and stretching your body. If you have two minutes (or less!), this movement and stretching routine can help combat the stiffness and soreness associated with prolonged computer use.

Without further ado, presenting:

Top Ten Exercises for Computer-Related Pain

AdobeStock_151993350.jpeg

1. Shake it out! - I love a good shake - who doesn’t? Sit up straight, take your wrists and hands and give them a good shake, letting your fingers fly.

2. Chin to chest - Something we often forget is how much posture contributes to pain further down the chain. Sit up straight and tuck your chin into your chest, feeling a stretch down the back of your neck. Hold this for 10ish seconds.

3. Ear to shoulder, then a twist - Still sitting up straight, lean your ear to your shoulder and hold it for about 10 seconds. Then twist your head so your nose gets closer to your armpit; hold this for another 10 seconds. Repeat on the other side.

AdobeStock_264162260.jpeg

4. Shoulder rolls - Still sitting up straight (are you sensing a theme yet??), roll your shoulders up to your ears then squeezing them back and down, pushing your shoulder blades as far down your back as you can. Bring your shoulders forward then back up to your ears. Do this 5 times.

5. Wrist stretch - Stretch your right arm in front of you and bend your wrist and fingers back. Use your left hand to pull your right fingers further back, feeling a stretch in your forearm. Hold for 10ish seconds and repeat on the other side.

6. Prayer stretch - Place your hands together in a prayer position in front of your chin. Lower your hands down, keeping your palms together and feeling a stretch in your forearms. Hold for 10ish seconds.

AdobeStock_331129900.jpeg

7. Finger stretch - Place all your finger tips together - think Mr. Burns from the Simpsons - and push your fingers together. Keep your fingers together and pull your palms away from each other. Stretch your thumbs away from your other fingers. Feel a stretch for 10ish seconds.

8. Wrist circles - Draw circles with your wrists! 5 in one direction, 5 in the other.

9. Hand fist and open - Squeeze your hands into tight fists for a few seconds. Then stretch your hands out wide, reaching your fingers out as far as you can for a few seconds. Repeat 5 times.

10. Finish this off with a final shake!

Looking for a print out of this program? Here it is in PDF form, with pictures!

The better you support your body with proper ergonomics (see our previous two ergonomic blogs here and here) and frequent movement breaks, the less likely you’ll suffer from computer related pain. So set that alarm, stretch it out and stay pain free!

As always, if you would like to book an assessment with one of our fabulous physiotherapists or our amazing massage therapist, give us a call at (778) 630-8800 or email us at clinic@ladnervillagephysio.com.

Finally - do you have a burning question one of our physiotherapists can answer? If you’d like to #askaphysio, we would love to answer!